This is the multi-page printable view of this section. Click here to print.
Build Guides
- Yet Another Custom Build
- Frequency Labs MeshAdv
- TBeam Supreme EDC
- WisMesh Pocket First Impressions
- RAK PoE Node
- Rak Solar Node
- Heltec T114 Build
Yet Another Custom Build
The Last of the Custom Builds (Famous Last Words)
When I first started with Meshtastic I was grabbing random devices and parts. After finding what worked out well for the types of nodes deployed I have a surplus of parts that I’ve slowly been putting together to get some actual use out of it. I’m finally down to the last of the random parts (Until I get some wild thought and buy more random)
I won’t go into the grave details of building this, but will leave you with the parts list! Given this was pretty custom building it could take many forms
Parts List:
RAK Wireless Battery Connectors
Misc Parts: Connecting wires Fork / U Connectors, Crimp on Wago Connectors Misc Screws from Local Hardware Store
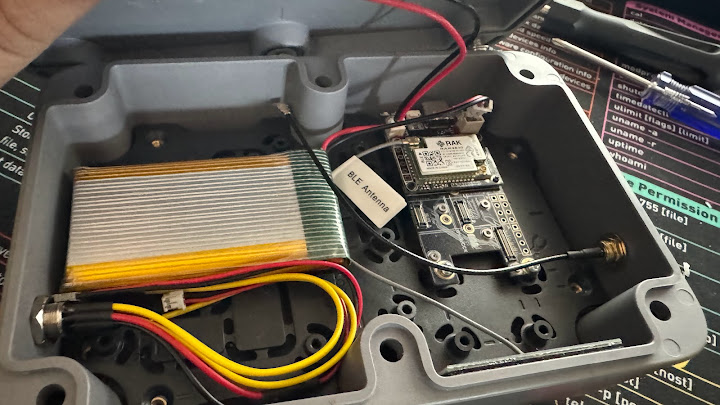
Assembly can be up to you, but I opted to lay out the box like this:
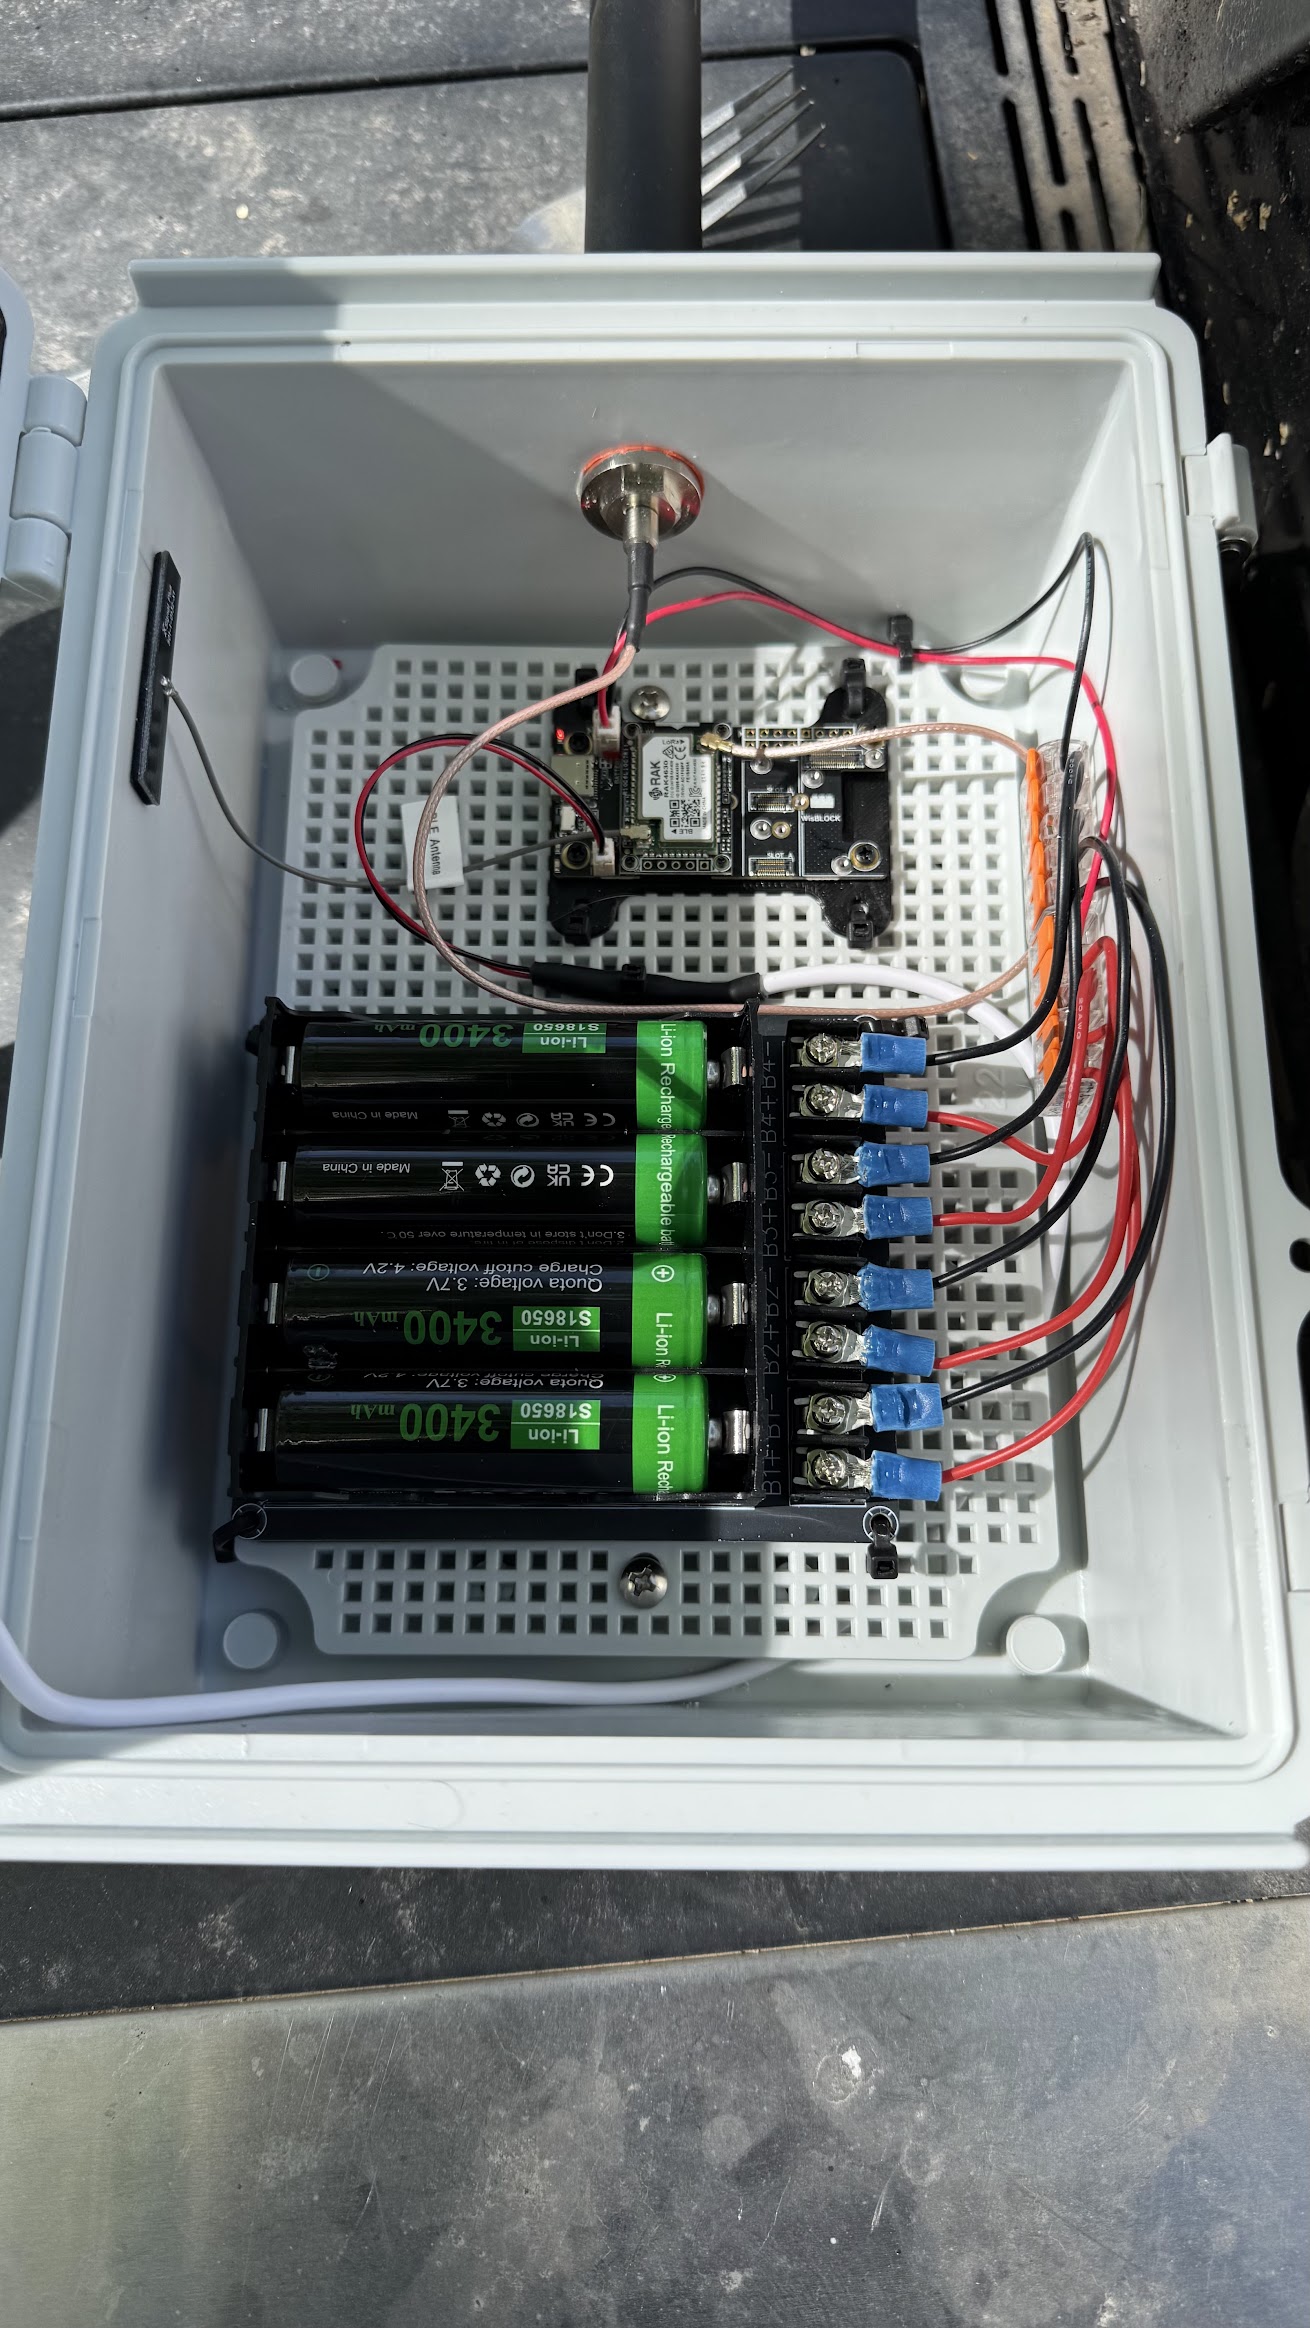
I did cut off the connector from the solar panel and soldered in the RAK Solar Connectors to put on the board. Also used some solid double sided tape to make sure the wires were not moving around the case.
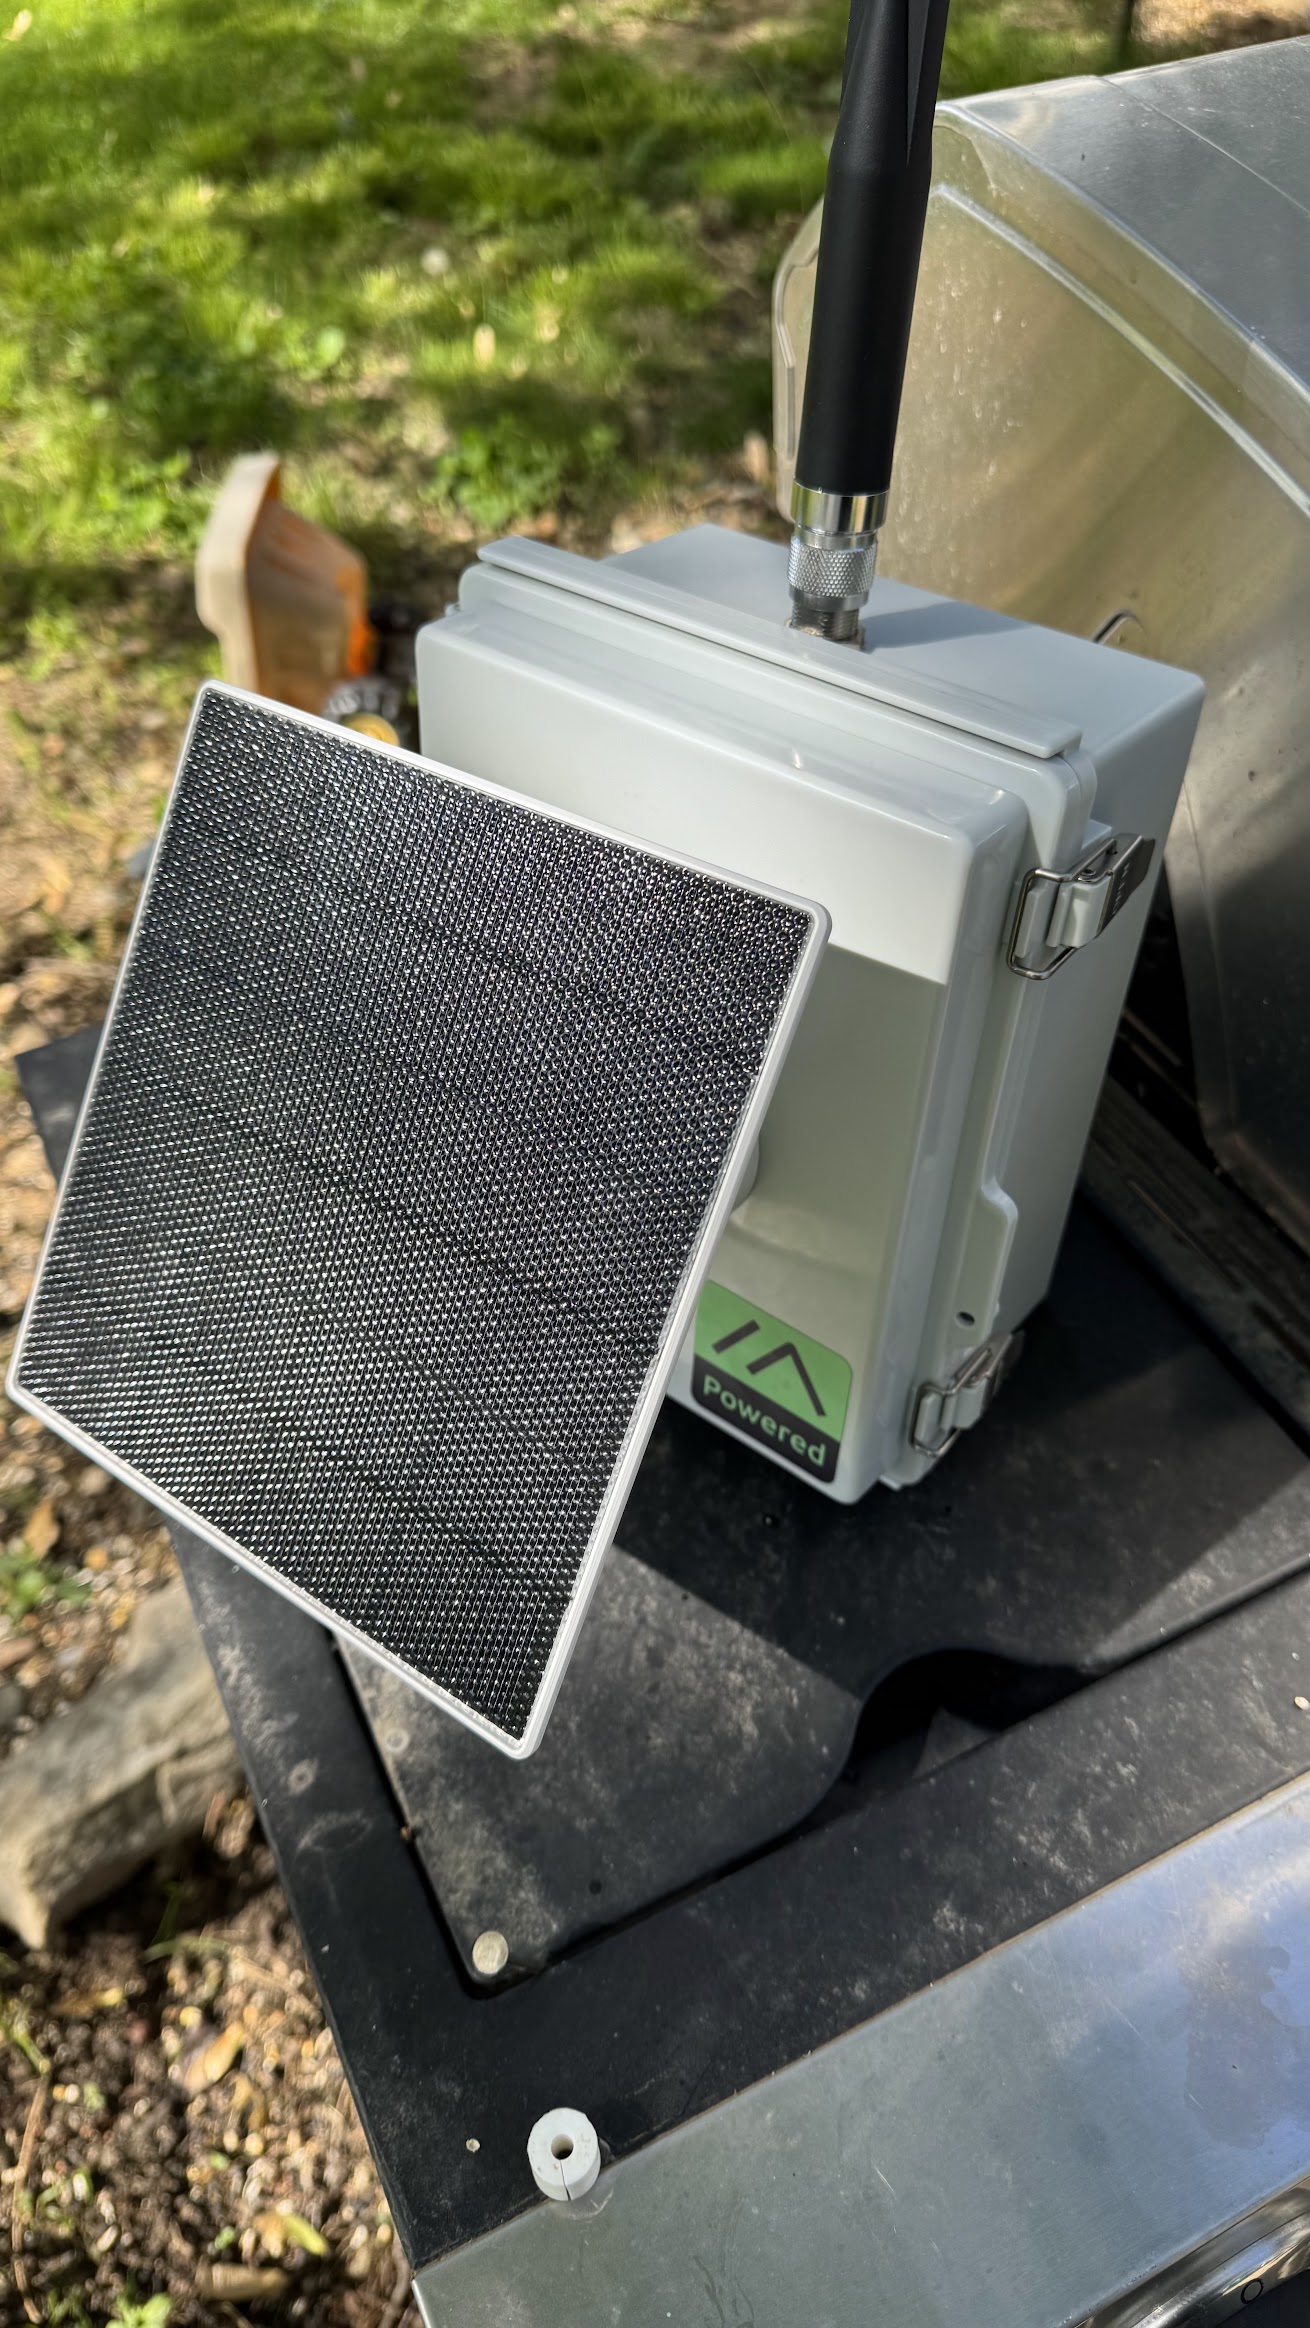
With the solar panel added in and plumbed through the front of the case. Touch it up with a little bit of silicon to seal up the holes and were able to deploy this!
We are hoping to get a few more Infrastructure Nodes out there now that the weather is nice. If you have a place where one might make sense reach out to us as we would like to connect with people to continue building out IowaMesh!
Frequency Labs MeshAdv
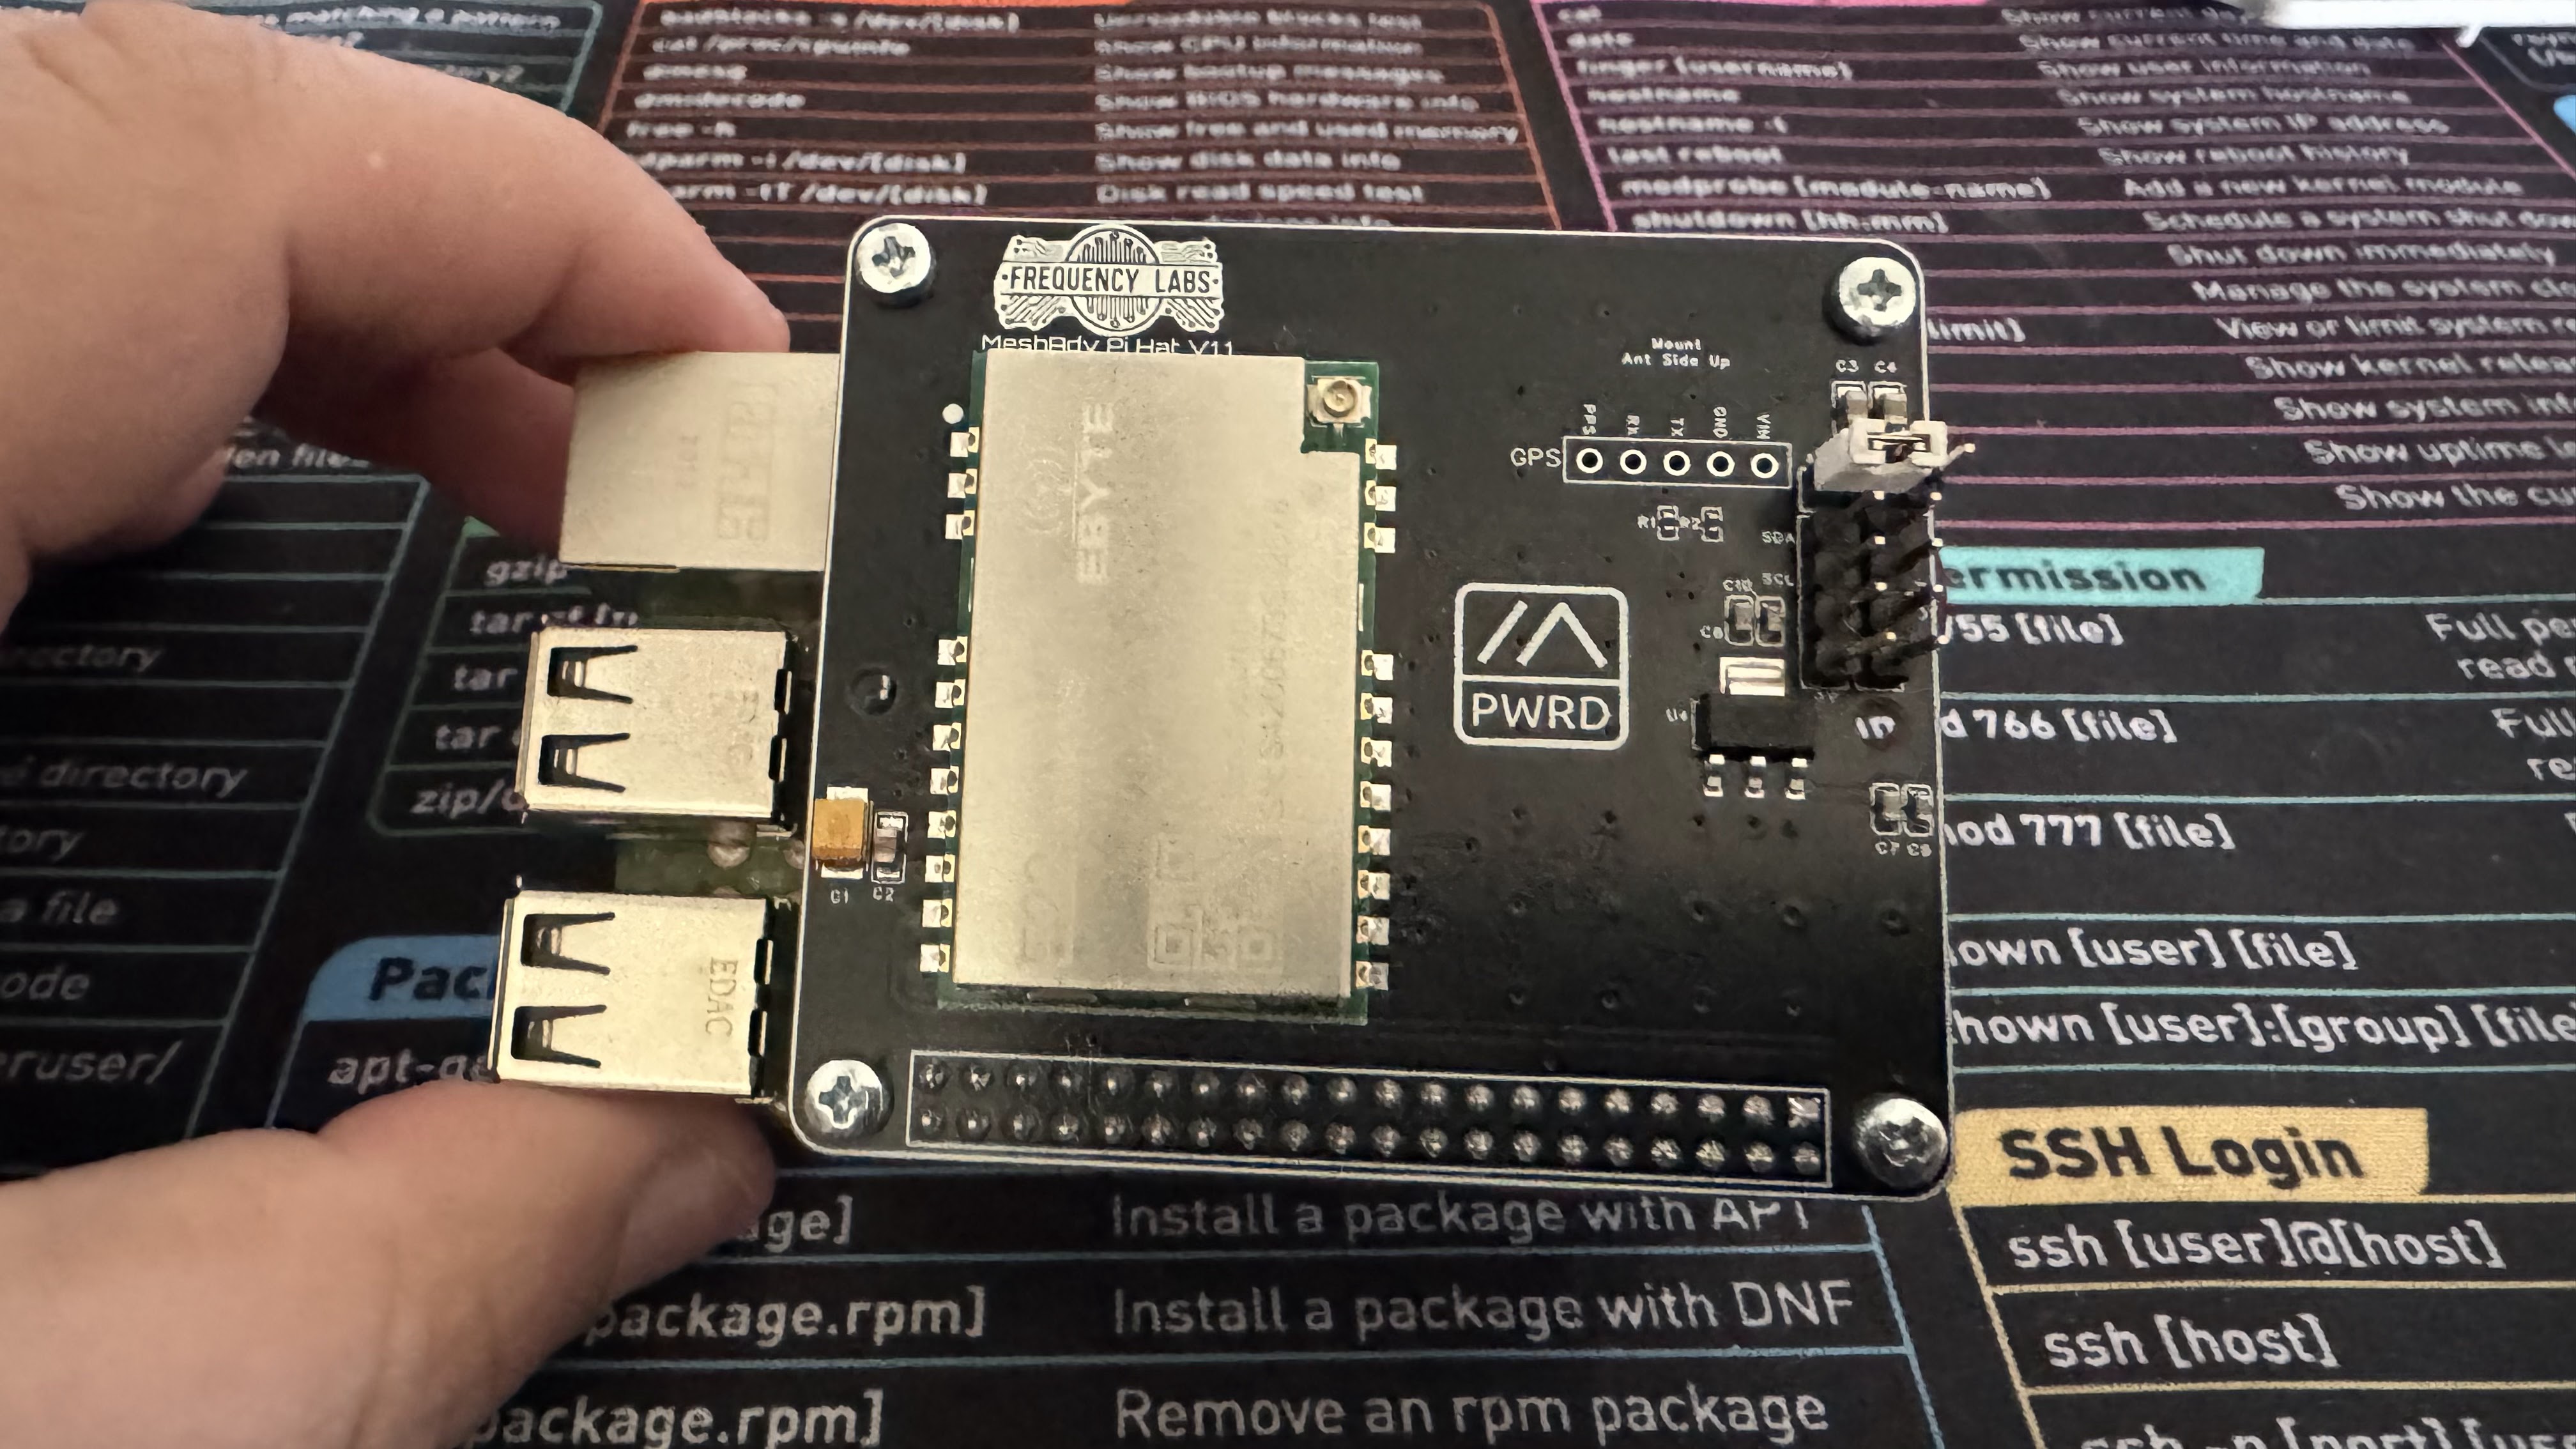
MeshAdv Raspberry Pi Hat
Before IowaMesh took shape as a platform, I was experimenting with various types of nodes at home. In work conversations, there had been discussions about whether a Raspberry Pi, combined with its GPIO headers, could effectively run Meshtastic. On a whim one afternoon, I impulse-bought the Frequency Labs MeshAdv Raspberry Pi Hat—just to see how well it worked. What’s the worst that could happen? I ordered, assembled, and deployed it, and to my surprise, it worked flawlessly!
Since it was already mounted on the roof, retrieving it just to snap a few pictures for a blog post wasn’t practical. However, as luck would have it, the OS ran into some issues and needed a full reset. That gave me the perfect chance to revisit the setup process—an important lesson in troubleshooting.
Parts List:
Female to N Male Lightning Arrestor
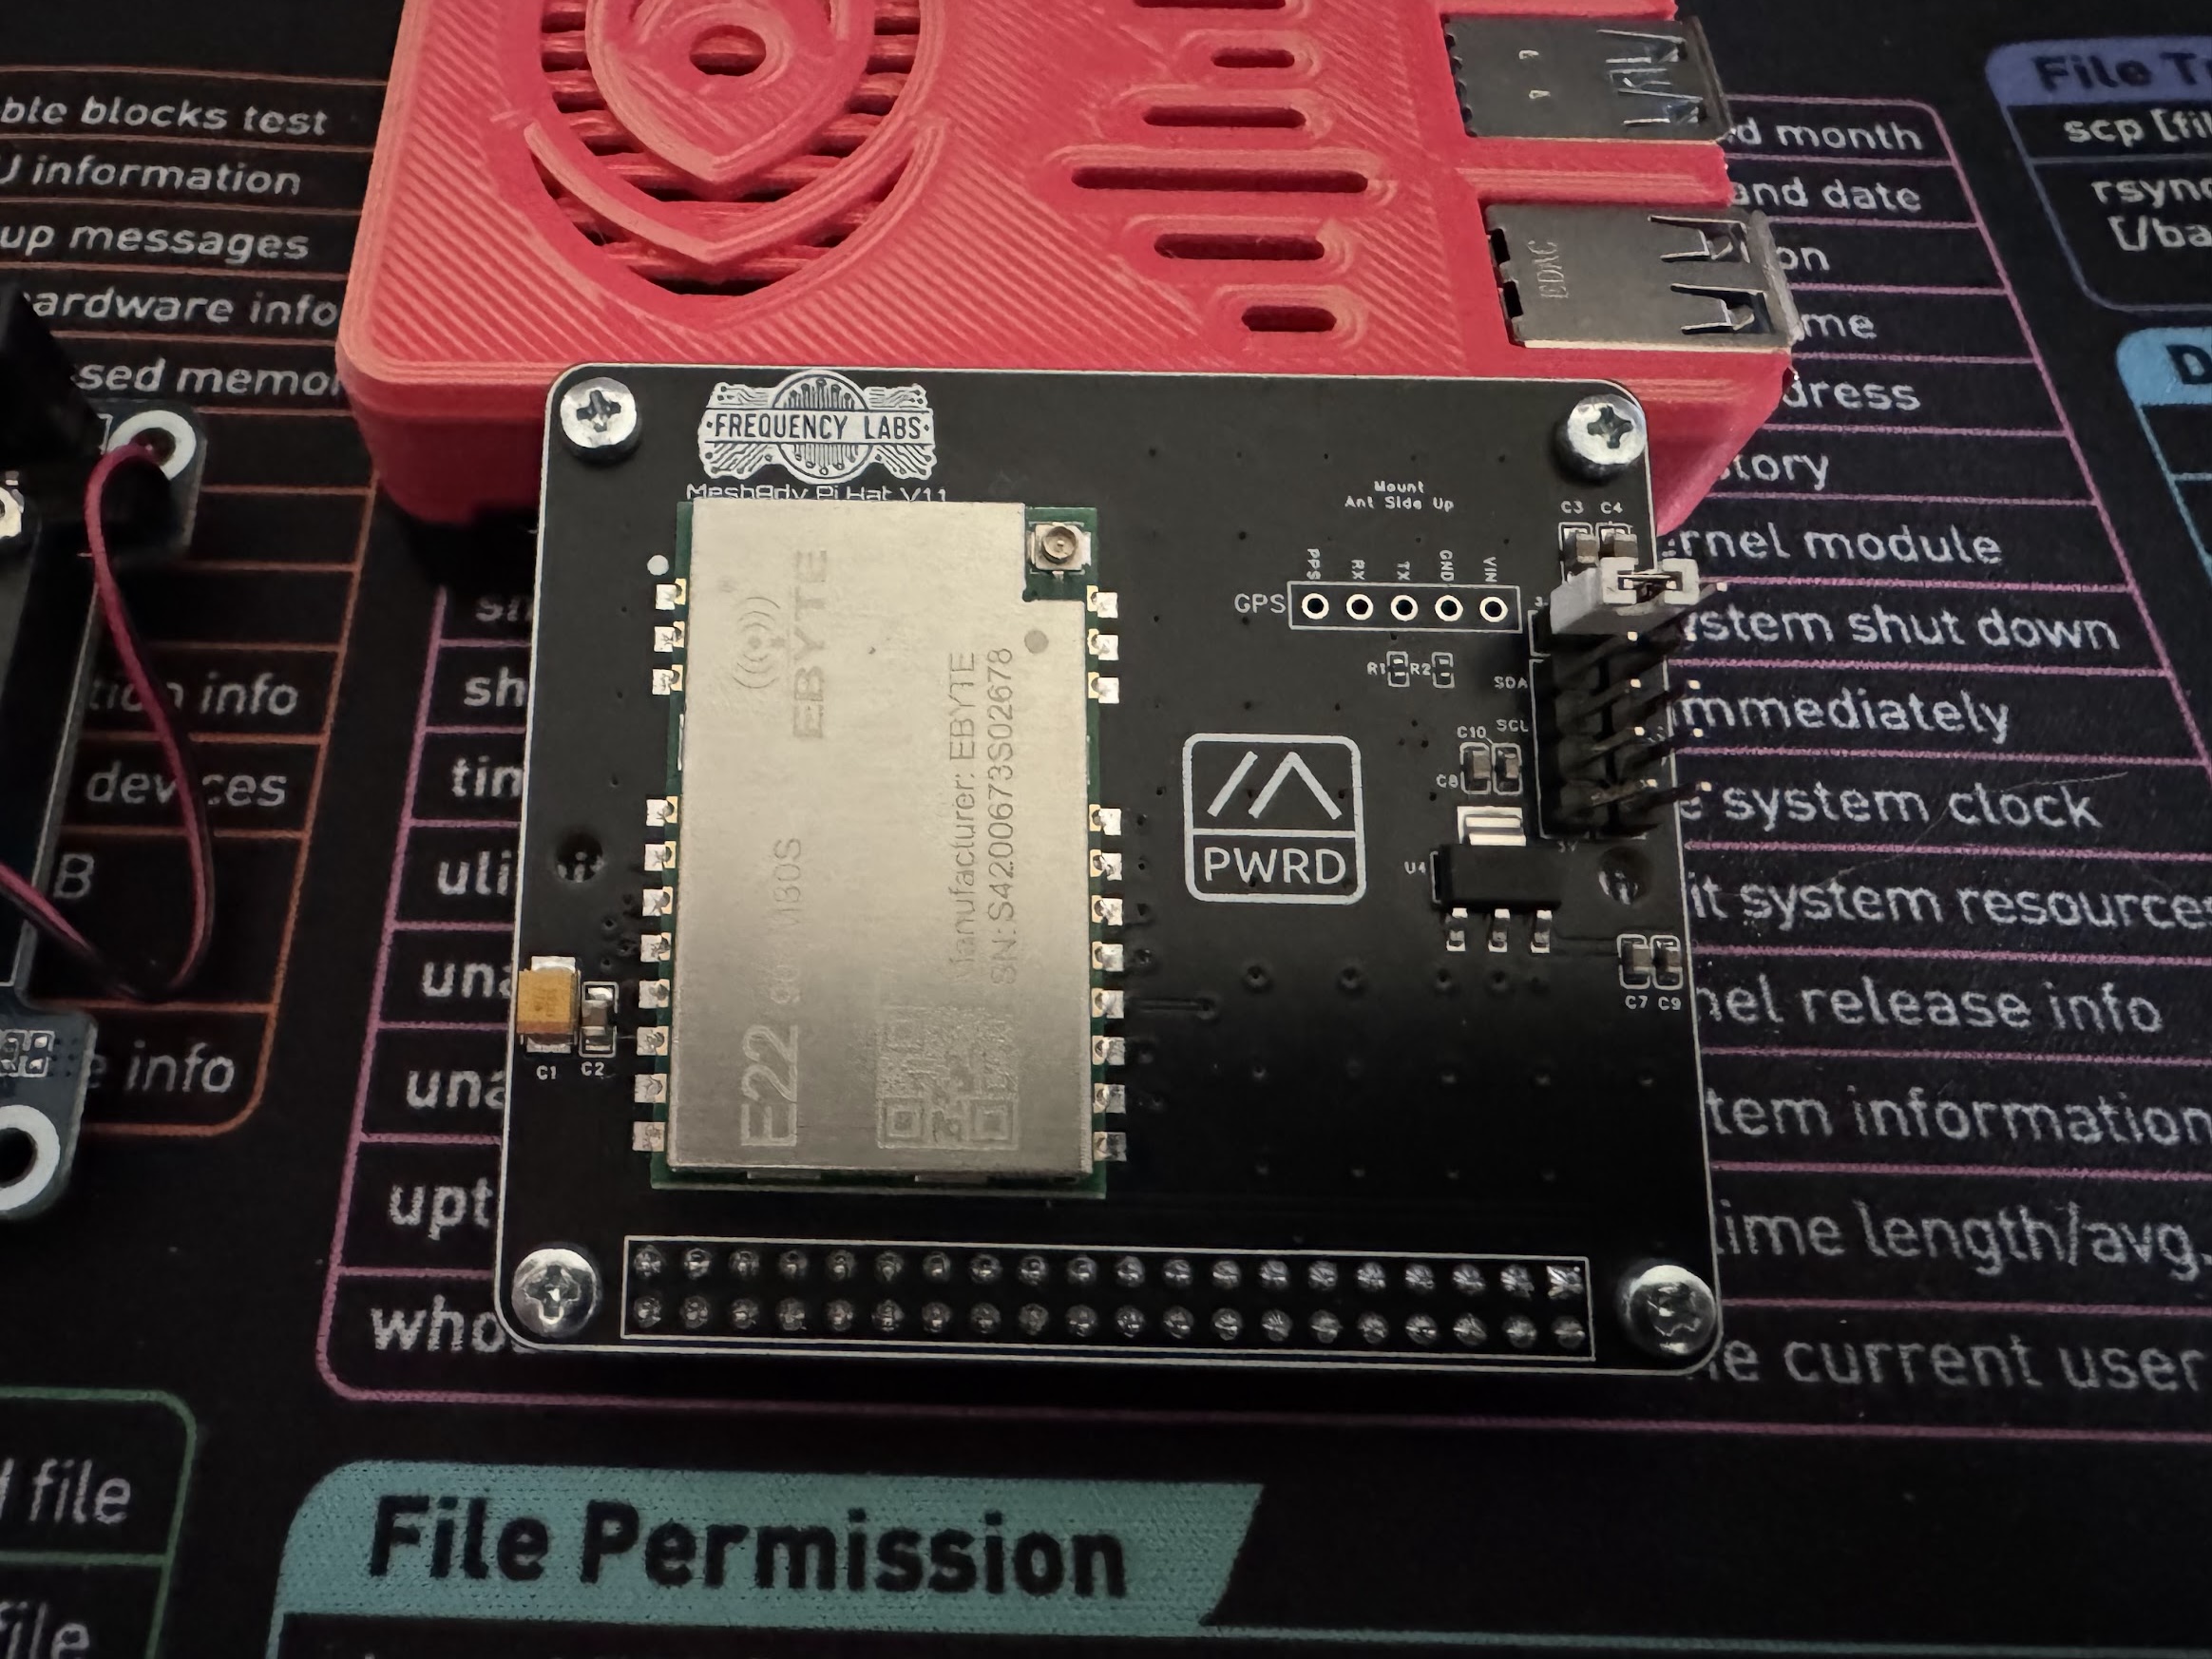
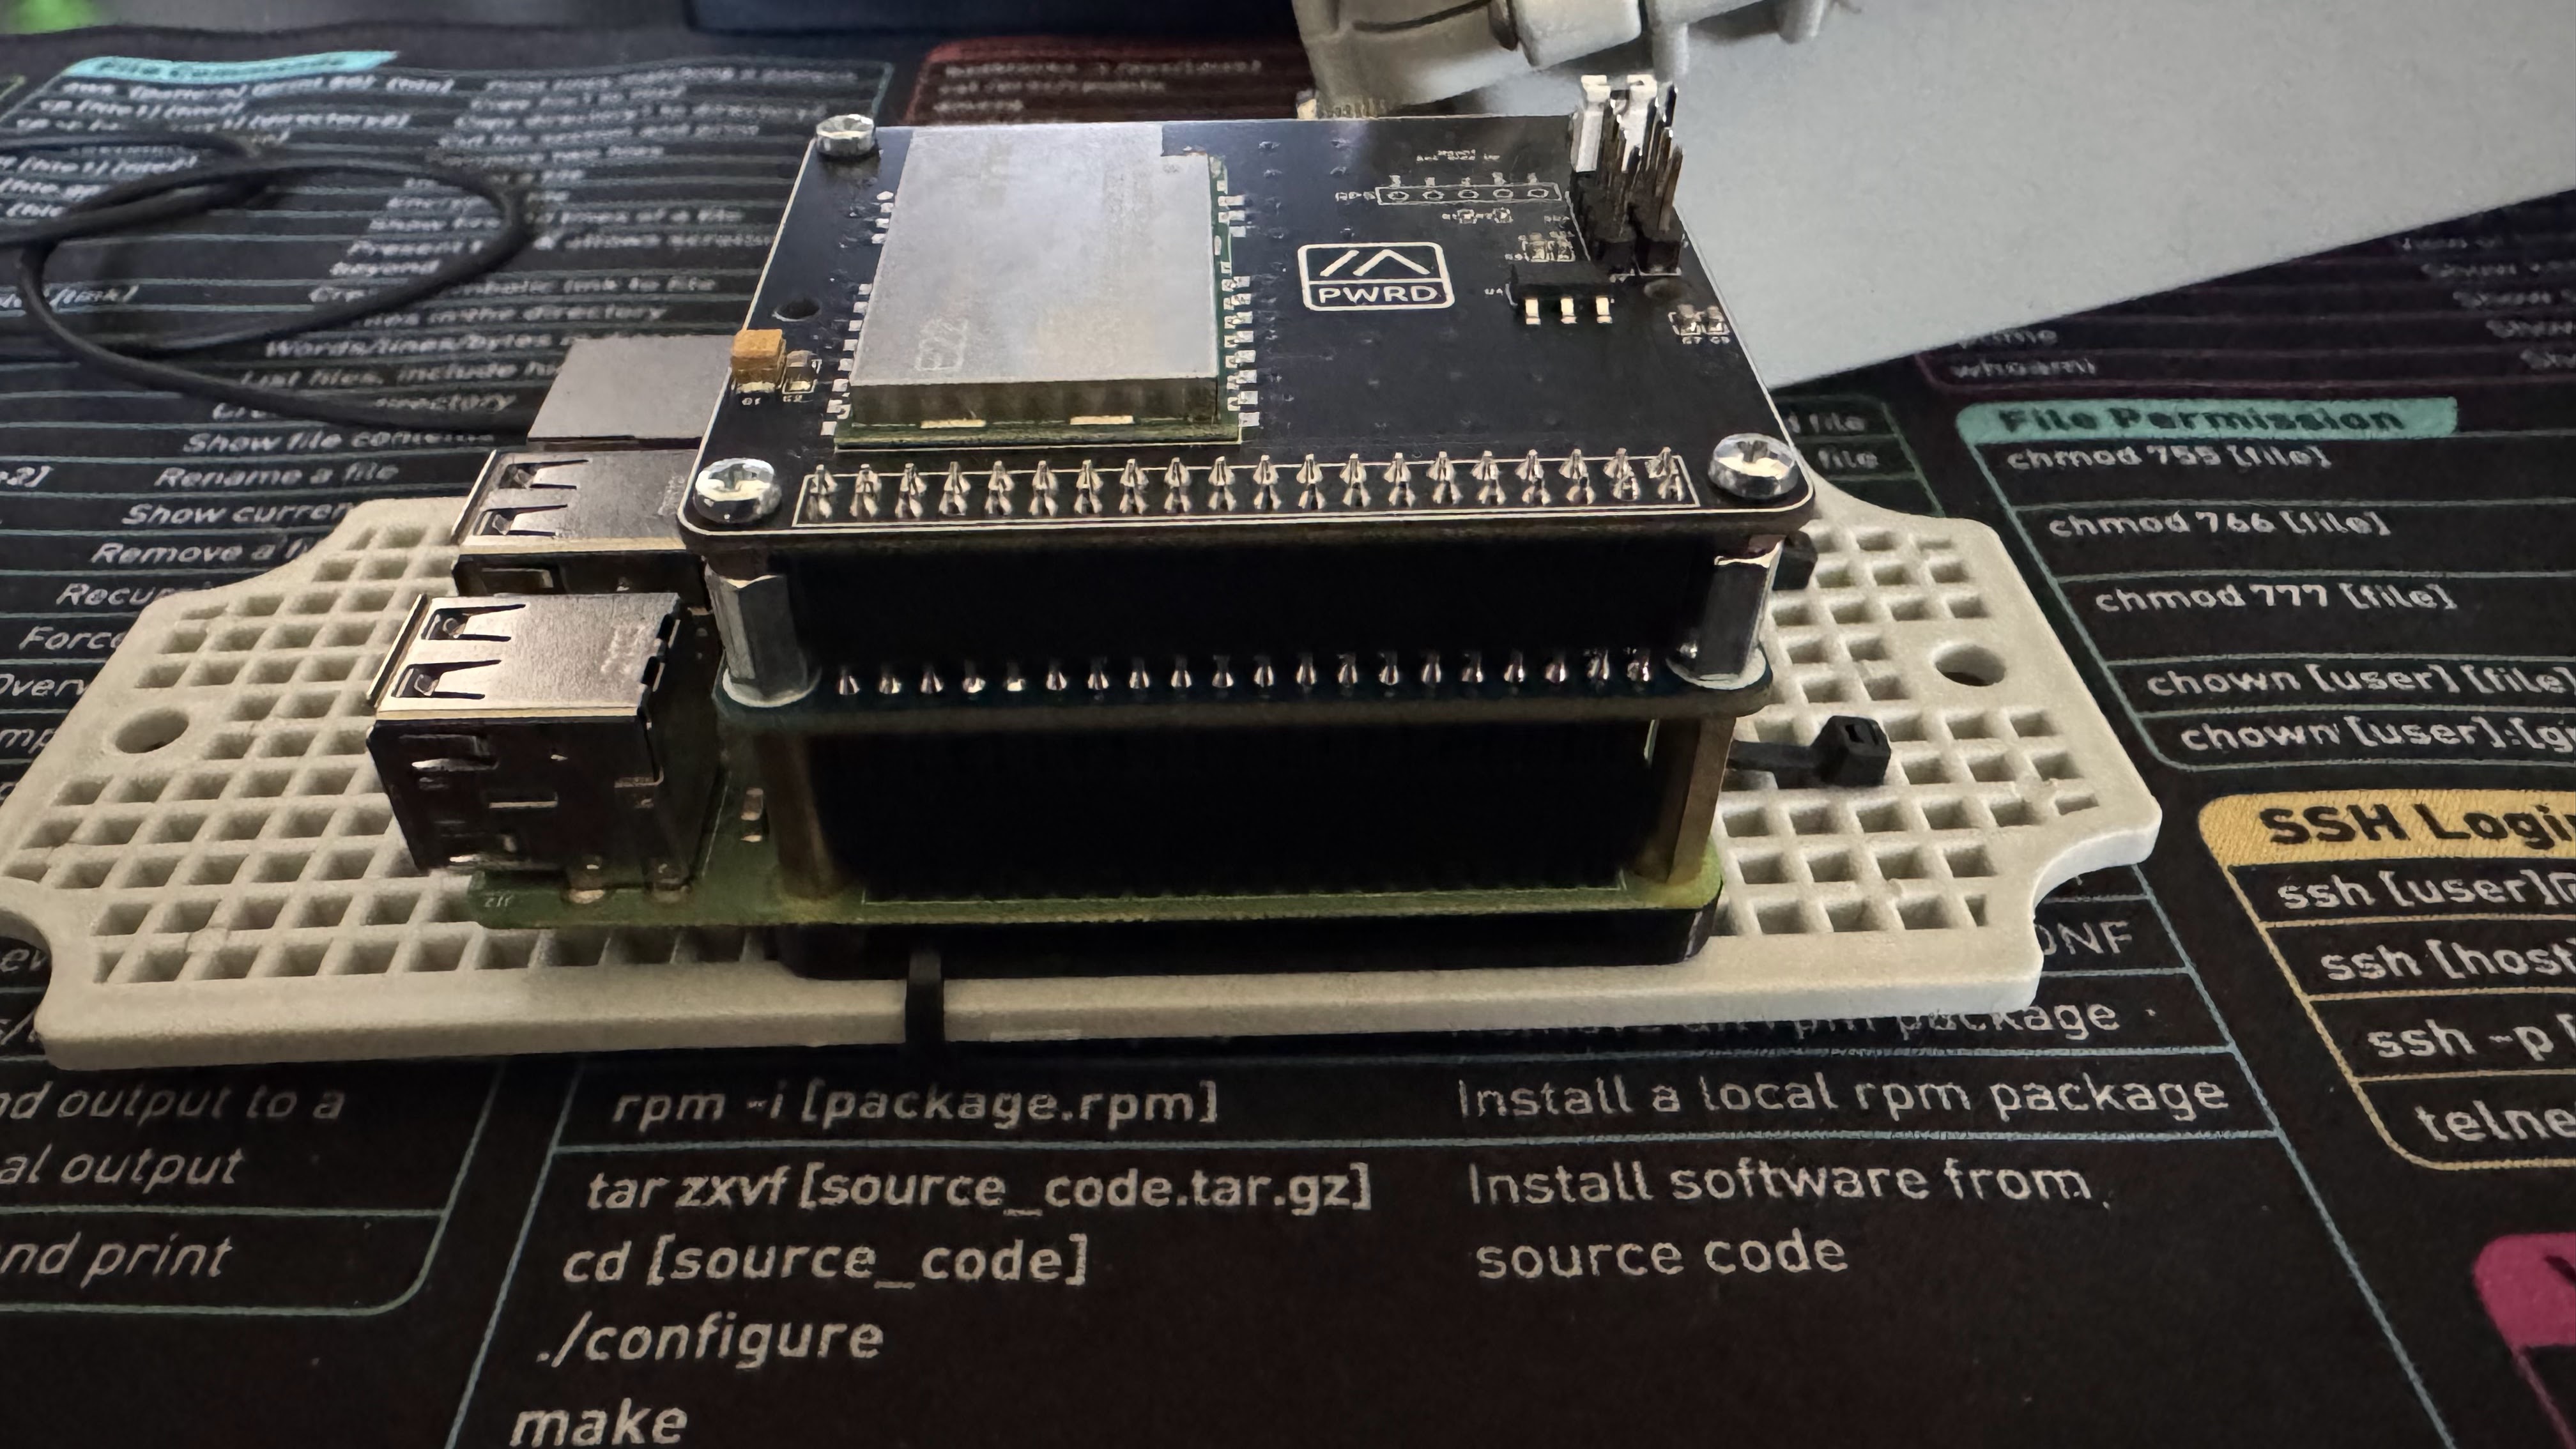
The Frequency Labs MeshAdv Pi Hat is well-built and easy to assemble. Featuring the EBYTE E22 LoRa chip with 1 watt of power, it offers robust performance and supports additional sensor integration. There’s a lot to appreciate—I was beyond impressed with its arrival!
For this build, I chose to use a Raspberry Pi 3B+. Since I had one on hand and considered this a noble experiment, I preferred to test with it rather than risk potential issues with a Raspberry Pi 4 or 5. According to the documentation, most Raspberry Pi models should work. While I mentioned the Raspberry Pi 4 in my list above, I wanted to specifically call this out.
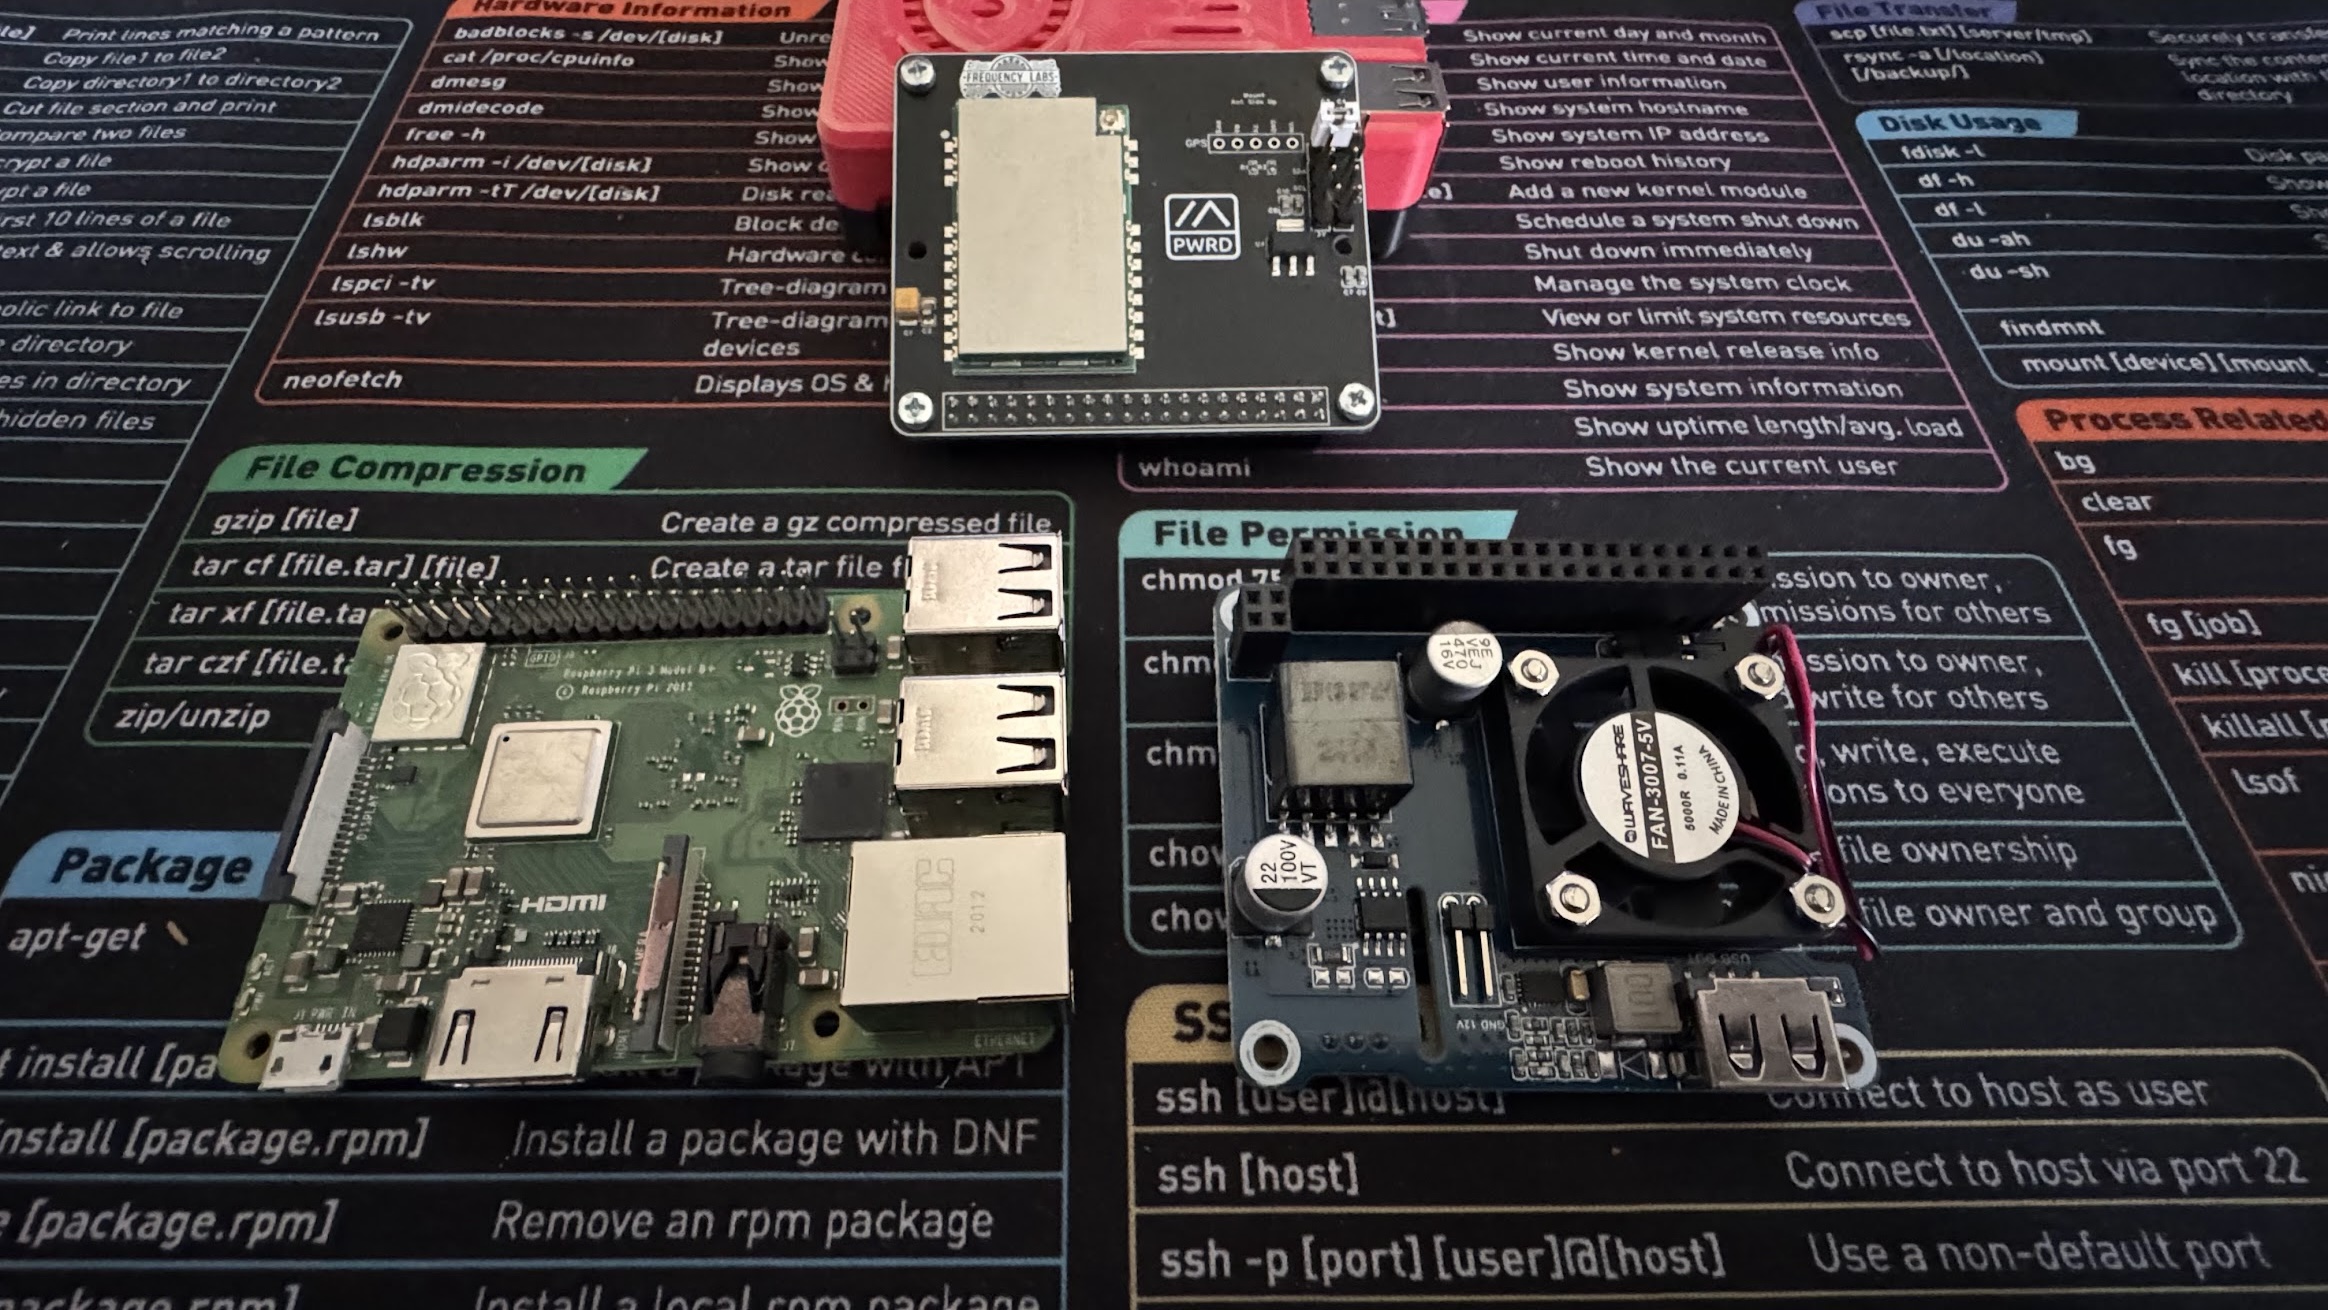
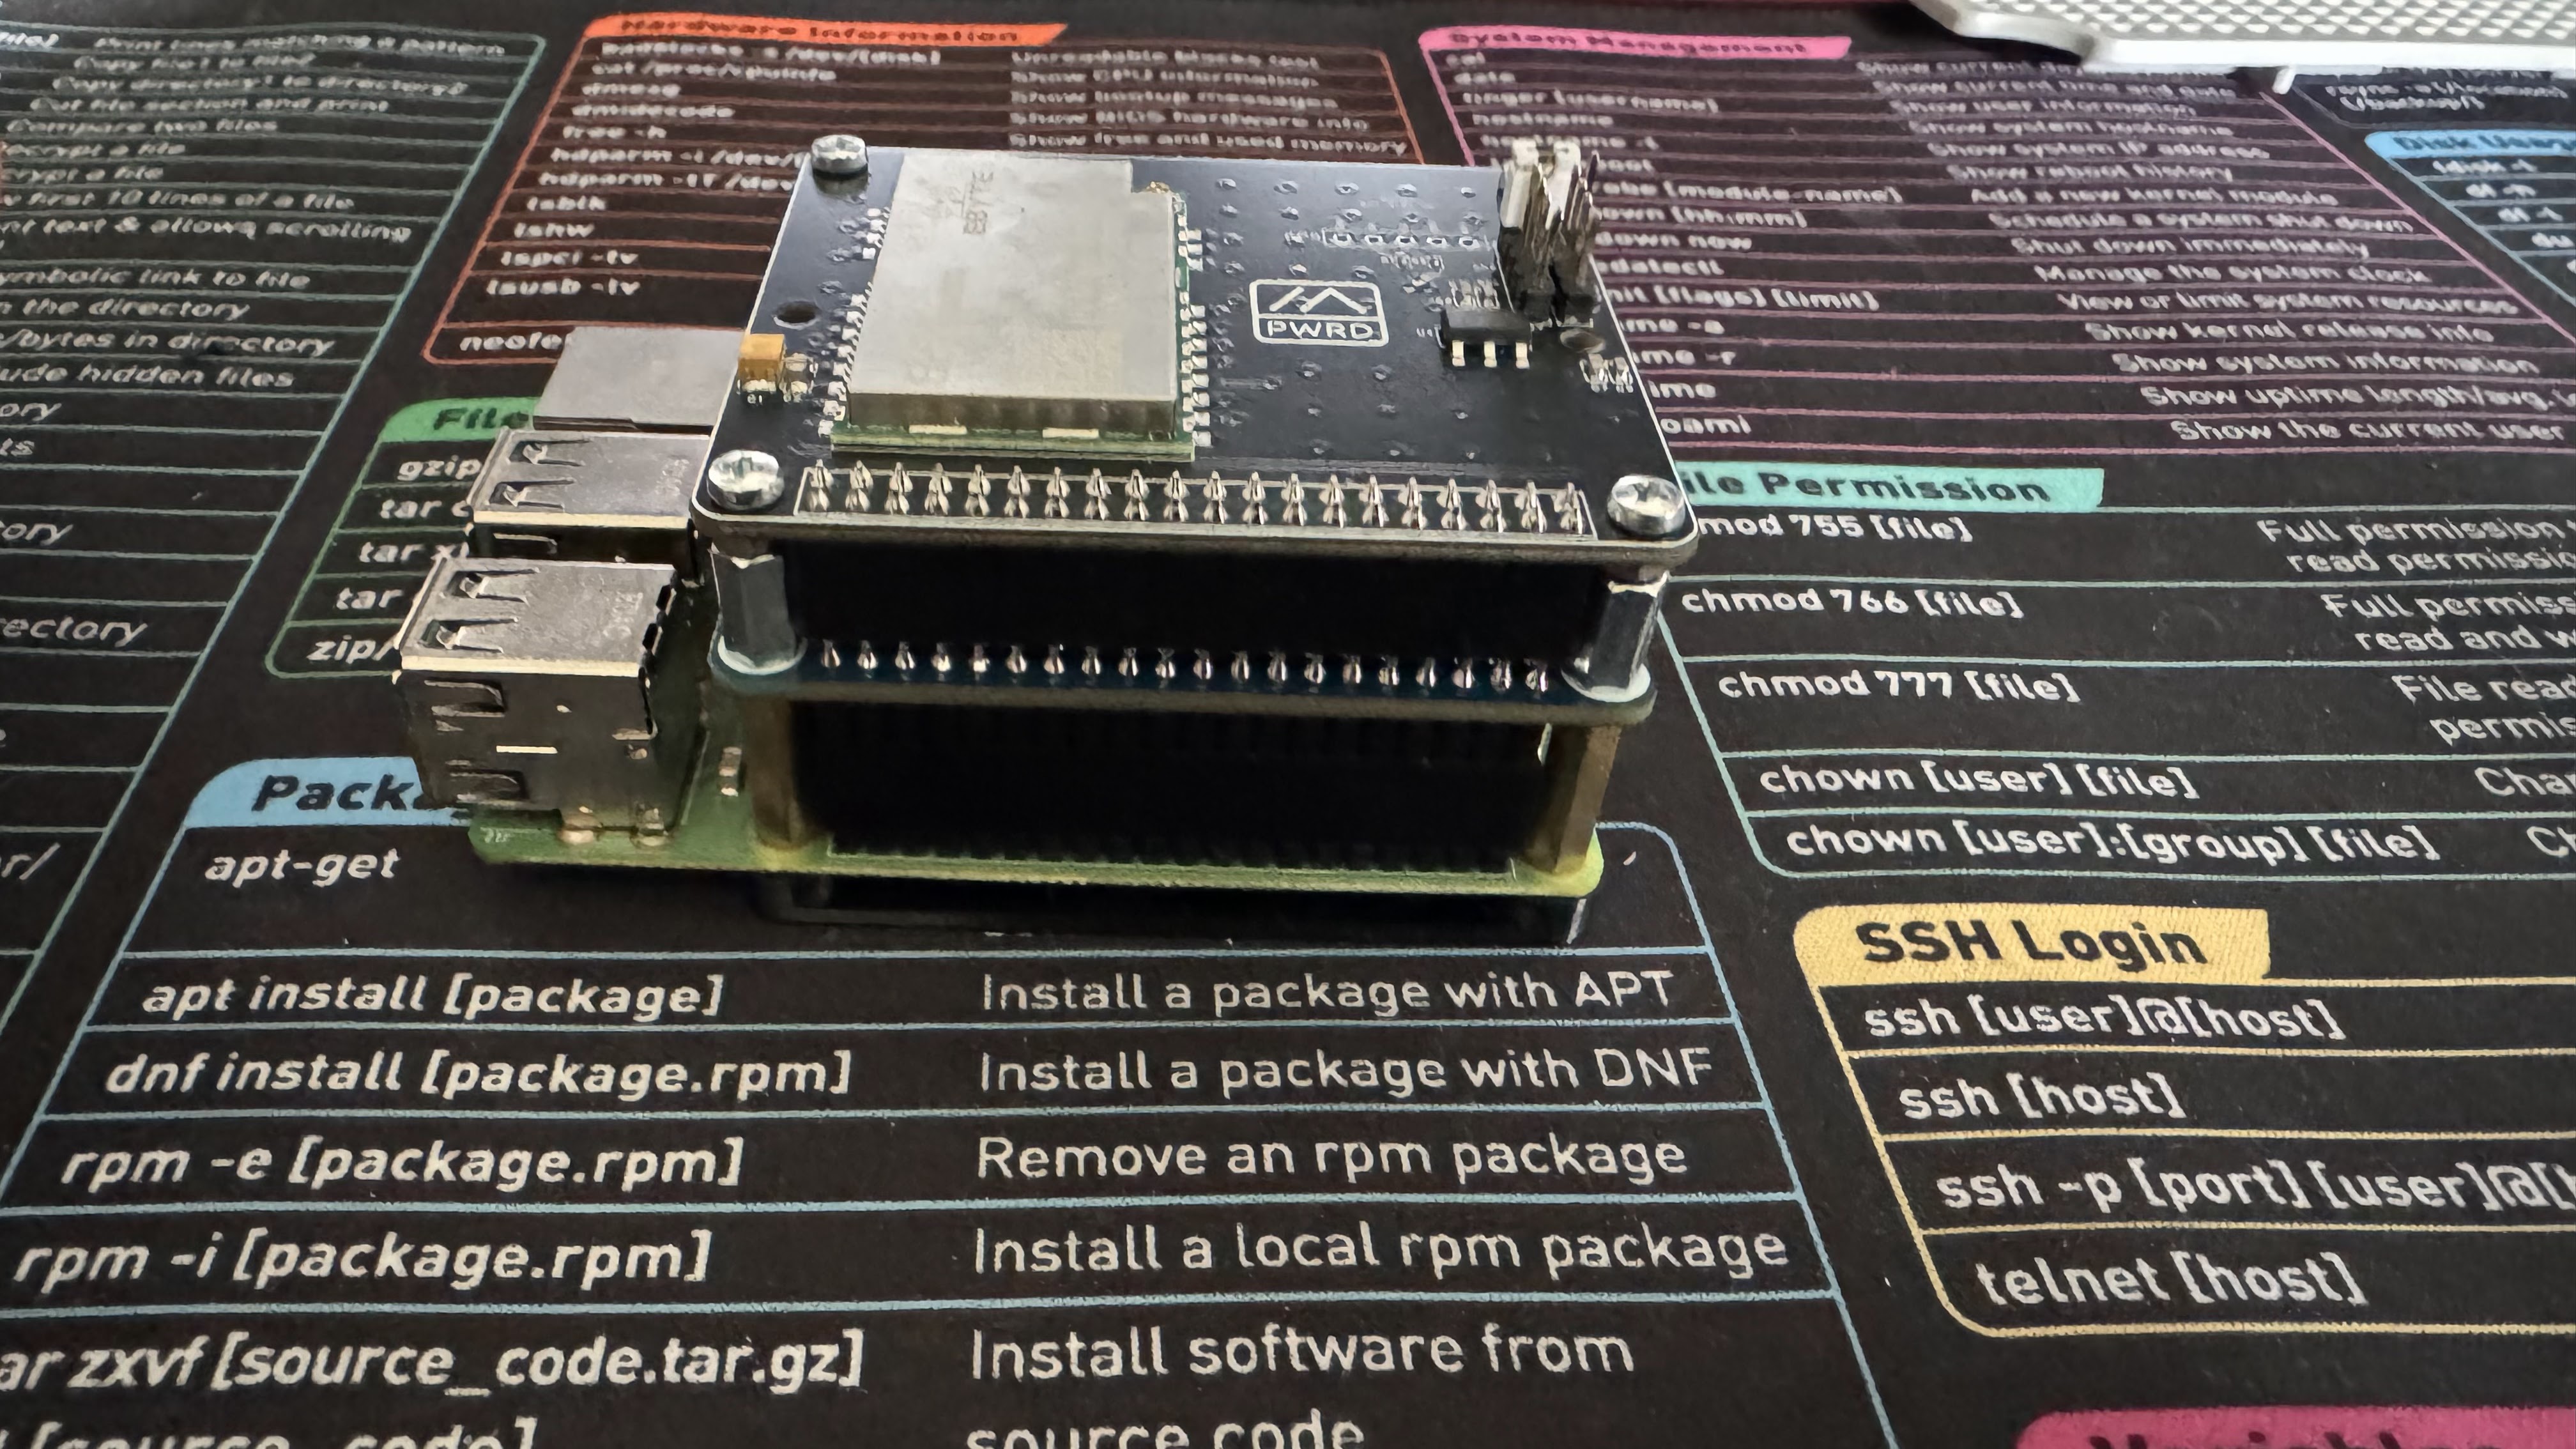
I wanted an all-in-one build, so I chose the WaveShare PoE Hat with pass-through pins, allowing me to stack components for easy deployment in a case and out in the field. Another key advantage is remote SSH access, making it possible to update the Raspberry Pi’s configuration and software without having to climb repeatedly. While I have it at home now, I plan to mount it 150 feet in the air—so minimizing physical access requirements is a huge win!
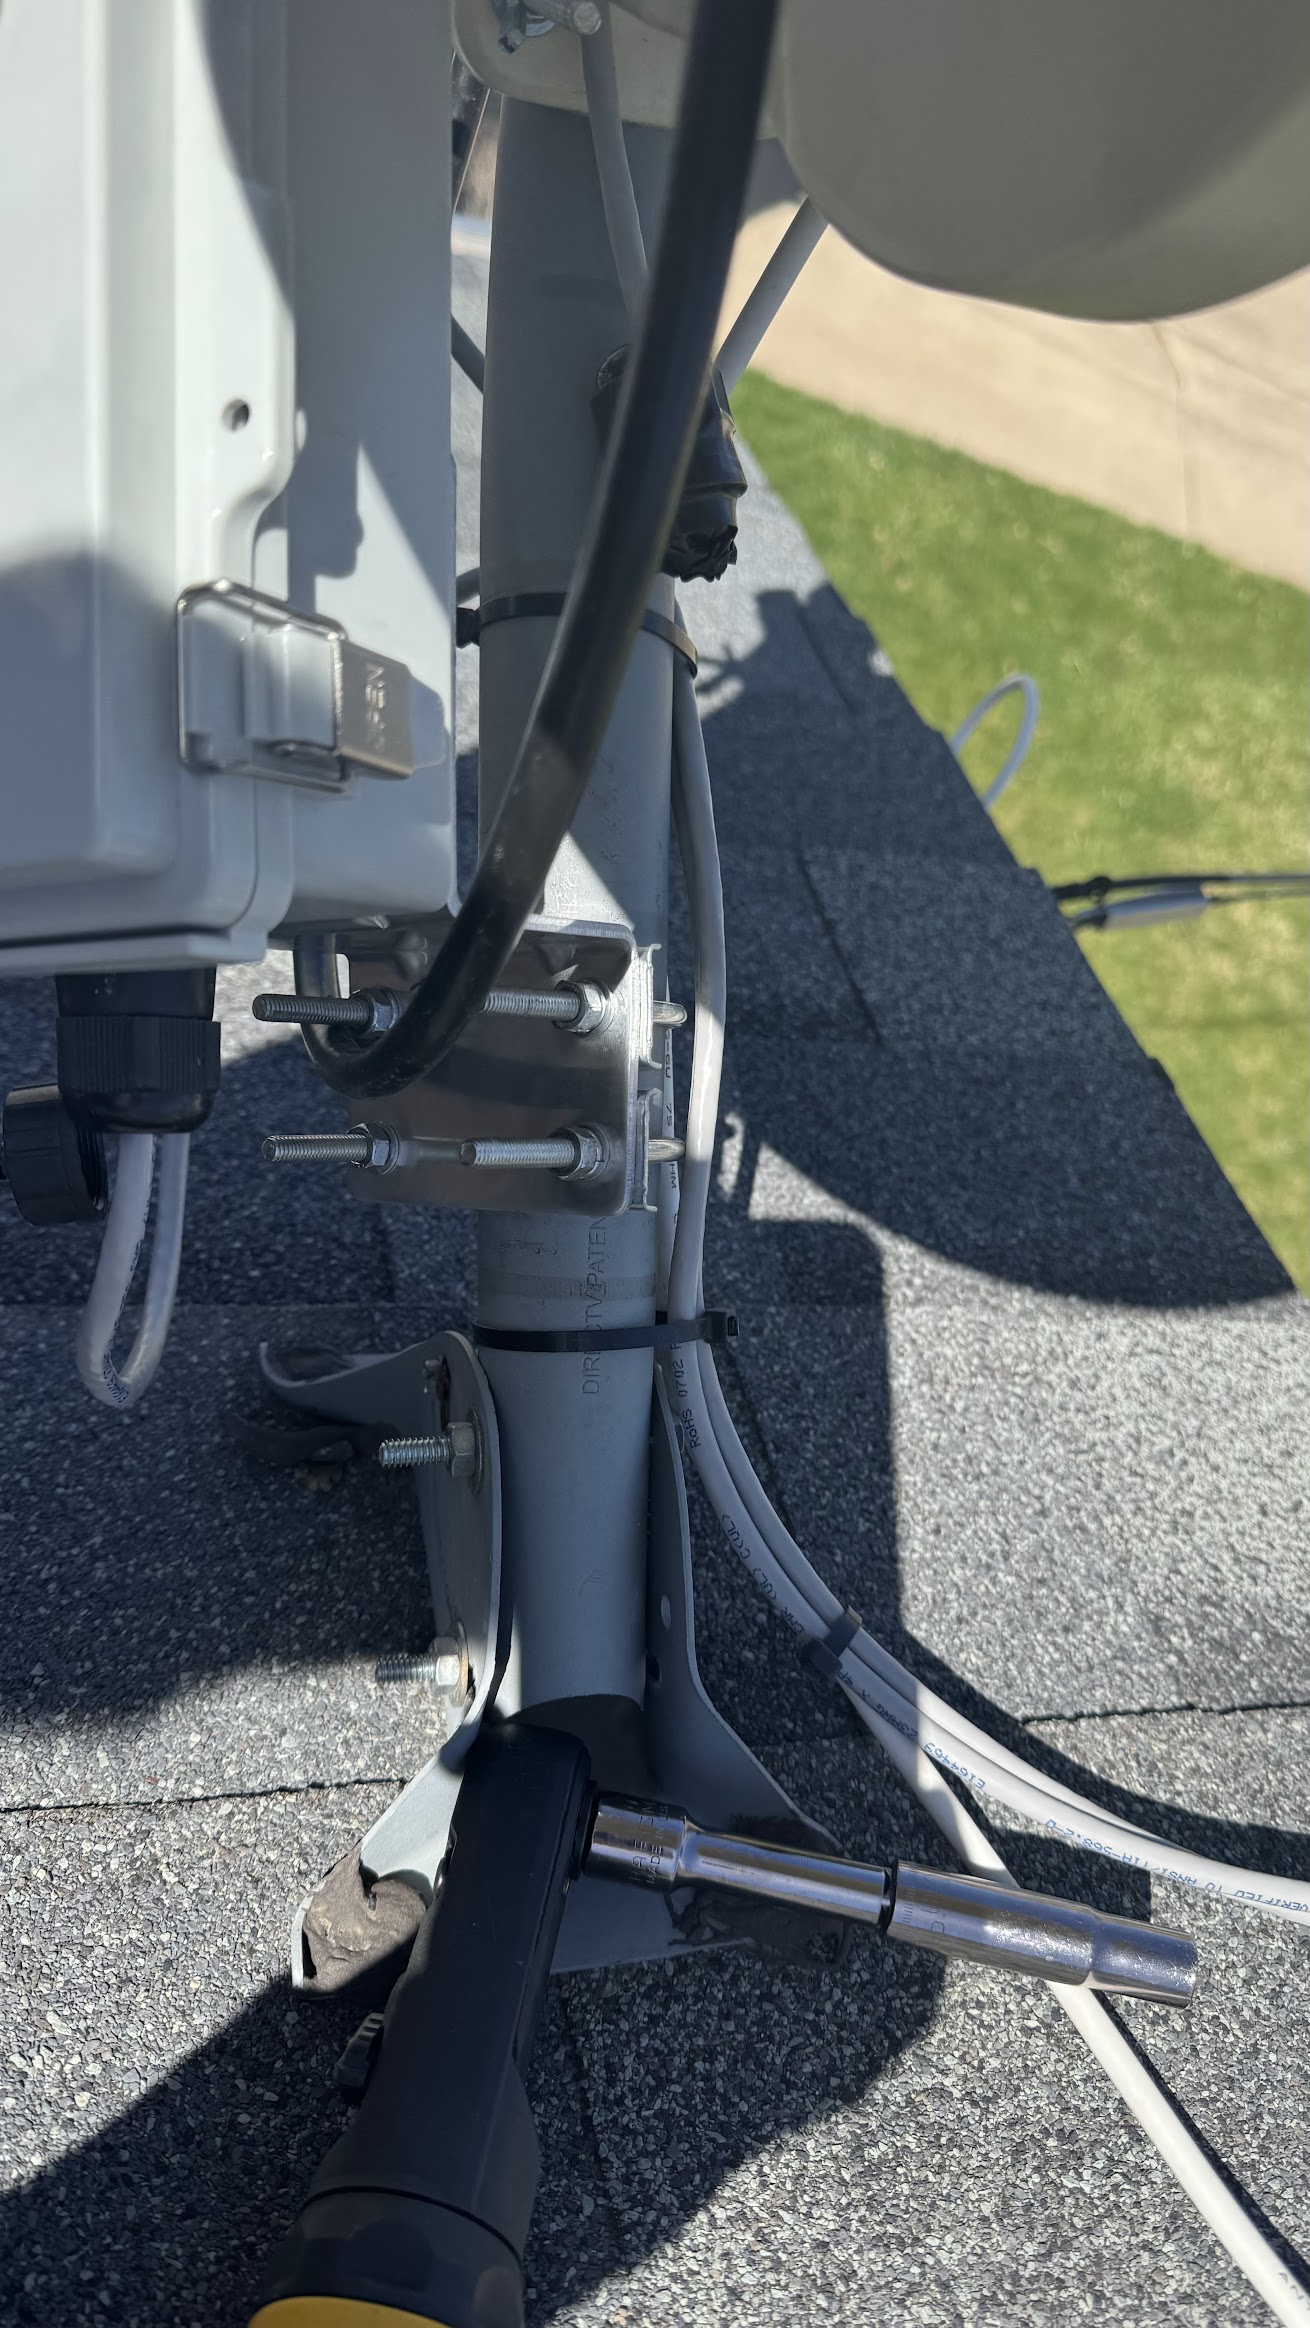
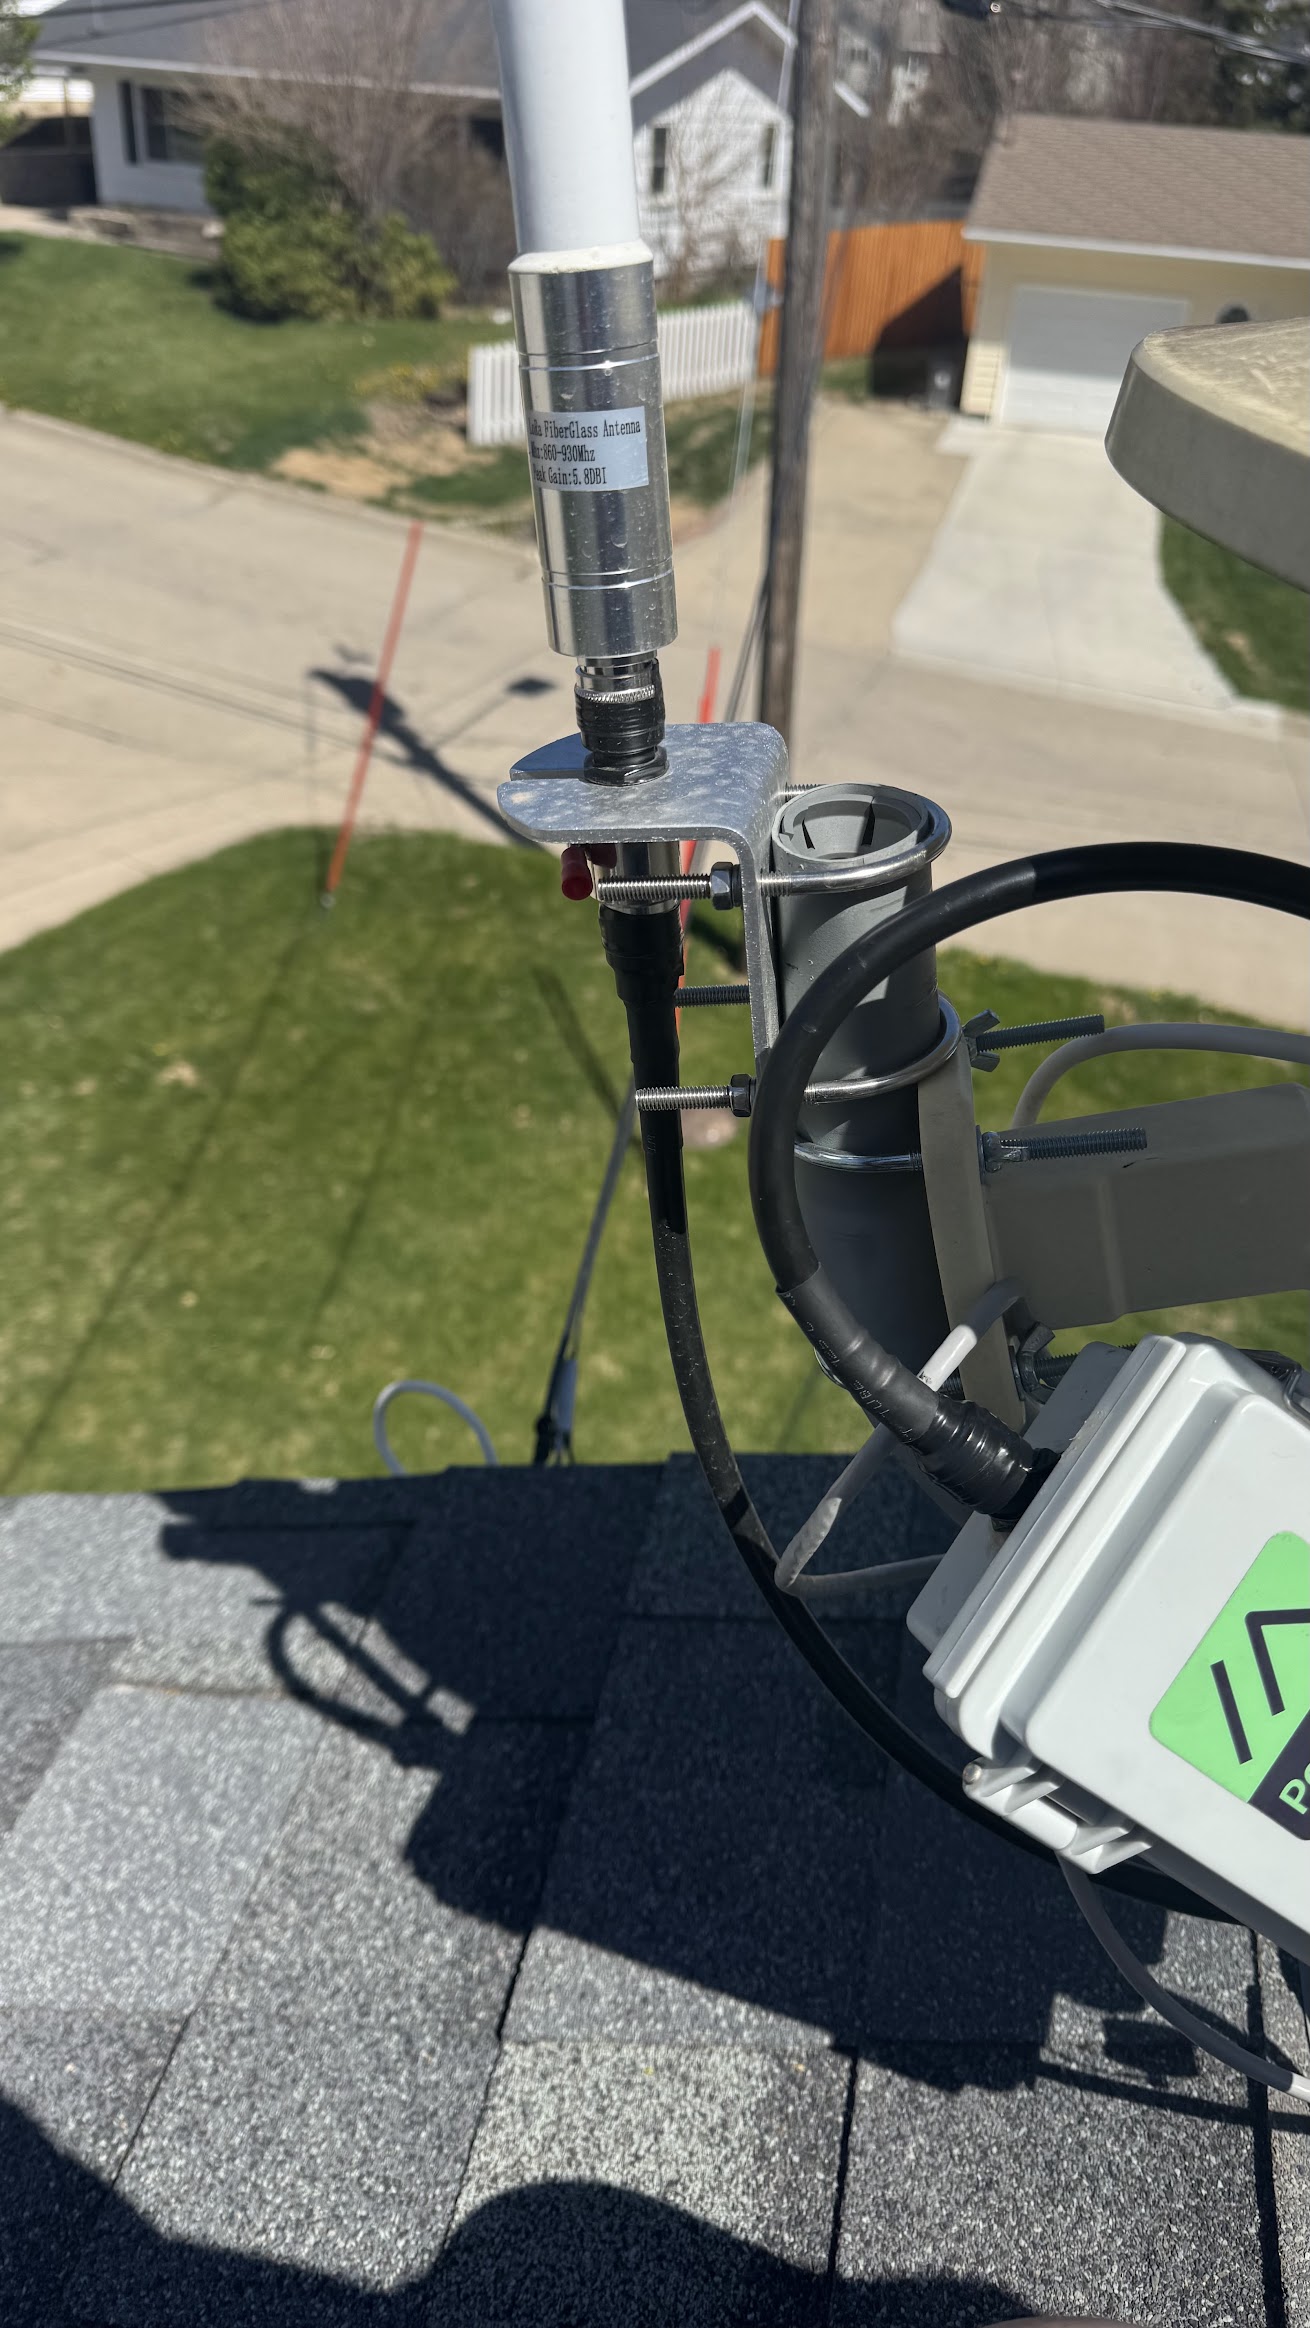
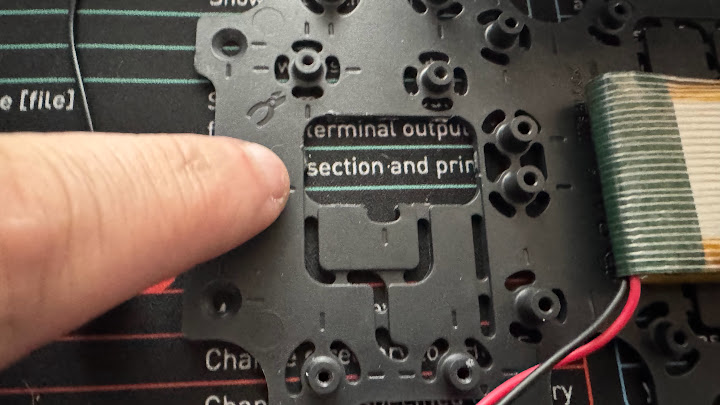
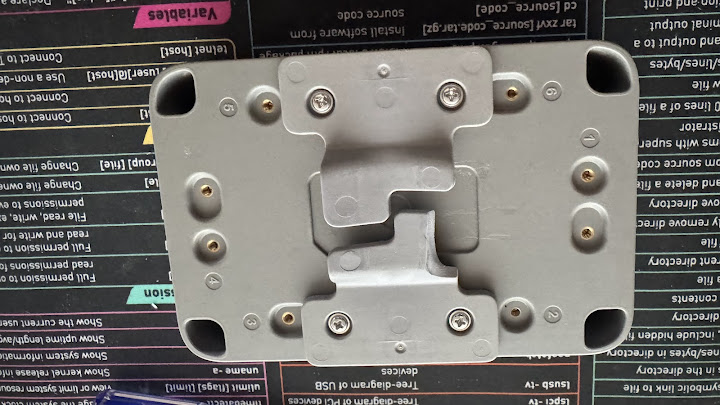
I used the taller mounts from the PoE Hat kit and put the screw side up. I had some other screw-on ends from another kit laying around so I was able to put the MeshAdv hat on top of the PoE hat, on top of the Raspberry Pi!
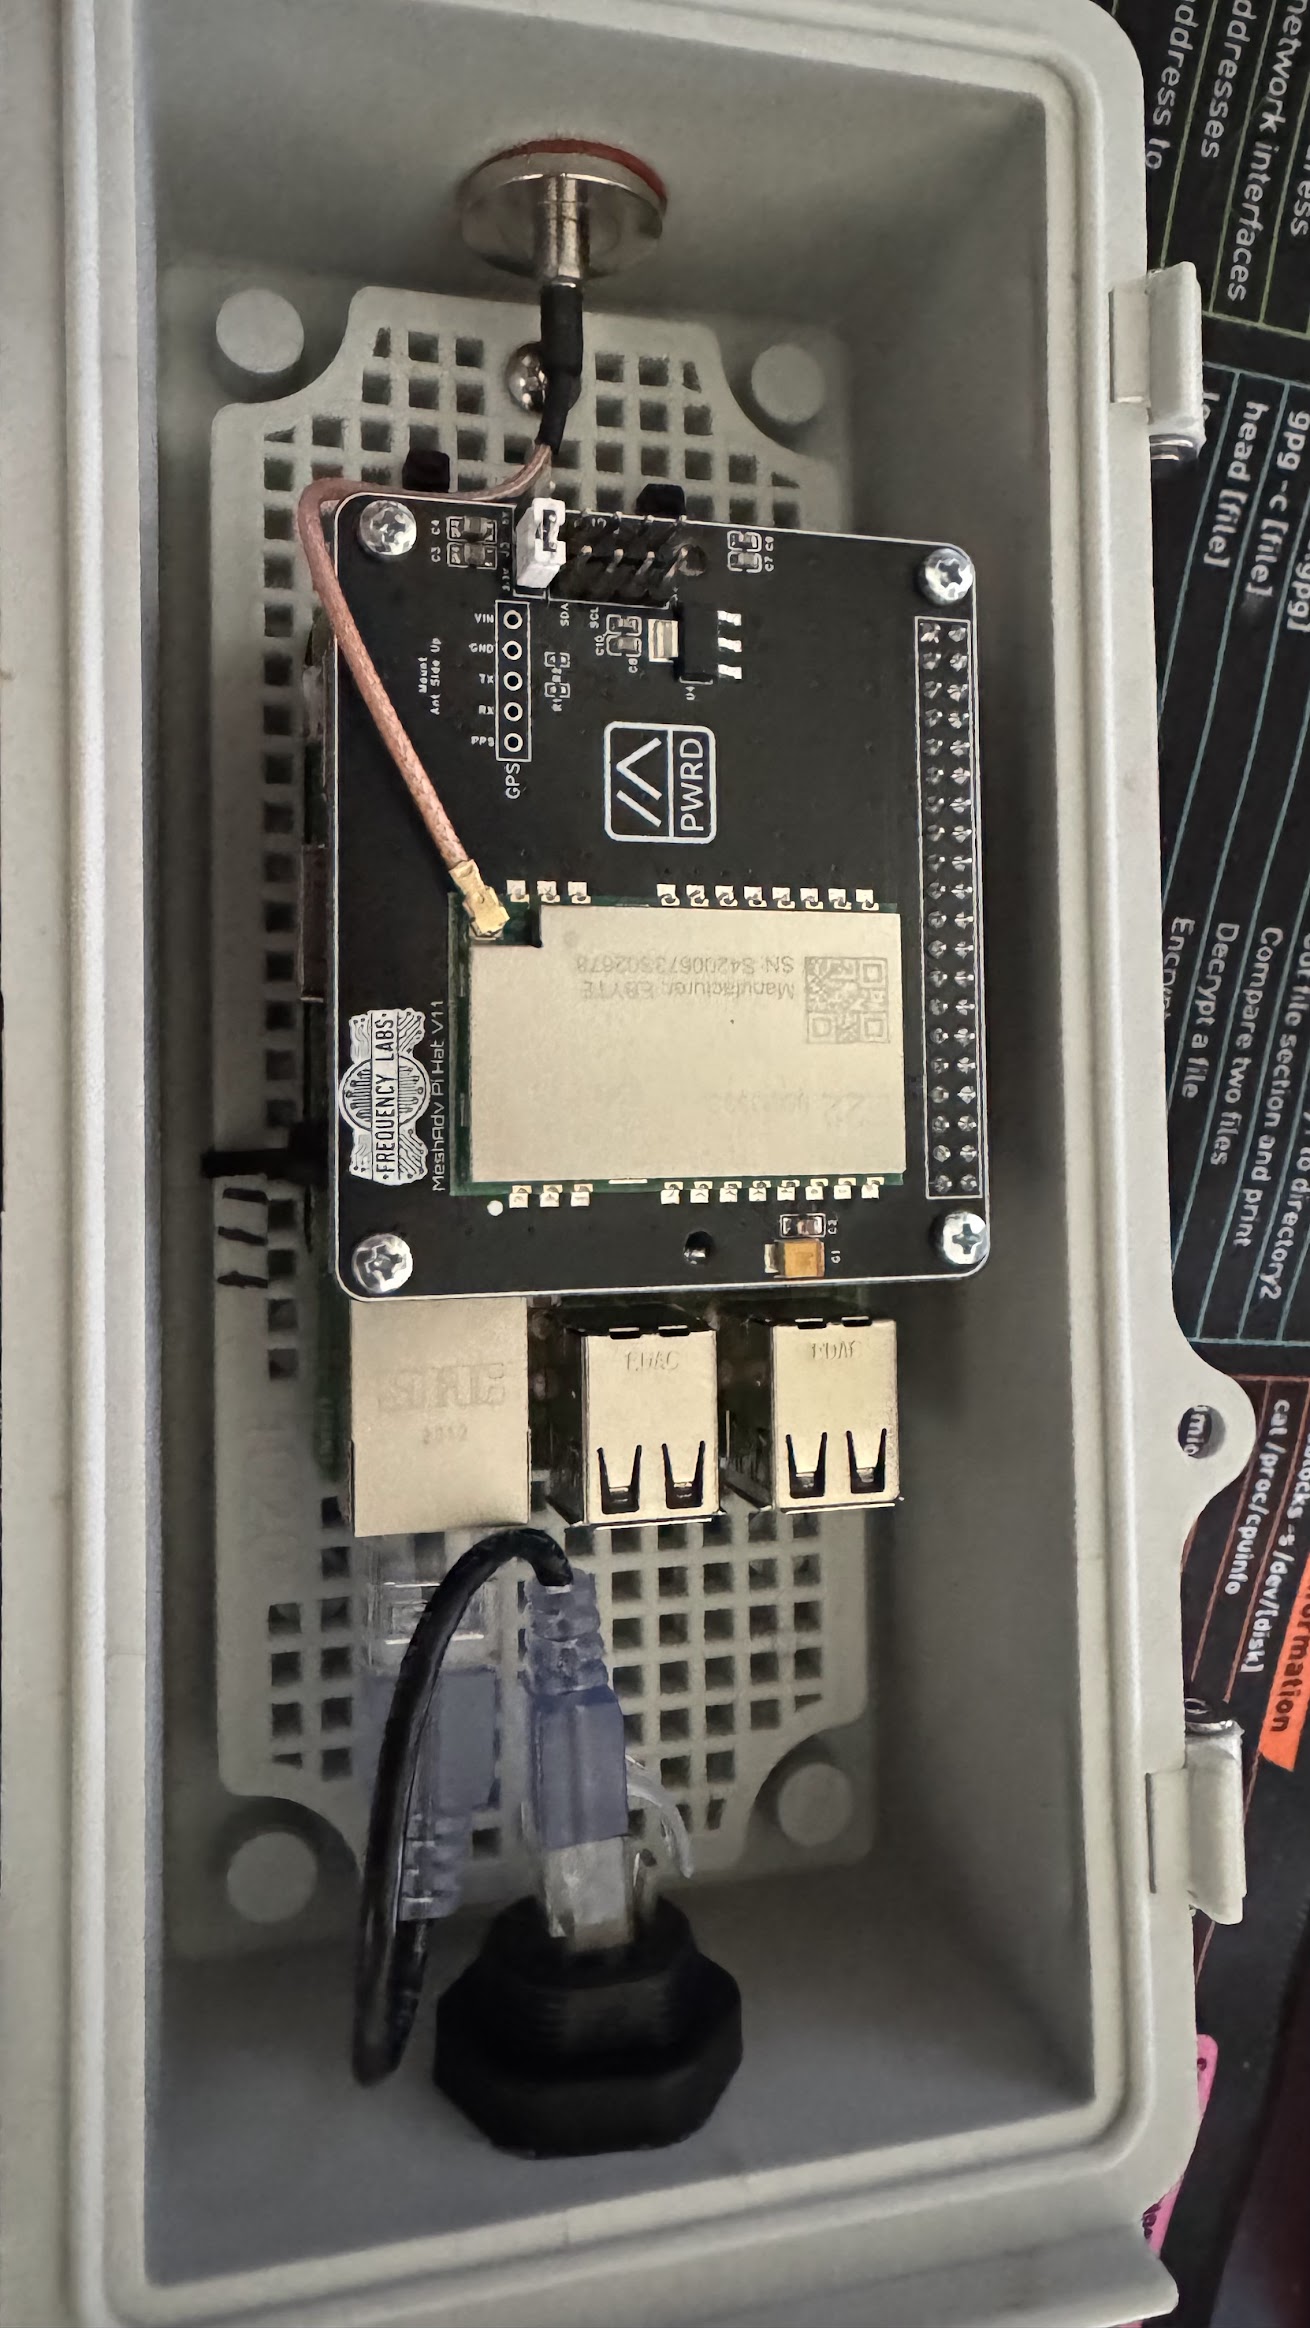
Once stacked (and while having the plate outside of the case) I took the 3d printed riser board we built for the Pi and zip tied it to the plate. You’ll see that more in the final build pictures
(Pi Plate for Build)[https://www.printables.com/model/1265288-pi3-mounting-plate]
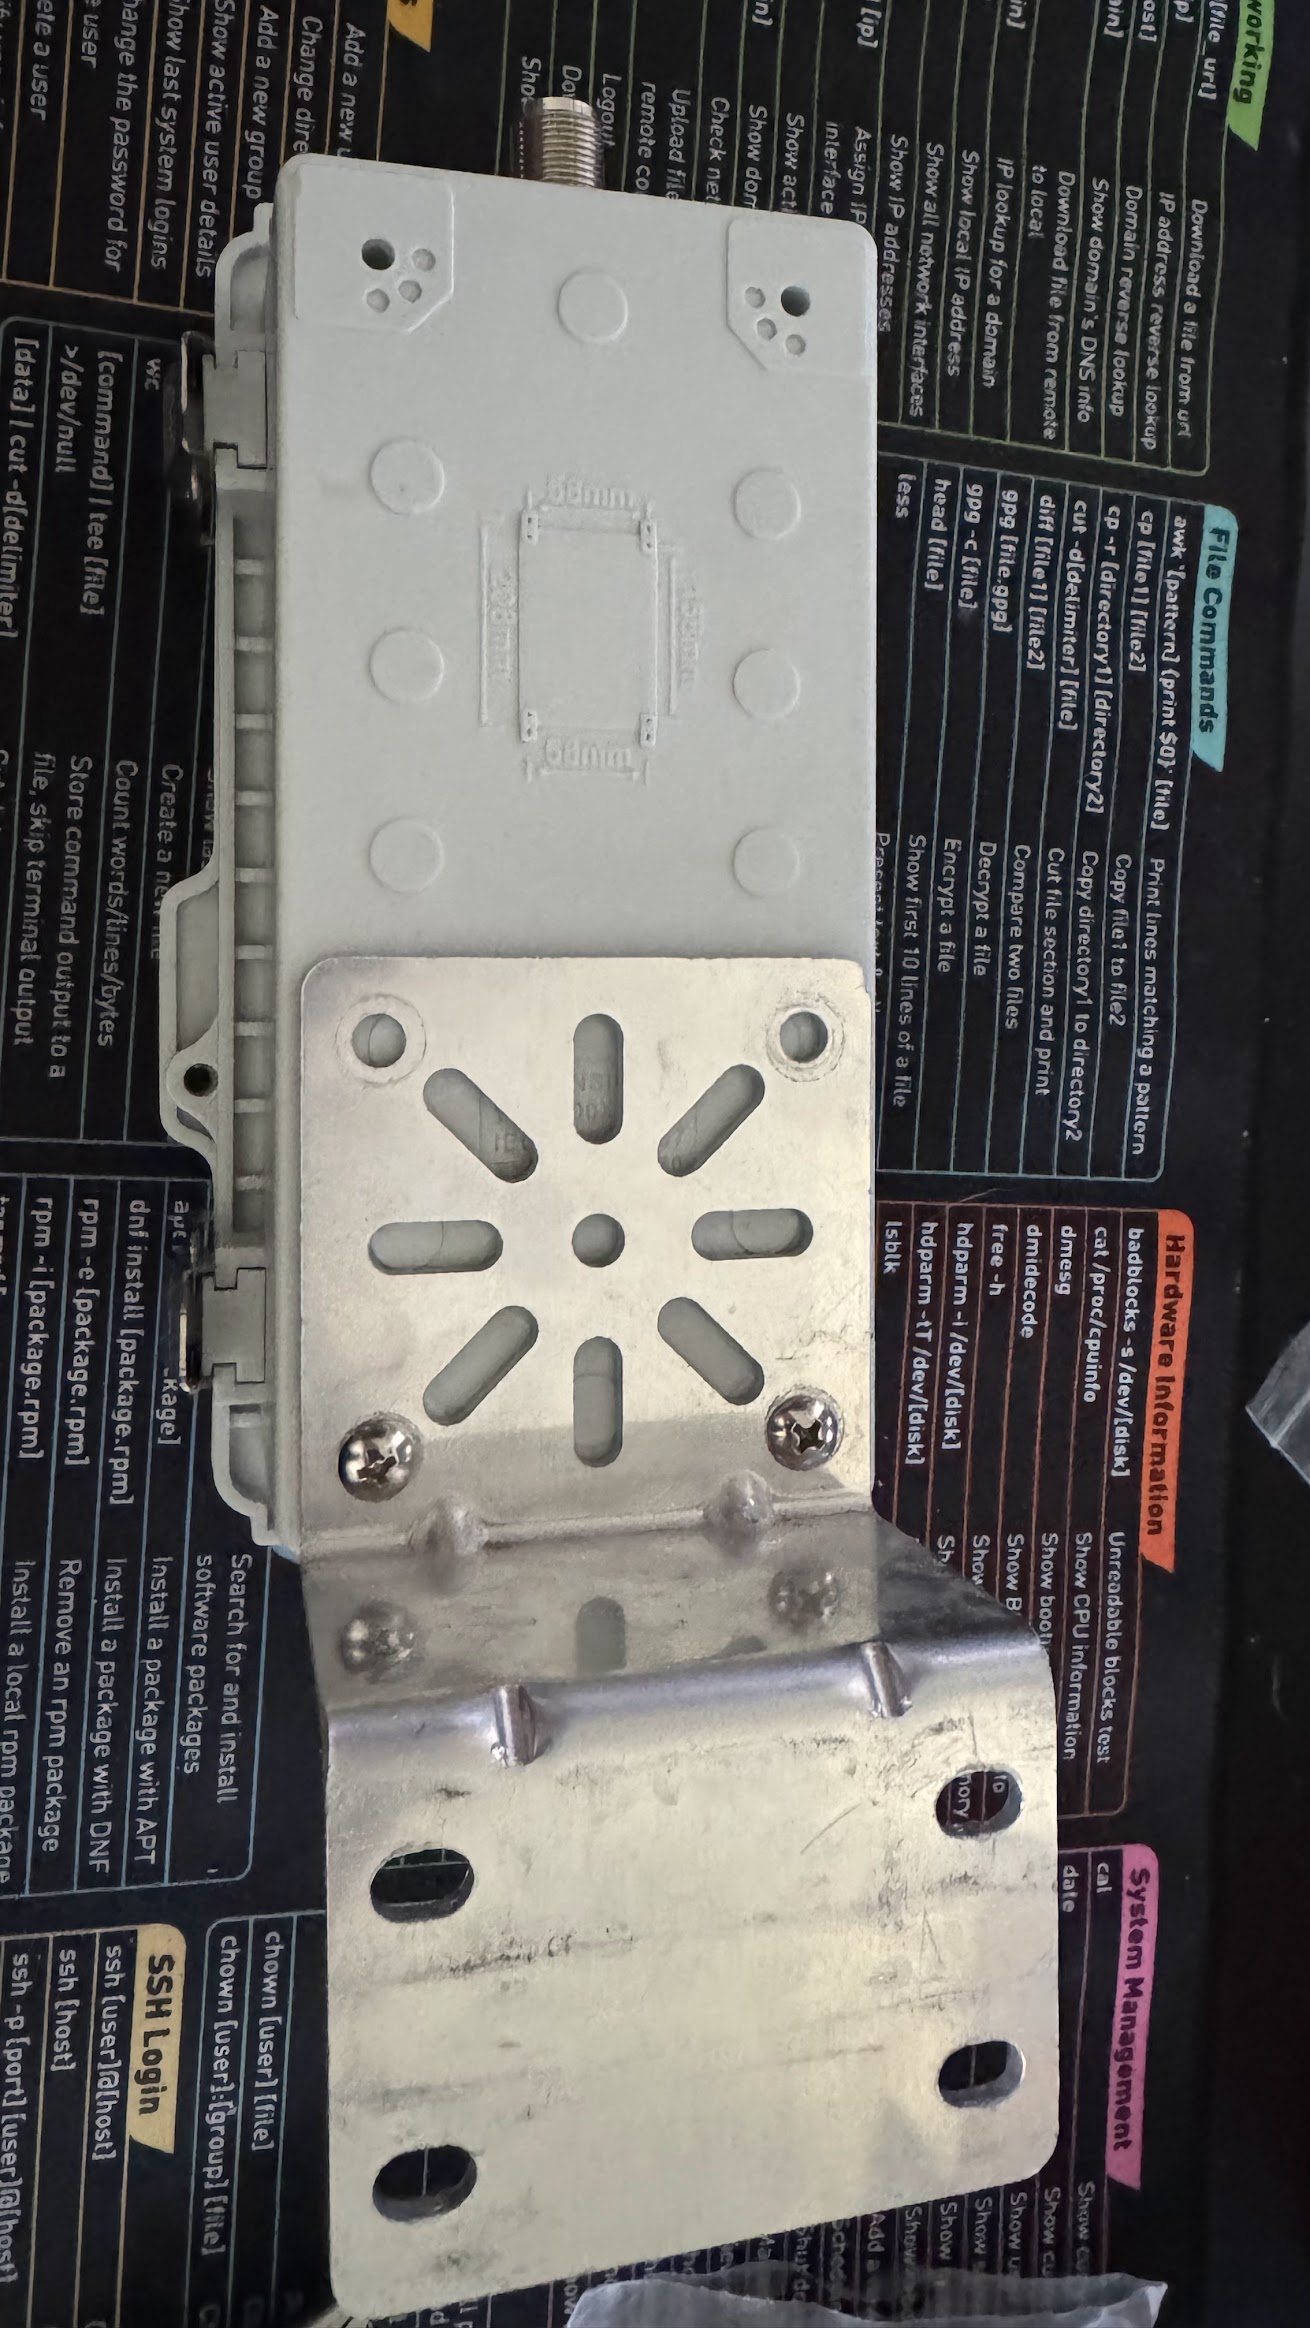
Since the plate was out of the case I drilled the hole in the top of the case for the bulkhead connector and the bottom for the ethernet pass through interface. This was done using a standard step bit that can be picked up at most hardware stores.
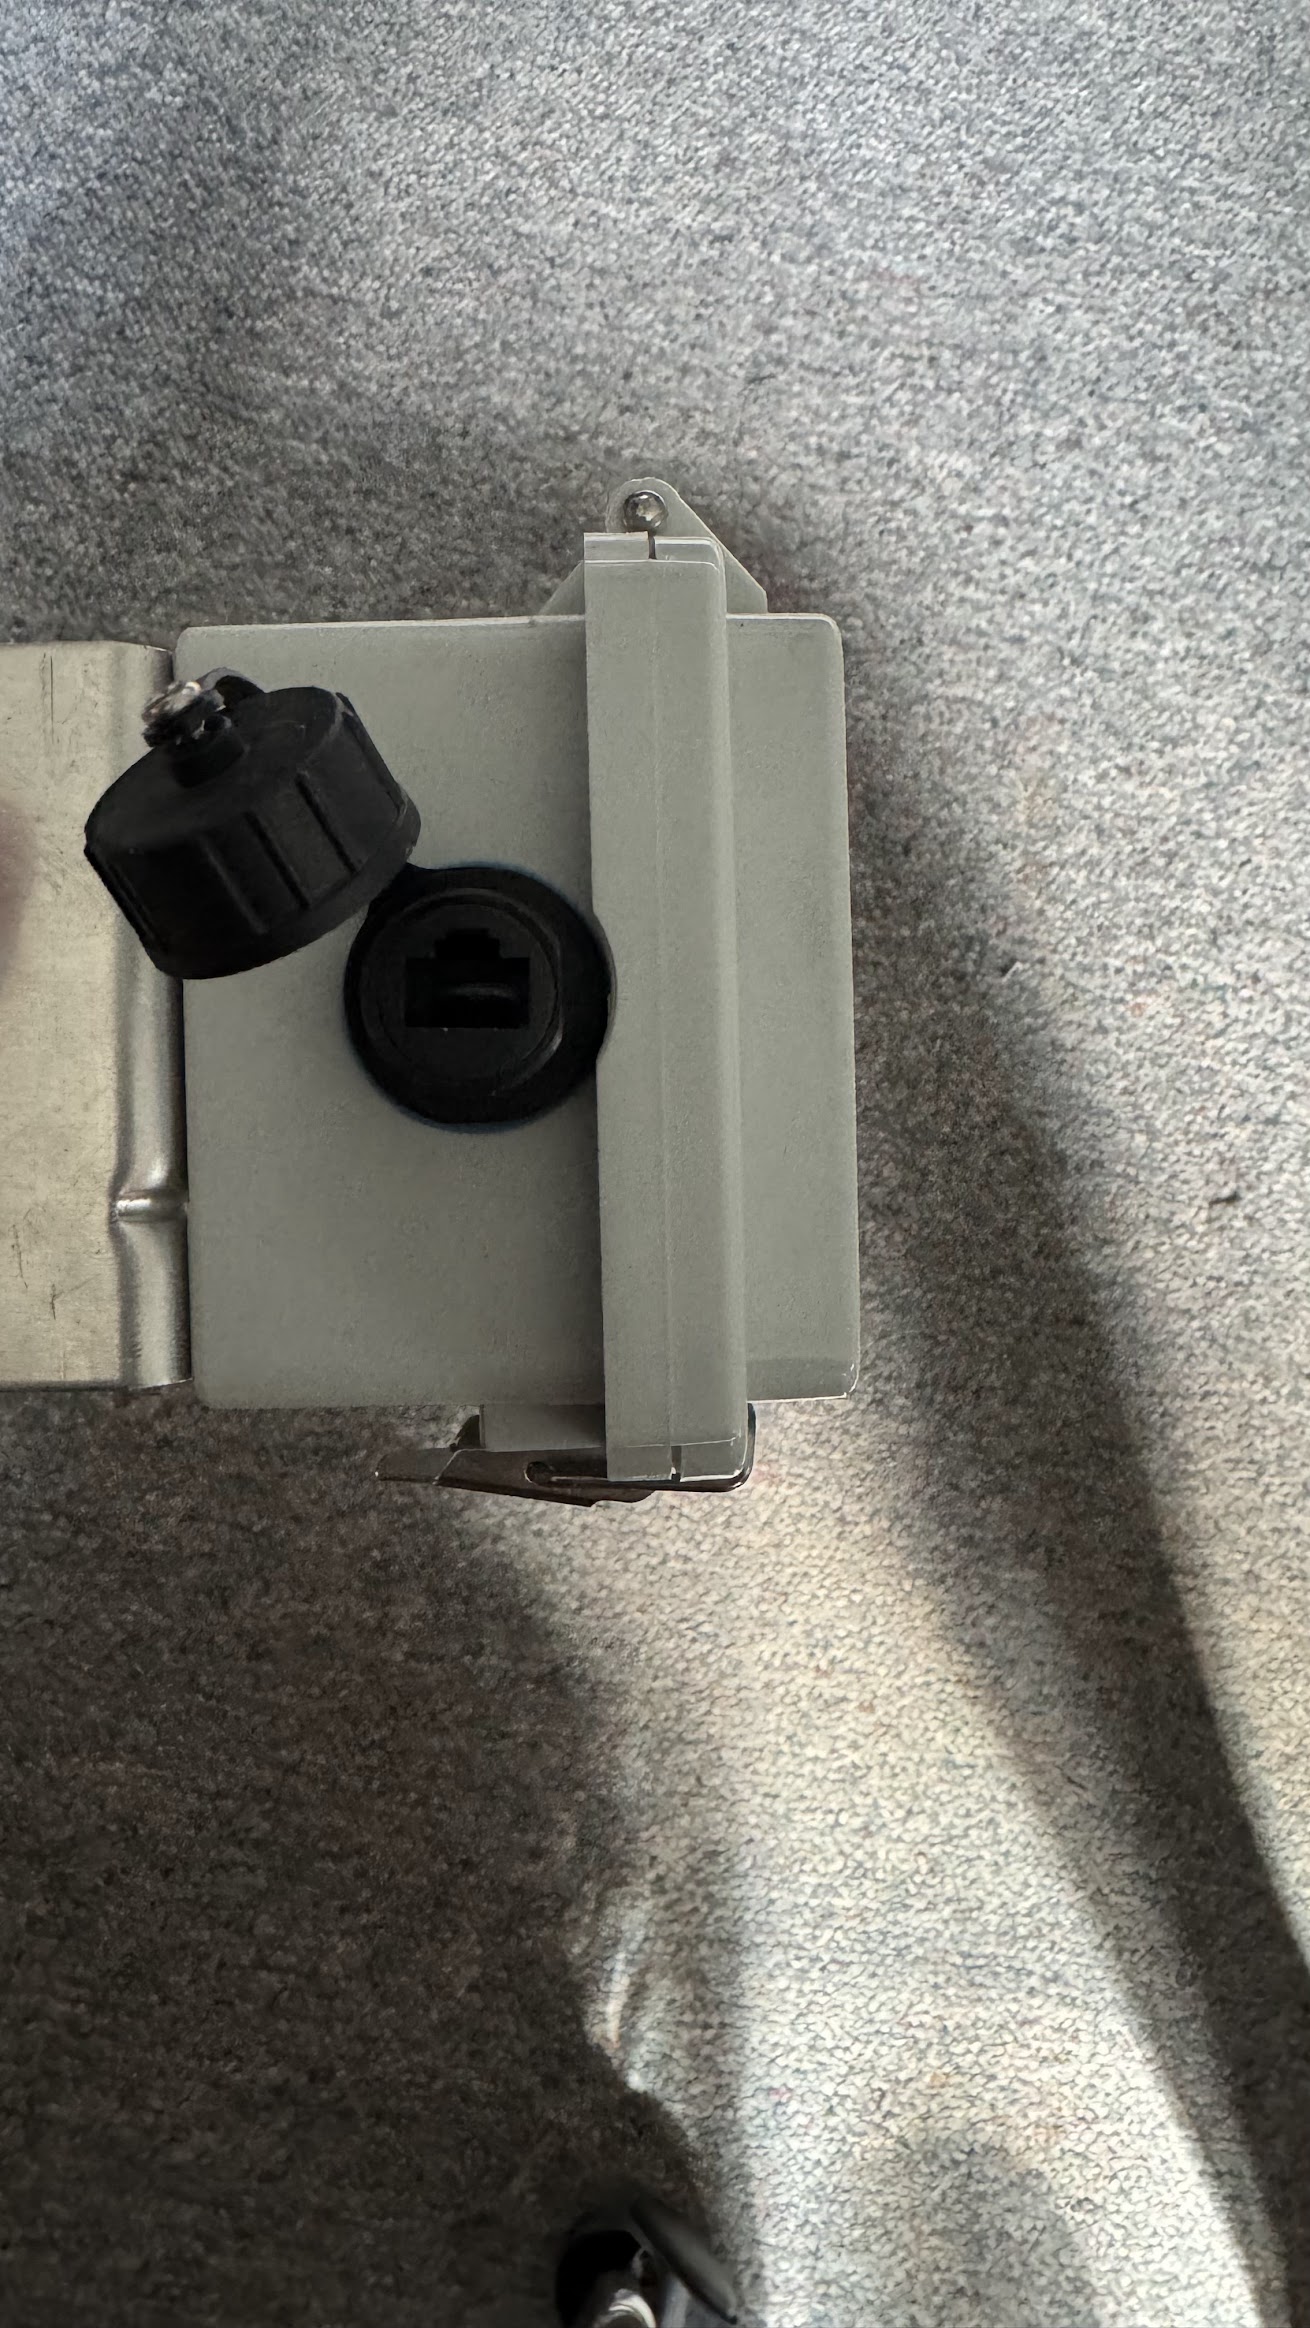
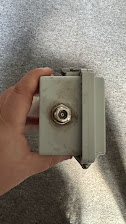
The case is a bit tight so I would suggest waiting to put the bulkhead and ethernet.
Next assemble the raspberry pi to the riser plate that was 3d printed and then the riser to the actual box plate.

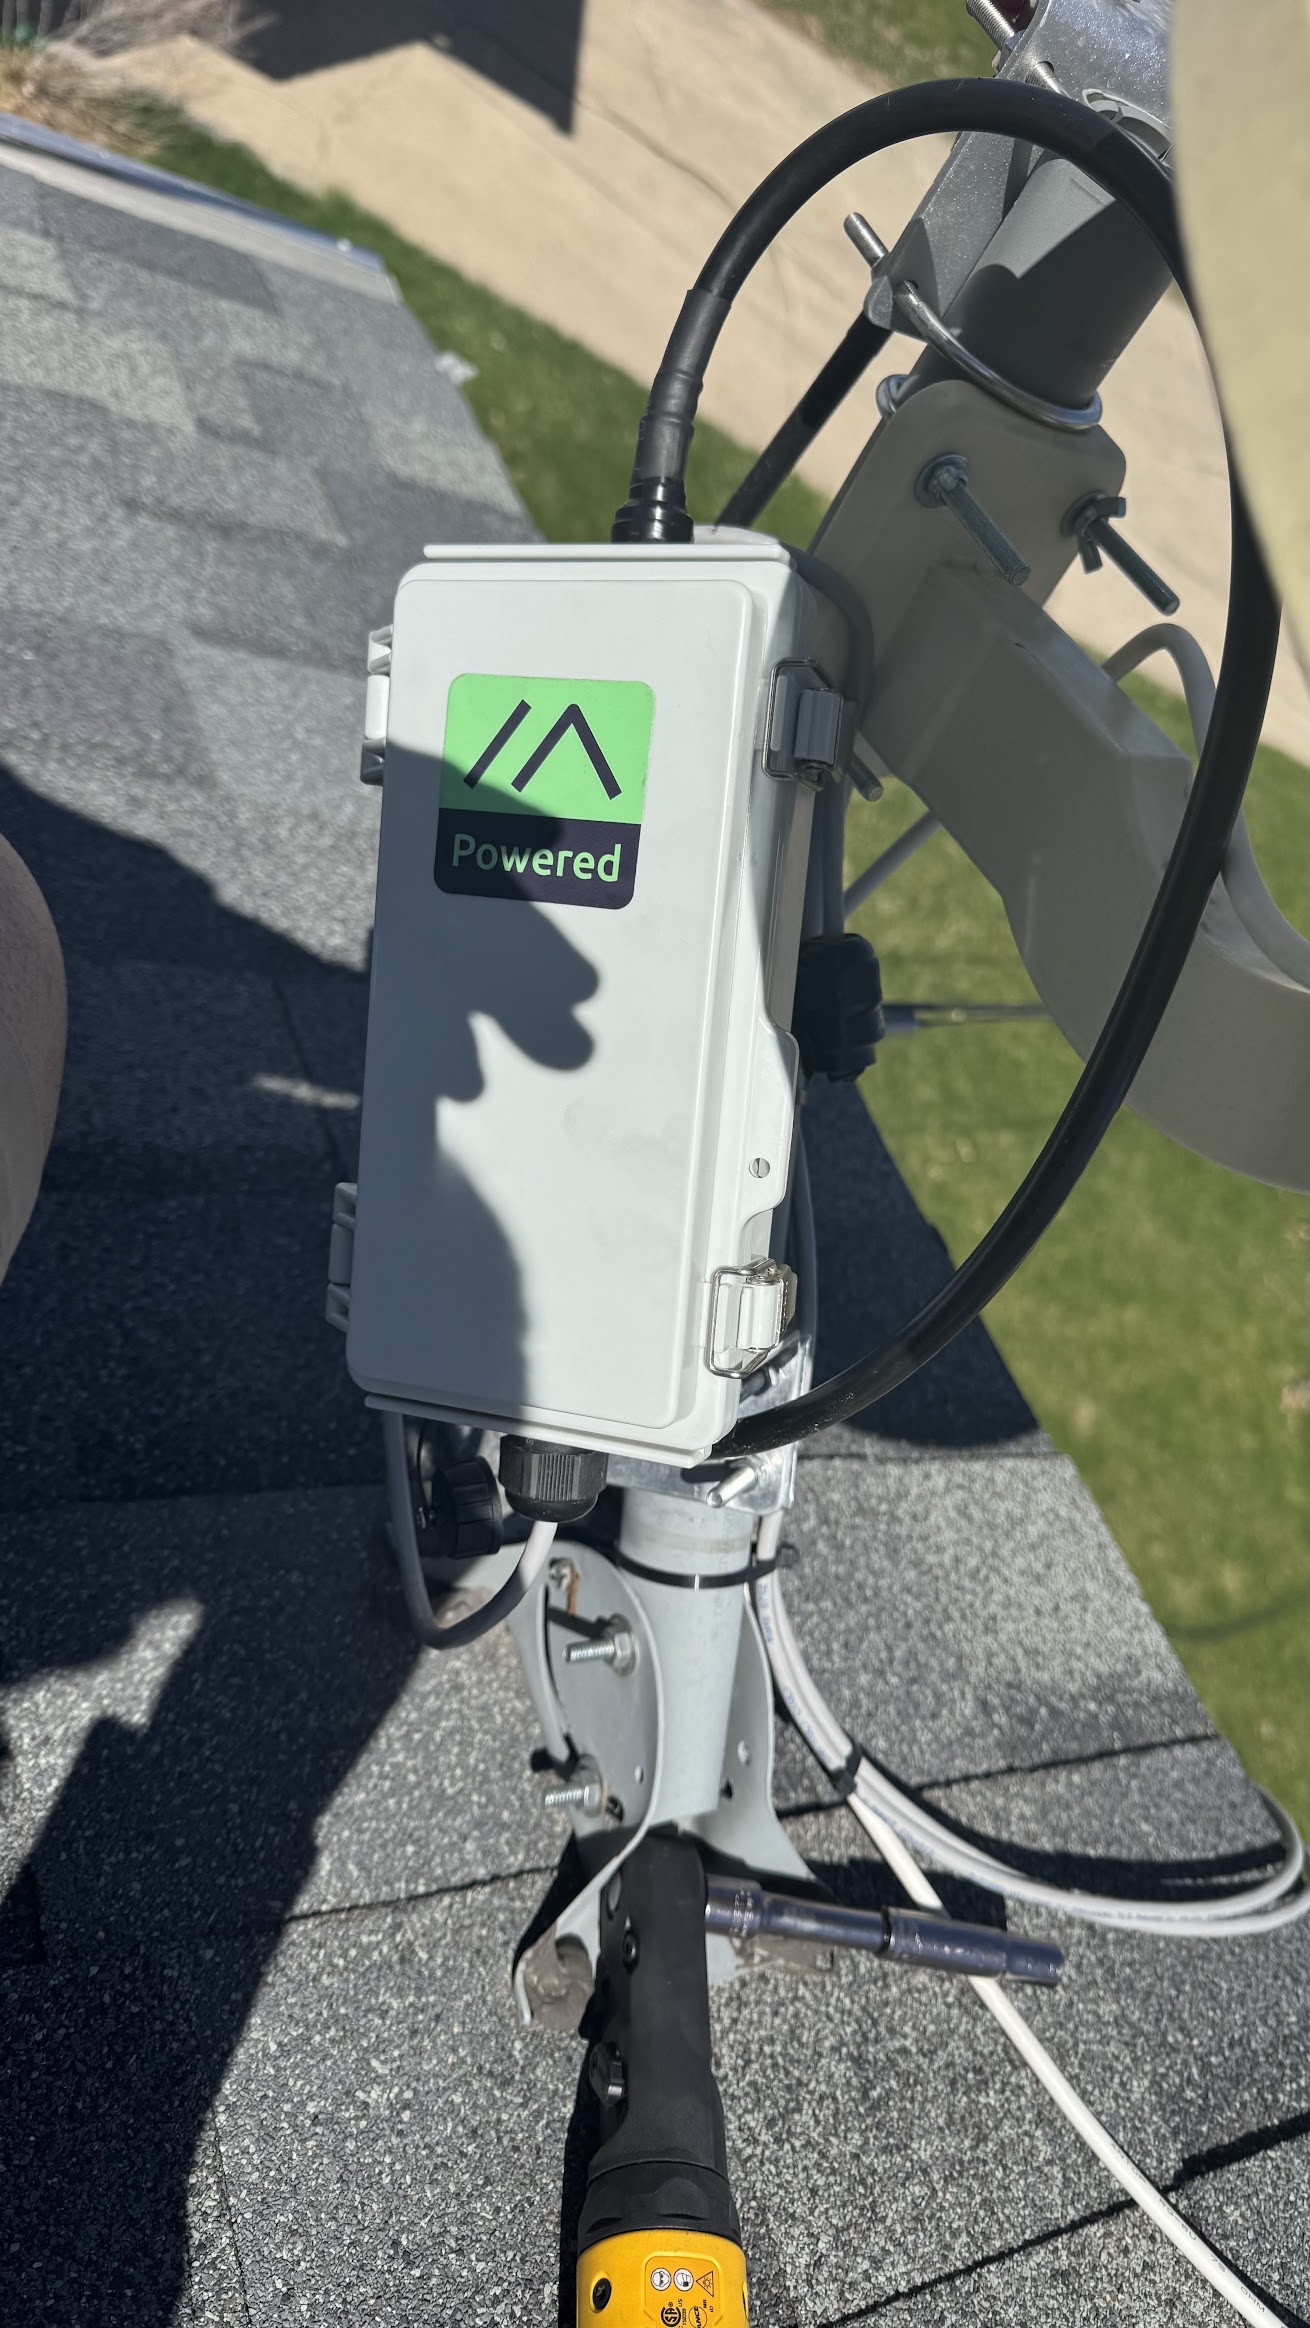
Install the case plate and finish the install and then install up on the roof
Here are the roof photos:
The config is a little different to get started since it’s running on top of a Raspberry Pi.
I chose to do the RaspberryPi OS 12 without the gui (There is no monitor attached so why bother). If you are not familiar with Raspberry Pi Imager here are the steps:
Imaging an SD Card for Raspberry Pi OS 12 (64-bit)
Prerequisites
- Raspberry Pi Imager (Download Here)
- SD Card
- Mac or Windows PC
- Card Reader (if needed)
Steps
1. Install Raspberry Pi Imager
Download and install Raspberry Pi Imager from the official site.
2. Insert the SD Card
Ensure the SD card is properly connected to your system.
3. Select Raspberry Pi OS
- Open Raspberry Pi Imager.
- Click “Choose OS” → Select Raspberry Pi OS 12 (64-bit).
4. Choose Storage
- Click “Choose Storage” → Select your SD card.
5. Optional: Configure Settings
- Click the ⚙️ settings icon to:
- Enable SSH
- Set Wi-Fi credentials
- Configure hostname, etc.
6. Flash the Image
Click “Write” and confirm. This erases and writes the OS to the SD card.
7. Eject & Insert into Raspberry Pi
Once done, remove the SD card and insert it into your Raspberry Pi.
Once logged into your Raspberry Pi OS, Run the latest round of updates (just because it’s what any good system owner would do) and then add the repositories to be able to install meshtasticd:
echo 'deb http://download.opensuse.org/repositories/network:/Meshtastic:/beta/Raspbian_12/ /' | sudo tee /etc/apt/sources.list.d/network:Meshtastic:beta.list

curl -fsSL https://download.opensuse.org/repositories/network:Meshtastic:beta/Raspbian_12/Release.key | gpg --dearmor | sudo tee /etc/apt/trusted.gpg.d/network_Meshtastic_beta.gpg > /dev/null

sudo apt update

sudo apt install meshtasticd
When I followed the offical guide on Meshtastics website the service would never stay running. I ended up having to add the config manually from the devleopers github repo. My config looks like this:
Lora:
  Module: sx1262
  CS: 21
  IRQ: 16
  Busy: 20
  Reset: 18
  TXen: 13
  RXen: 12
  DIO3_TCXO_VOLTAGE: true

I2C:
  I2CDevice: /dev/i2c-1

Logging:
  LogLevel: info # debug, info, warn, error

Webserver:
  Port: 443 # Port for Webserver & Webservices
  RootPath: /usr/share/meshtasticd/web # Root Dir of WebServer
Next Start the meshtasticd service and make sure everything works:
sudo systemctl status meshtasticd

sudo systemctl status meshtasticd
Look for errors in the log and fix as appropiate:
journalctl -u meshtasticd -e
The rest of the setup will be done by the WebUI.
This build was certainly an adventure! While it’s not a setup for everyone, those looking to tackle more advanced projects may find it a worthy challenge.
TBeam Supreme EDC
TBeam Supreme Build
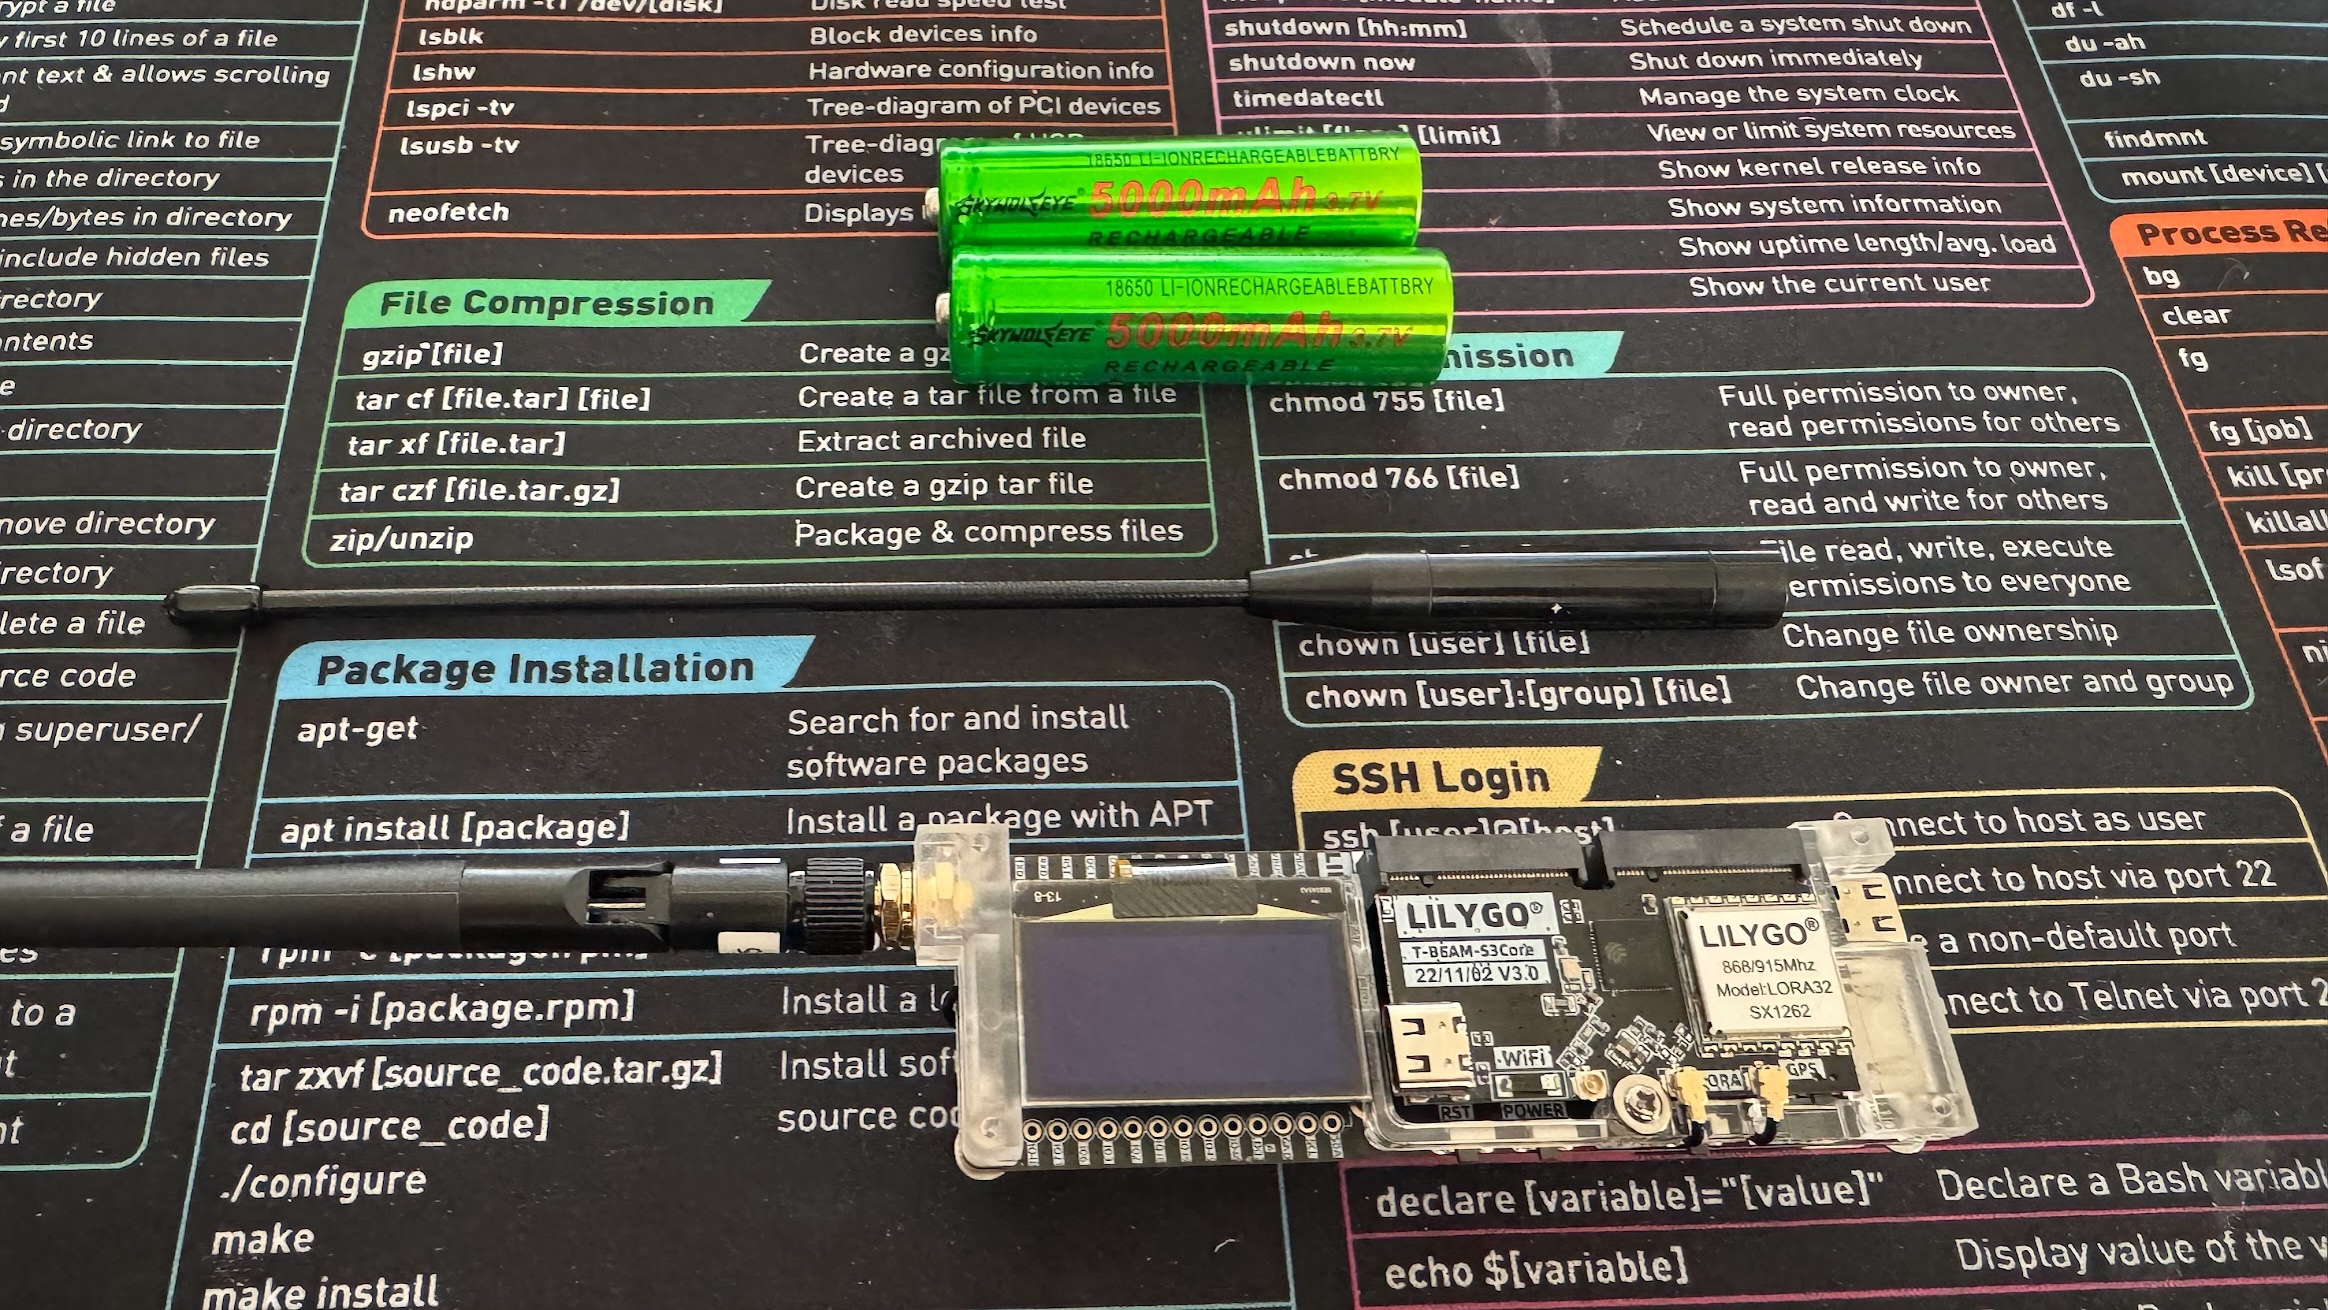
Not long after working with the RAK boards I thought I would try out the tbeam. I had heard good things about it and wanted to really see what all of the hype was about. The original case that I found was a bit clunky and wasn’t overly well. So I threw it in a case just to hang out for a while and even then it really ended up in a drawer… Until now! I was thinking about our annual sales conference coming up and the Meshtastic network we would like to build again. I just happened to search again for a case that would work for this tbeam thinking I would carry it around and stumbled on the TBeam Supreme 3D printable cas from Alley Cat and after looking closer at it seemed to be solid. When I printed it, I can confirm it is solid, easy to print and easy to assemble. While I know there are tons of options out there this case has certainly made me a believer in the tbeam again.
Here is the parts list that I used:
TBeam: Lilygo TBeam Supreme
Batteries: Generic 18650 Batteries
Antenna: Amazon Lora 915 Antenna
Misc Screws and Nuts: 2 M3 nuts and 2 M3x8 bolts Local Hardware Store; I used Theisens as they have bulk
The base kit comes with the board, and antenna. I opted to add a different antenna. The stock antenna is not overly good according to the NanoVNA, but I find that the generic antenna from Amazon is spot on when it comes to the 915 mhz Lora that Meshtastic uses.
When printing the case I had to use the 13mm with nuts STL file to allow for the size of the Amazon antenna. Hats off to the creator for having multiple options for different antenna types without needing to import the STL and modify it yourself!
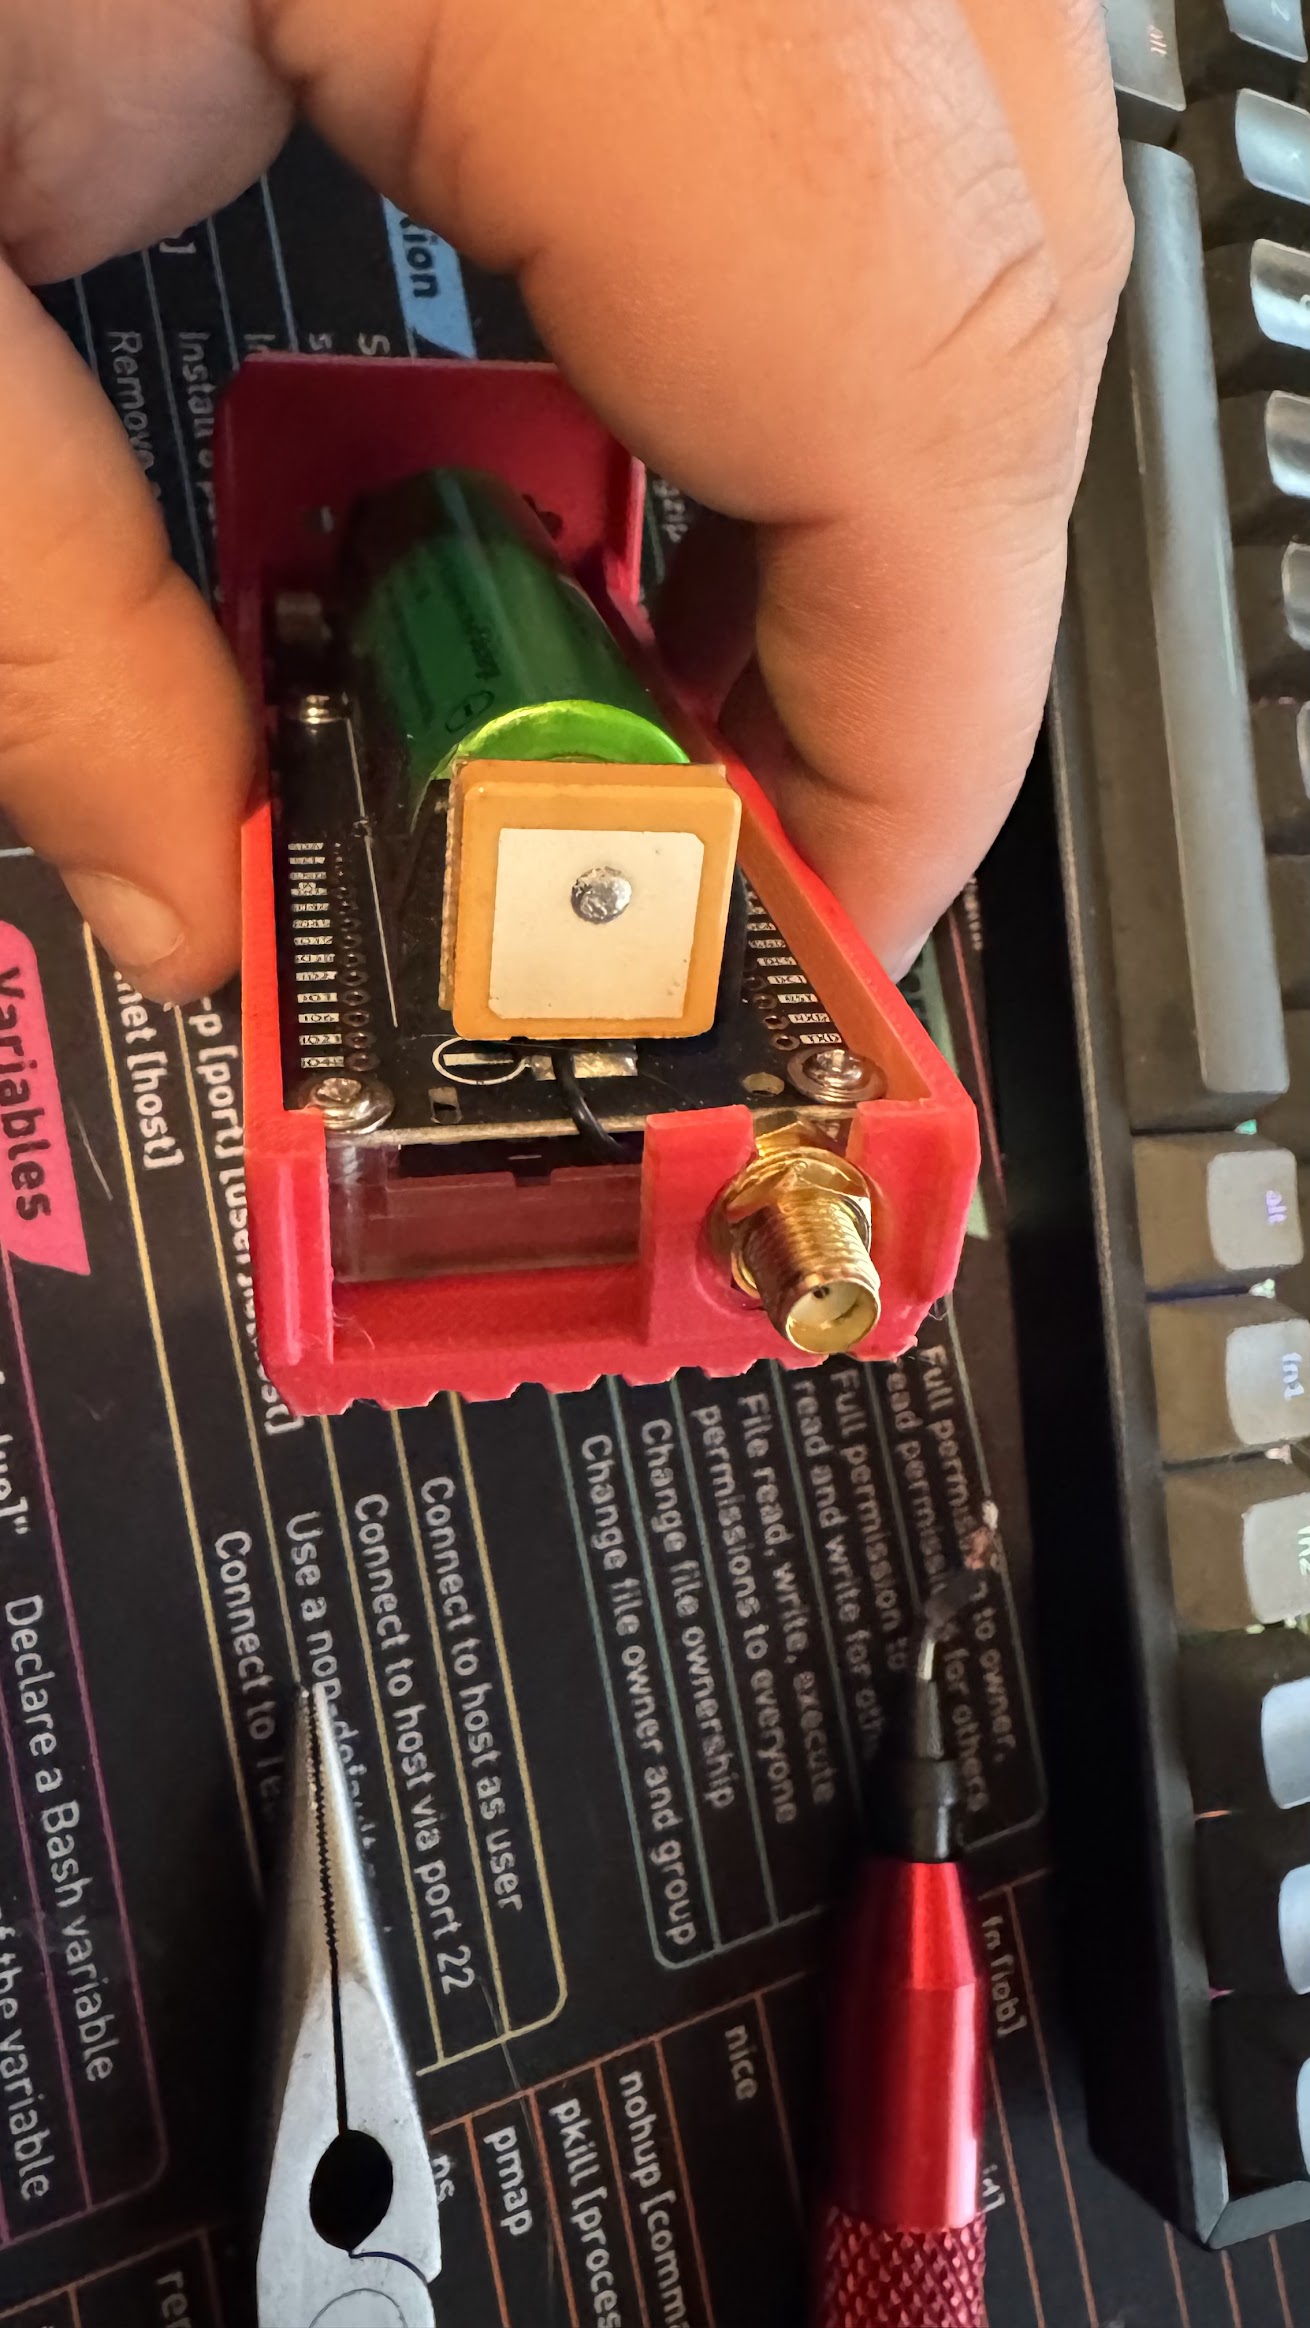
Assembling the tbeam into the case is really straight forward and doesn’t require anything to be modified from the frame of the board. The only thing I ended up having to do is move the GPS module (which is held in by double sided tape). I found that not putting the antenna on while putting the two halves of the case together
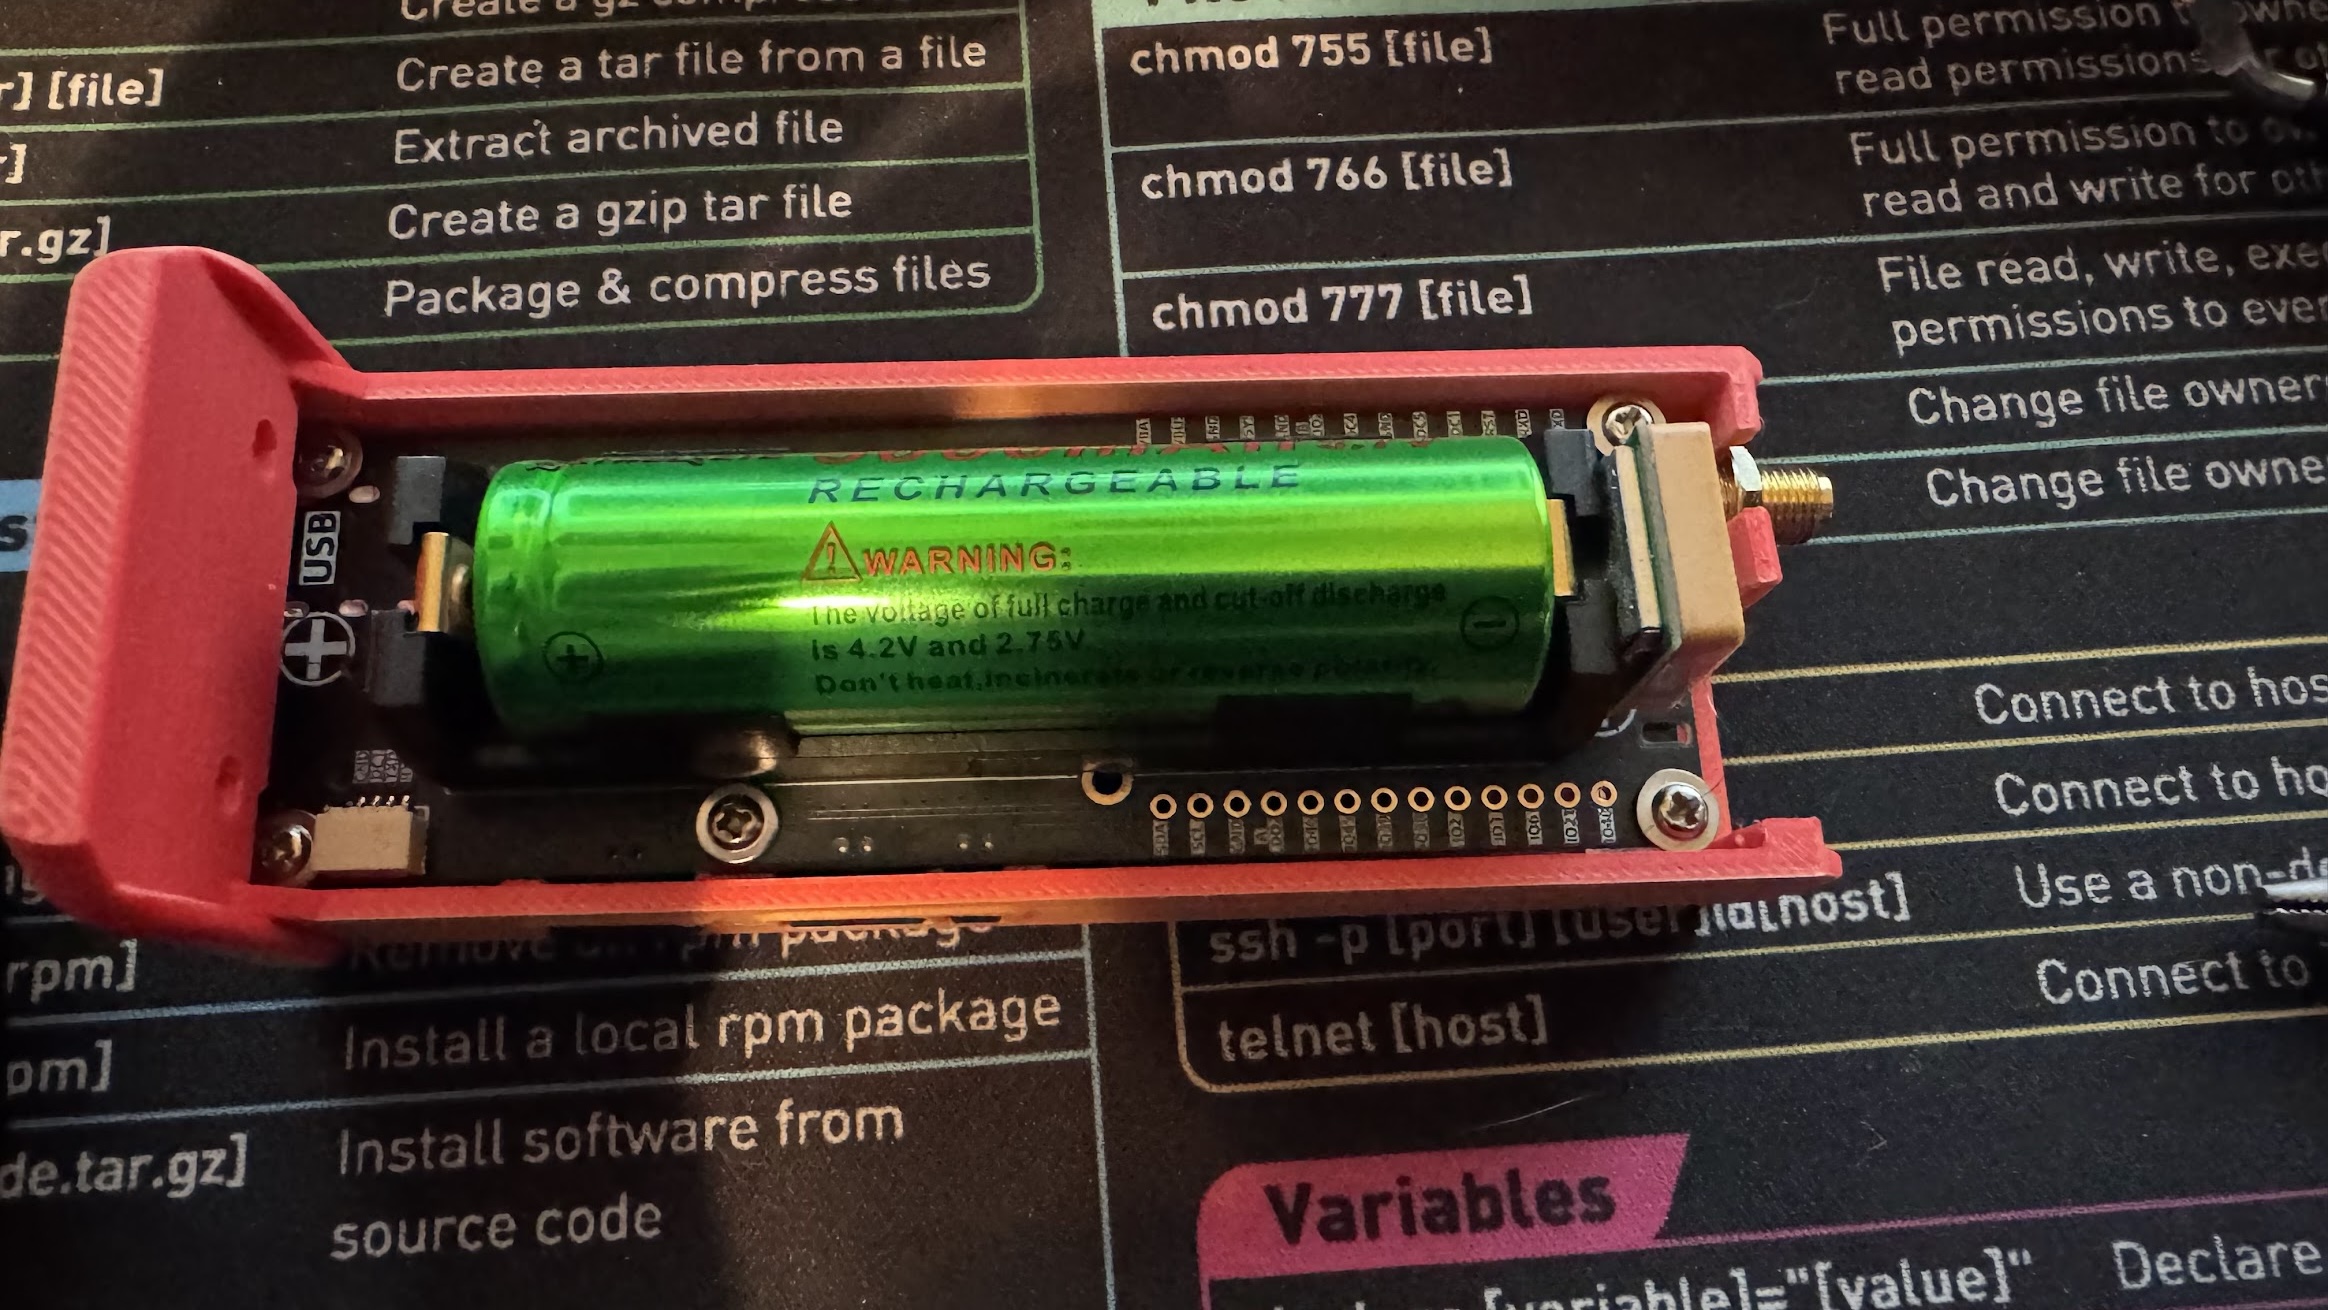
I opted to not do any of the insert types of the cases so I had to insert the M3 nuts into the bottom of the case before final assembly
| Top View | Inserted |
|---|---|
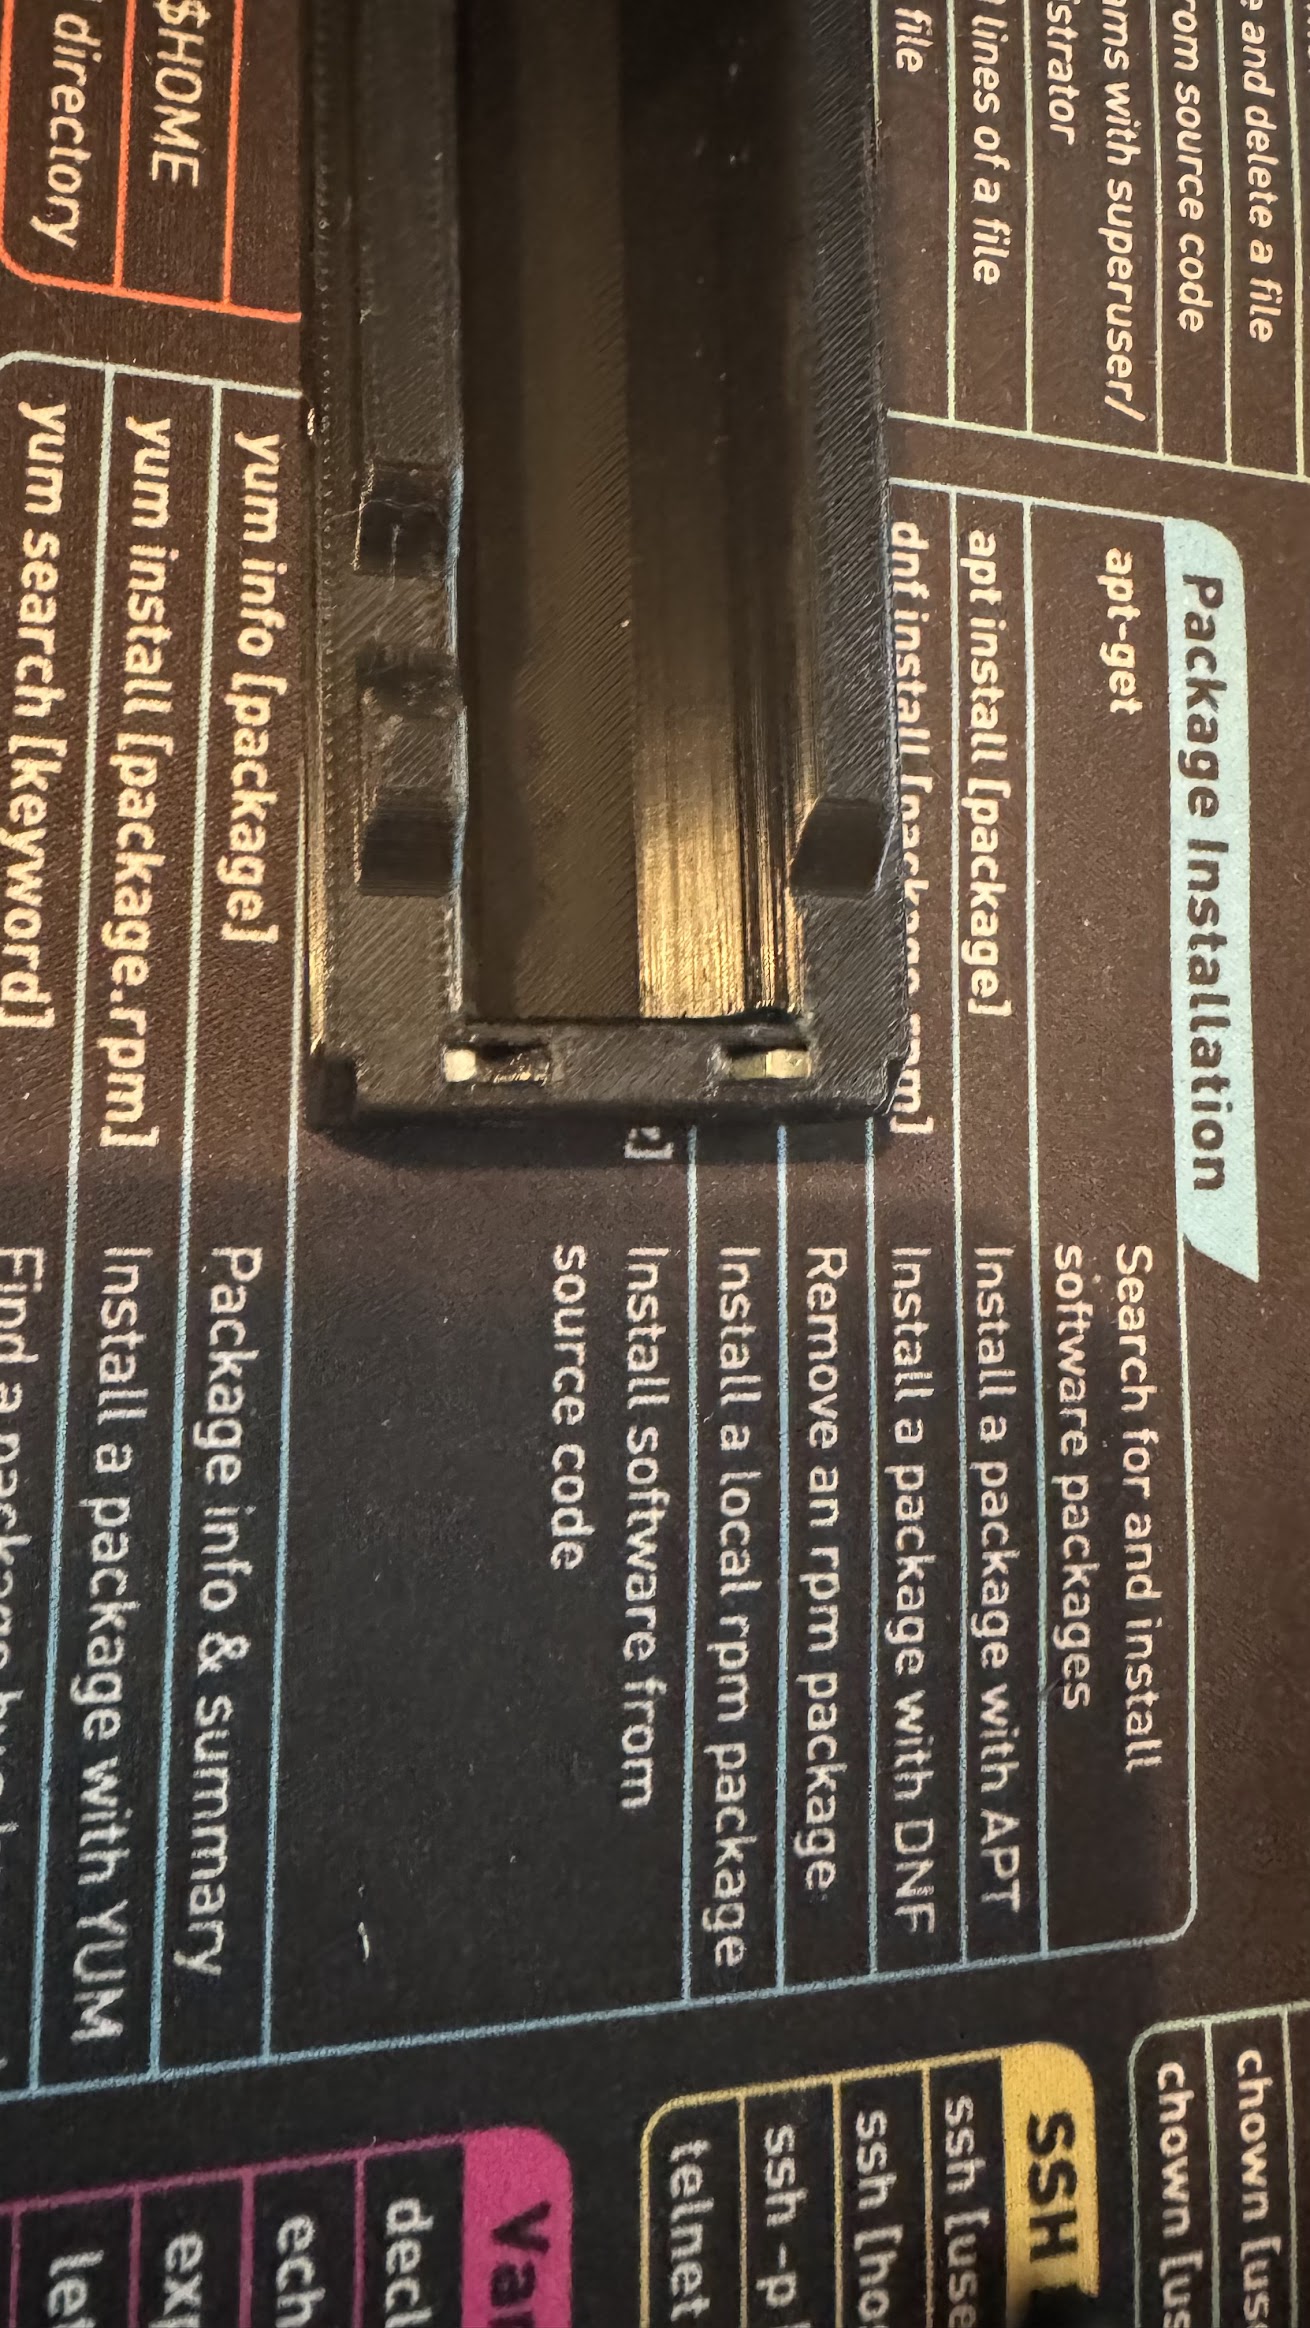
|
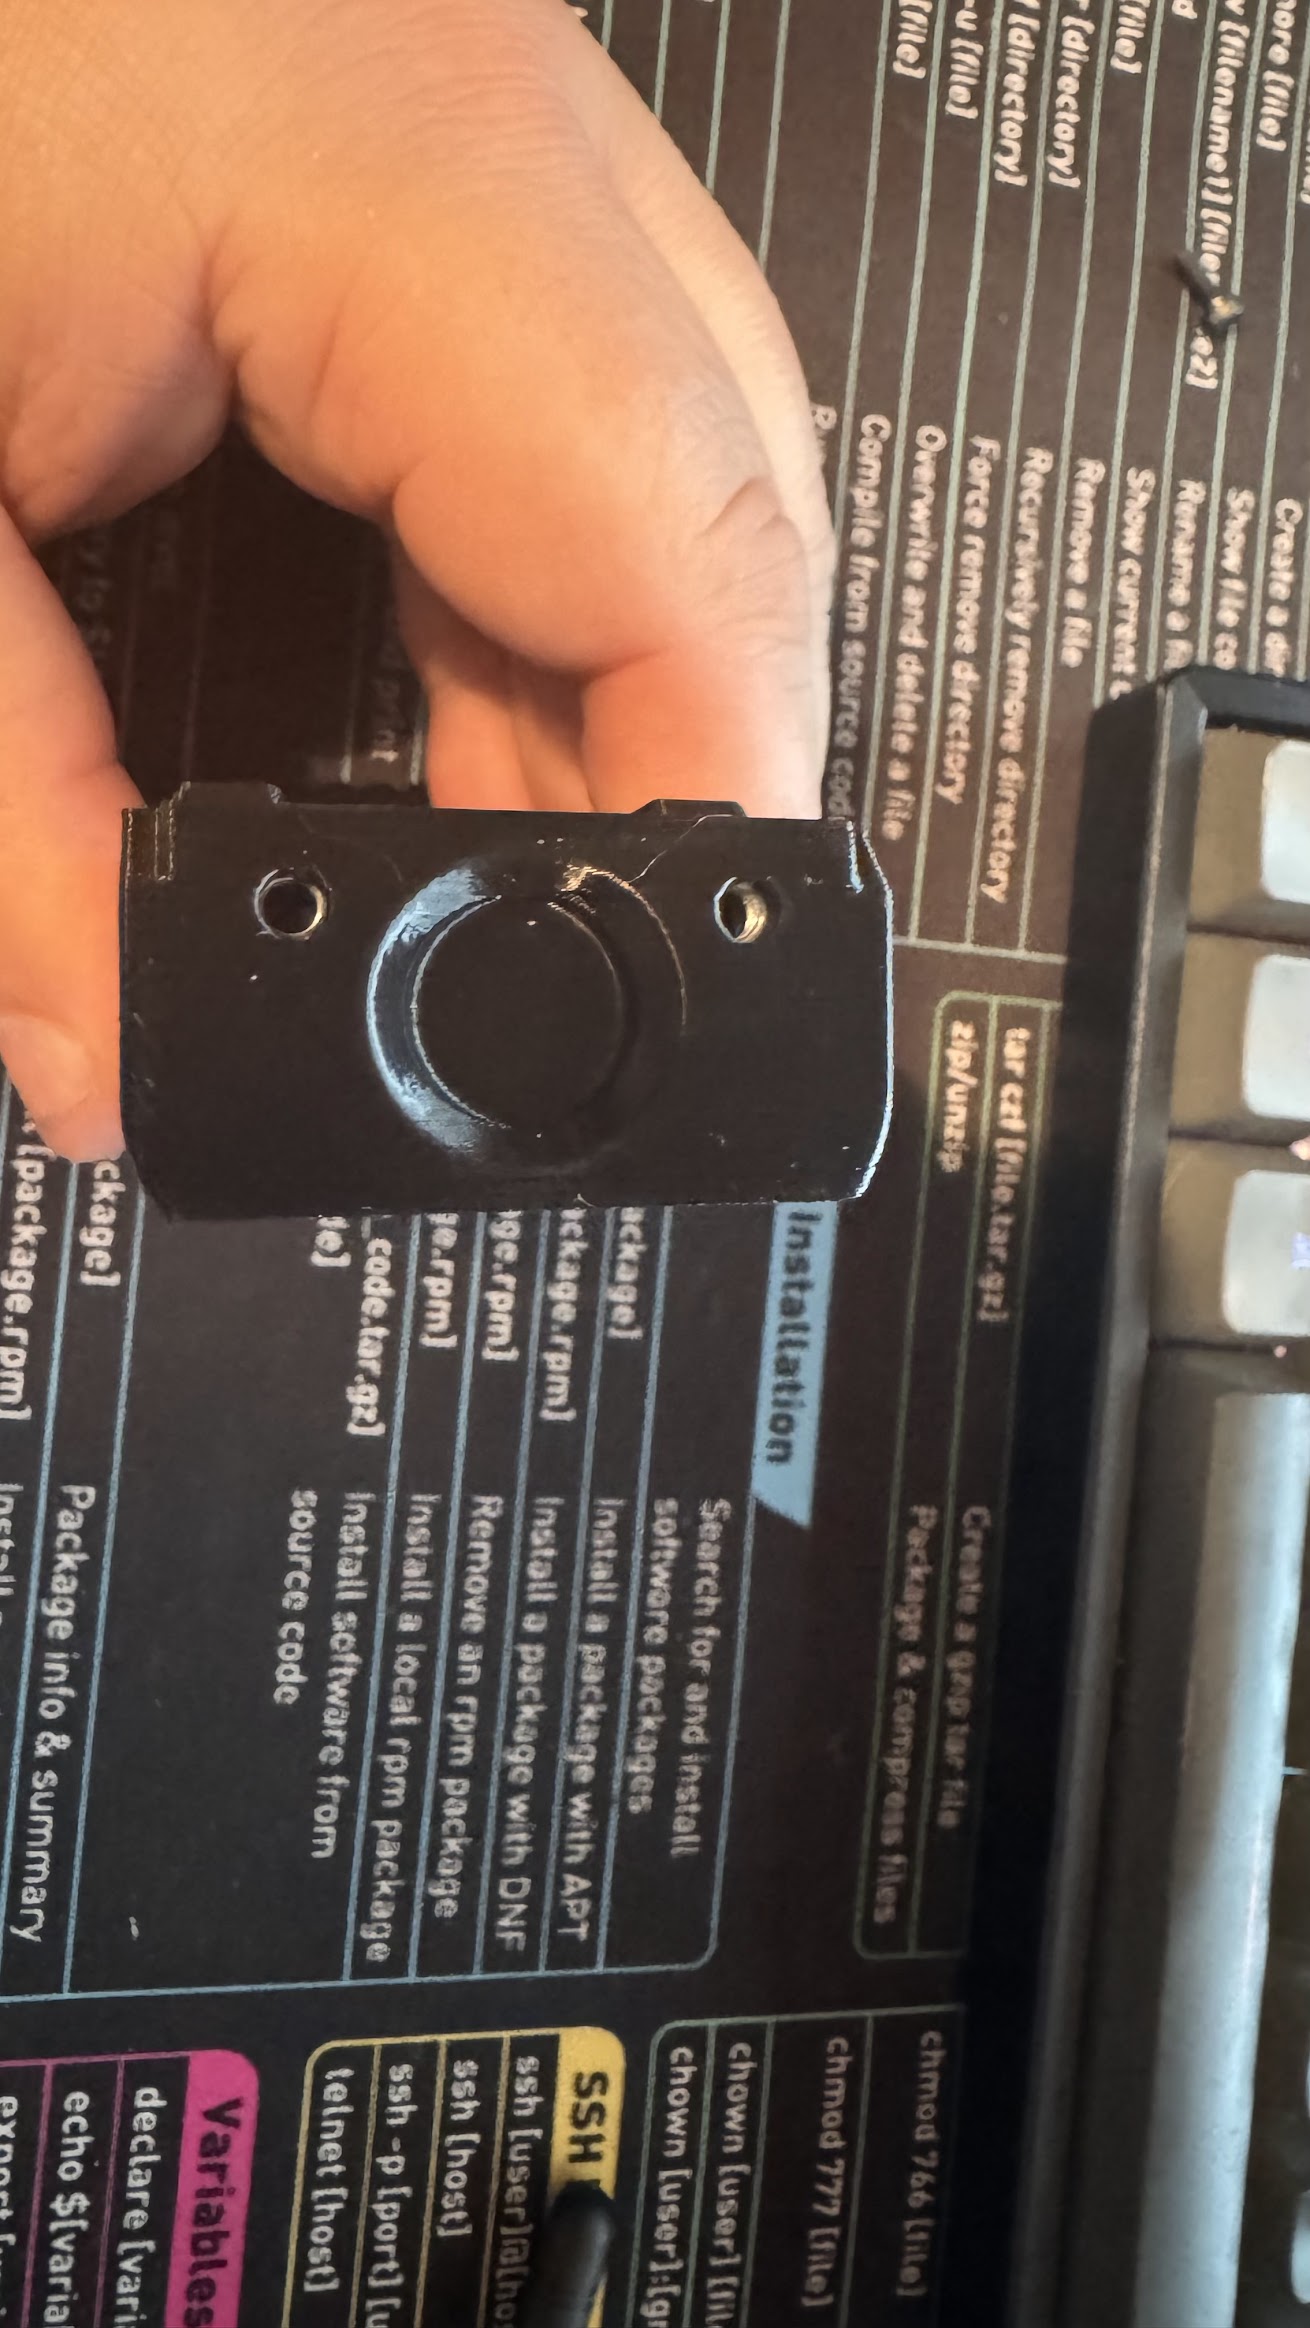
|
Here is what some of the final assembly looks like:
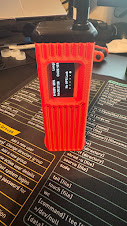

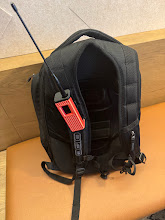
In anticipation of carrying around this node I also printed the bag clip which is working great!
I’ve really enjoyed this case and putting this back together again! It really has been nice to experiment again with this board. The larger battery has been helpful to keep it running throughout a day without having to charge it
WisMesh Pocket First Impressions
WisMesh Pocket First Impressions
The WisMesh Pocket from RAKWireless is a great place to get started in the world of Meshtastic. Its robust design, long battery life, and ease of use make it the perfect first node for anyone, beginner or experienced radio operator. The unit has a high-quality screen, well-printed case, an independent on/off switch, and GPS receiver preinstalled.
Initial impressions
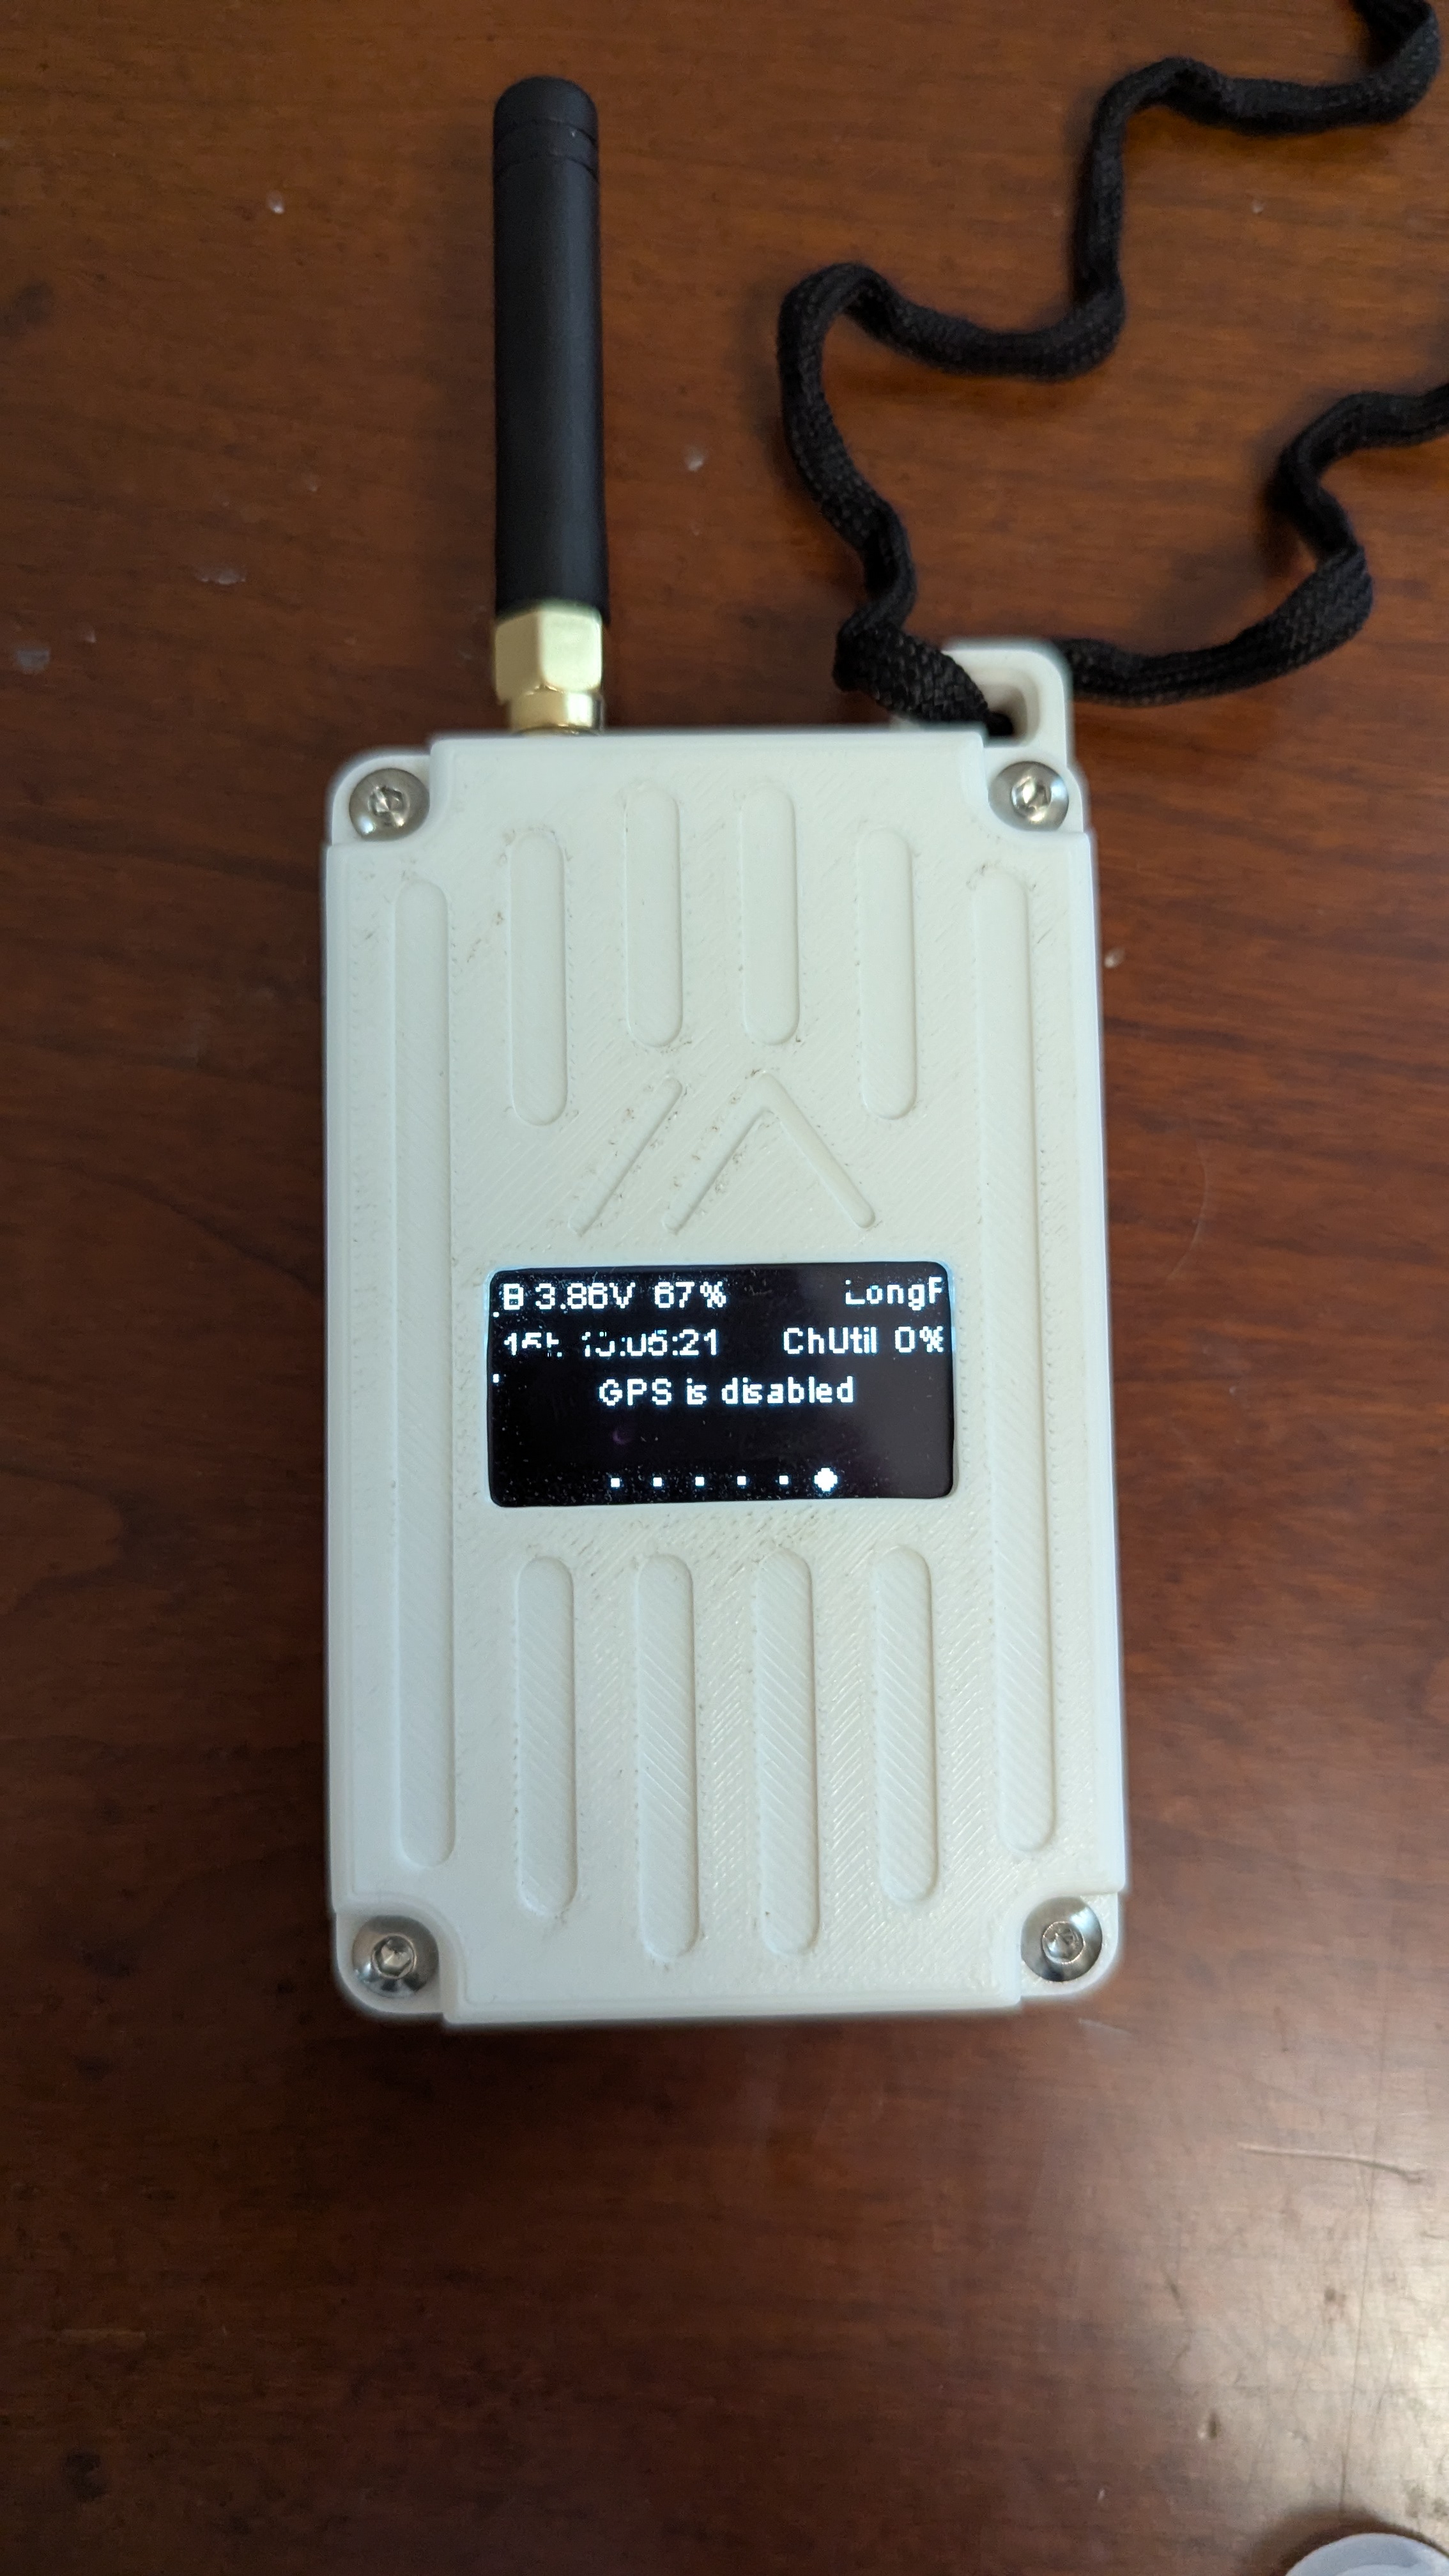
I’ve had this device for three days so far. It arrived ready to go out of the box. The battery had 80% charge (your mileage may vary), and I have yet to charge it. At the time of writing, it is at 67% with intermittent GPS usage. You will have to update the firmware, as updates have been released since these were produced, but that is expected.
Functionality
Overall, the unit is very easy to use and understand. The screen is a good size, making reading off it easy, and has a good brightness. The unit isn’t too big, but not too small. It fits in jeans pockets comfortably if walking or working, and has a loop on the top of the case for a keychain or string. The included antenna leaves a bit to be desired, and I am considering upgrading mine.
Setup
One of the shining features of the WisMesh Pocket is that it’s ready to go out of the box. The unit ships pre-assembled with Meshtastic on it. All you have to do is connect your phone via the Meshtastic app, set your region, and away you go!
Final Thoughts
Overall, the WisMesh Pocket is a well-built unit that’s simple to use and understand. It is on the higher end of the Meshtastic Budget range, coming in at $99 at the time of writing, but you absolutely get what you pay for
RAK PoE Node
In this guide, I will go over the process of how I built my PoE-powered Meshtastic base station. This is an easy to build node that uses primairly official RAK components, so no soldering is required!
Parts list
Most of the parts for this build were purchased from Rokland. I highly recommend buying Meshtastic parts from Rokland where you can as they are absolutely great to work with.
- RAK Meshtastic Starter Kit
- ALFA Network Outdoor 915MHz LoRa antenna
- UFL/IPEX to N-Female connector
- RAK13800 Ethernet module
- RAK19018 PoE module
- Waterproof box
- Monoprice CAT6A cables
- RJ45 cable glands
Optional, if you don’t have a PoE switch:
You’ll also want to 3D print a mounting plate. I used the RAK19007 Mounting Plate by KBOX Labs.
Build guide
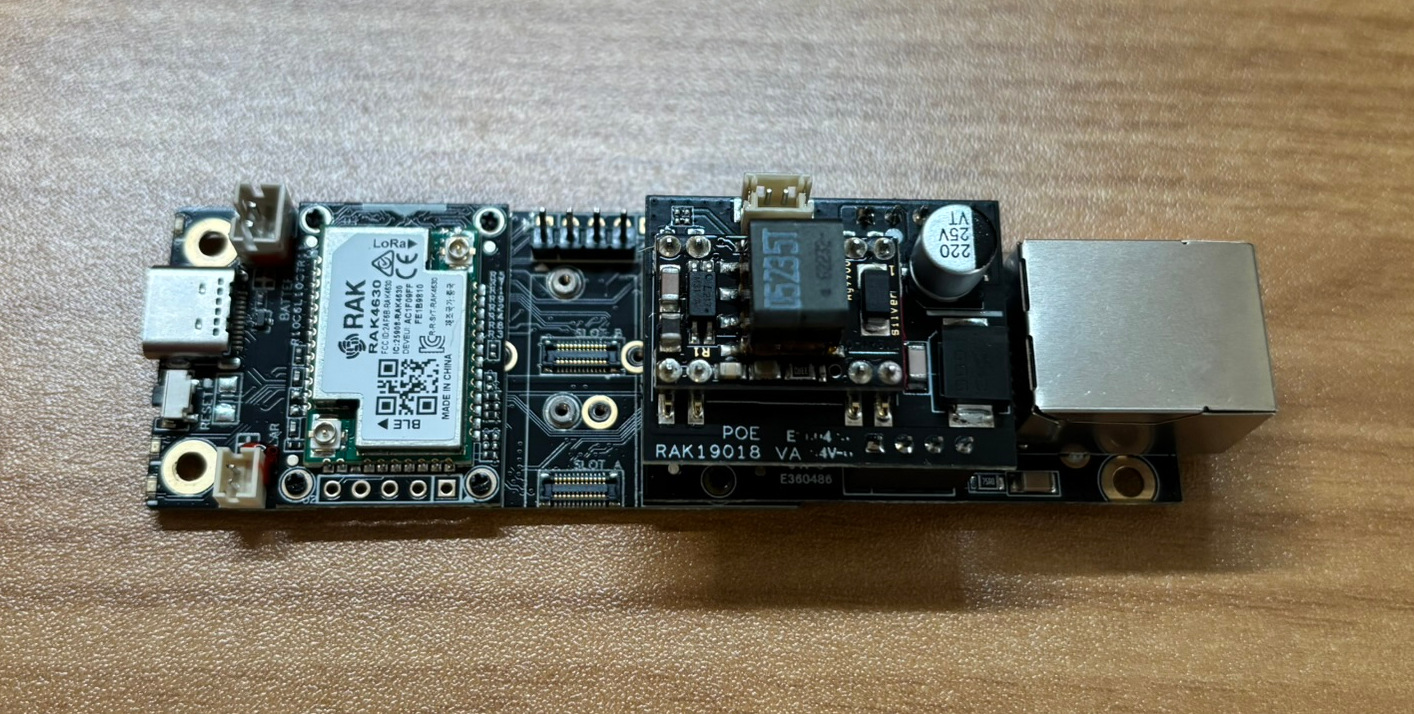
The first step is to assemble the RAK board. Installing the Ethernet and PoE modules is quite easy. The ethernet module simply screws into the RAK starter kit board, and the PoE module plugs right into the Ethernet module. I then proceeded to flash Meshtastic on the board and configure it to connect to my network using DHCP and uplink/downlink to the Iowa Mesh MQTT server.
I highly recommend testing out the PoE functionality at this time, as there are reports of issues with this PoE module when paired with some switches due to the low power consumption of the RAK board. If you run into any issues, disabling PoE power saving features on the switchport can help. If you are still running into issues, I recommend using an 802.3af PoE injector to power your node.
Now that the board is configured, we are ready to start building the rest of the PoE node!
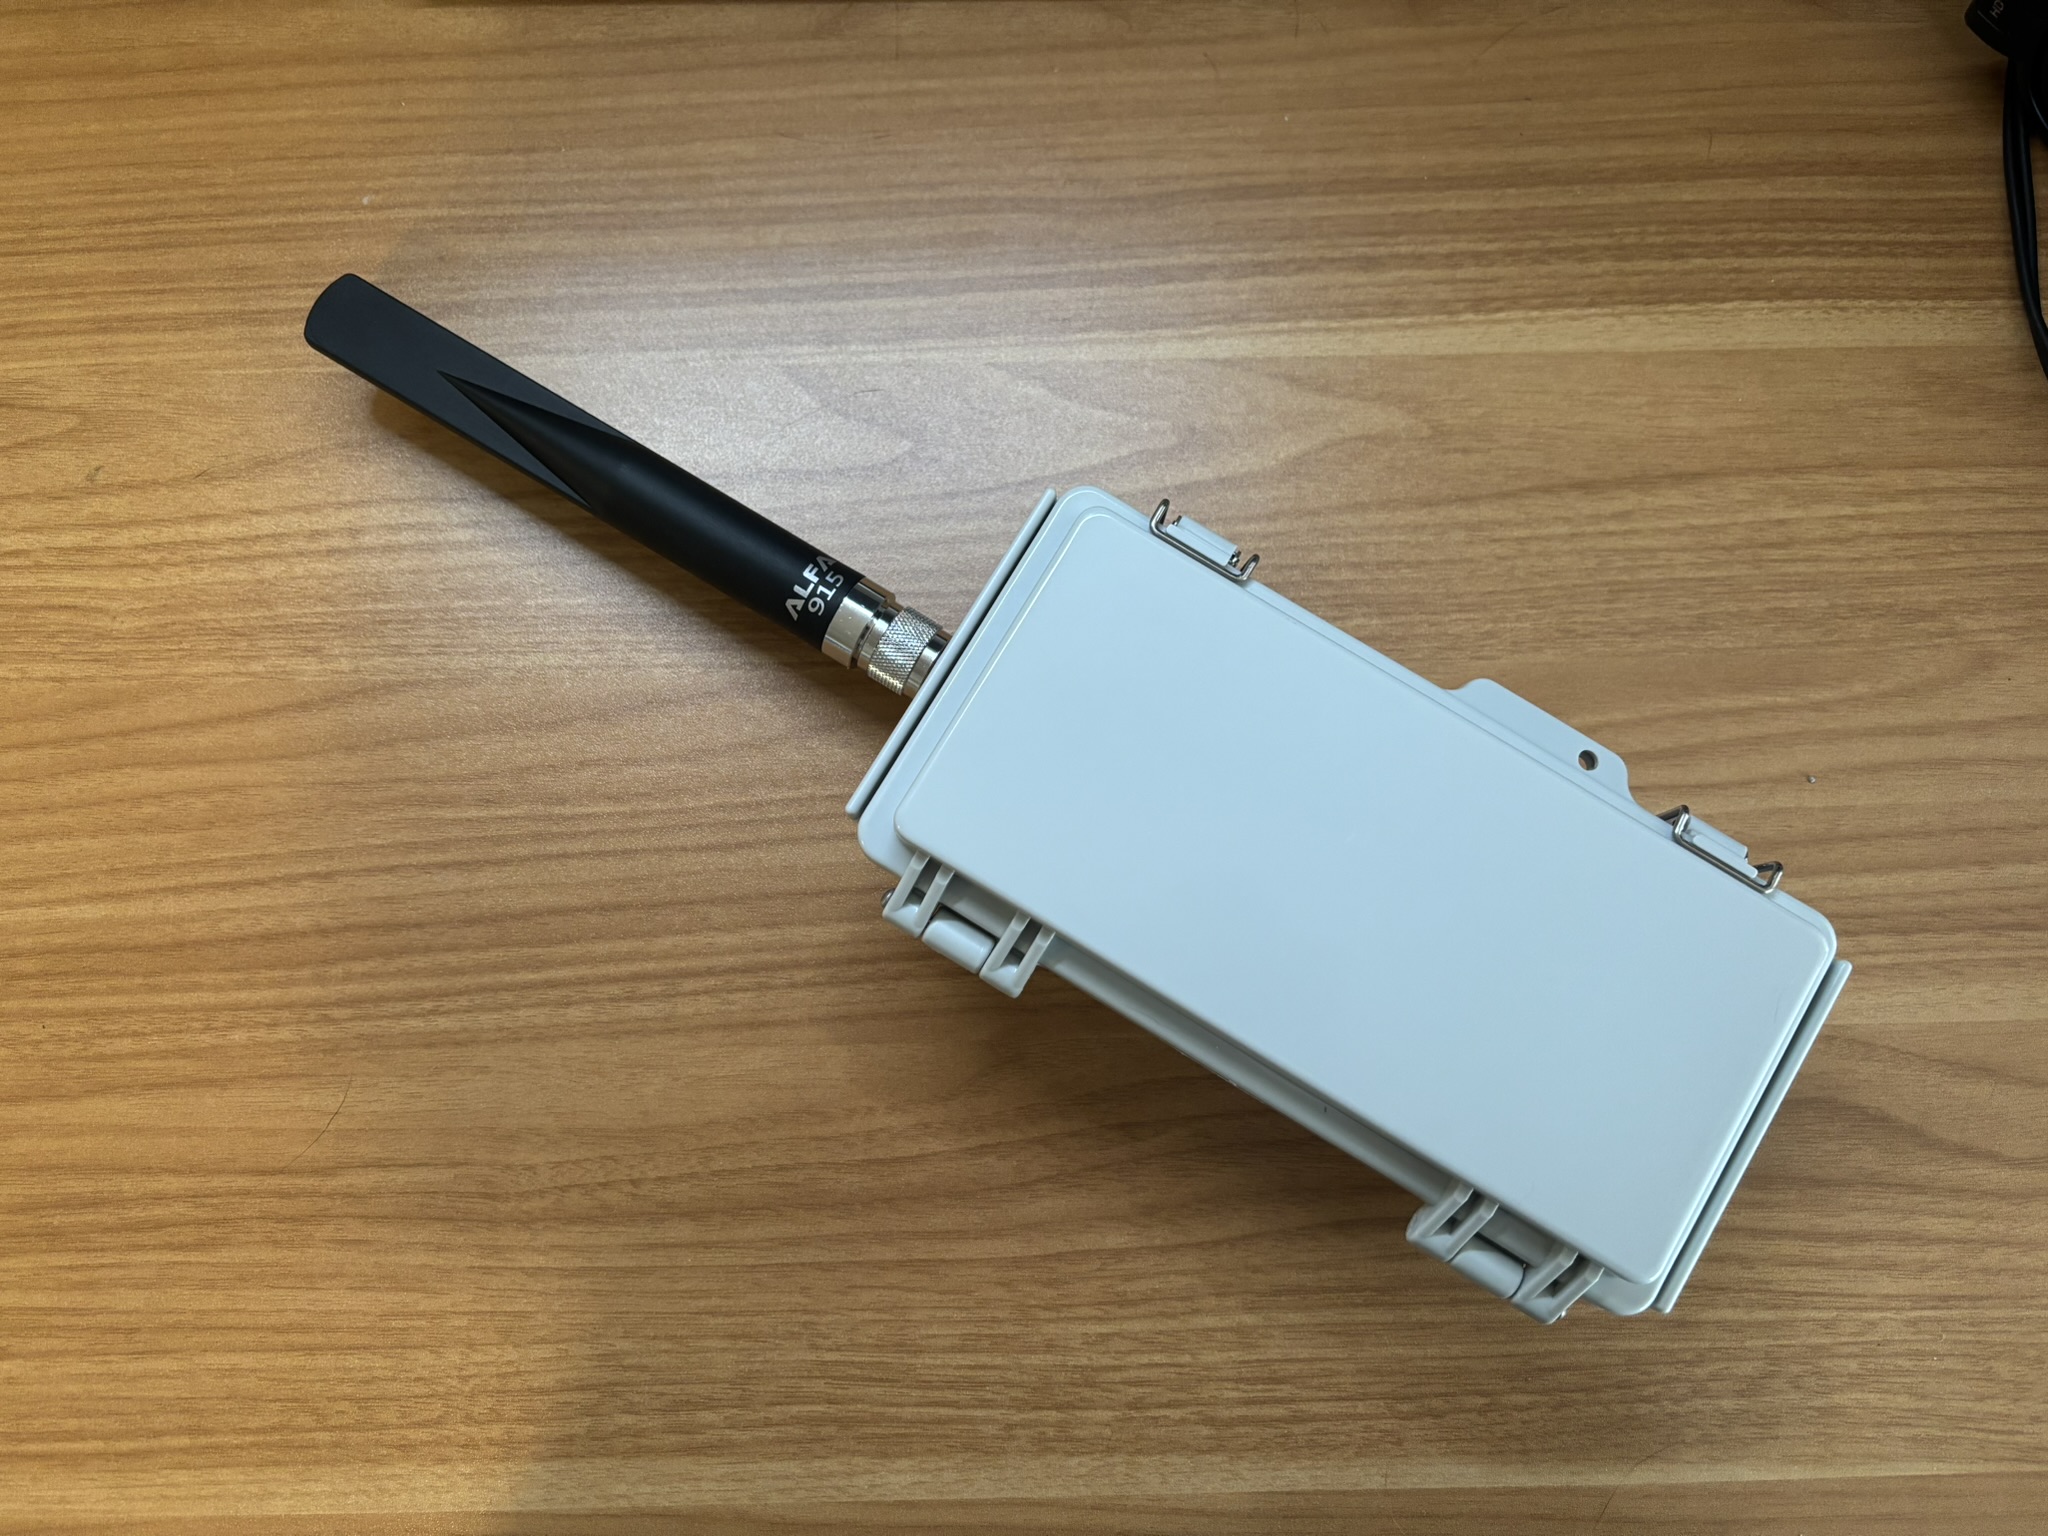
Using a step bit, I drilled a 5/8ths size hole on the top of the waterproof box for the antenna. I then screwed in the antenna, ensuring that the gasket built into the connector was touching the plastic box with no washers in front.
Next, I drilled a hole on the bottom of the box for the RJ45 cable gland using a step bit. If I was to do it all over again, I wouldn’t have centered this on the bottom of the box. If you ever need to remove the 5x5 grid, it’s in the way of the screws.
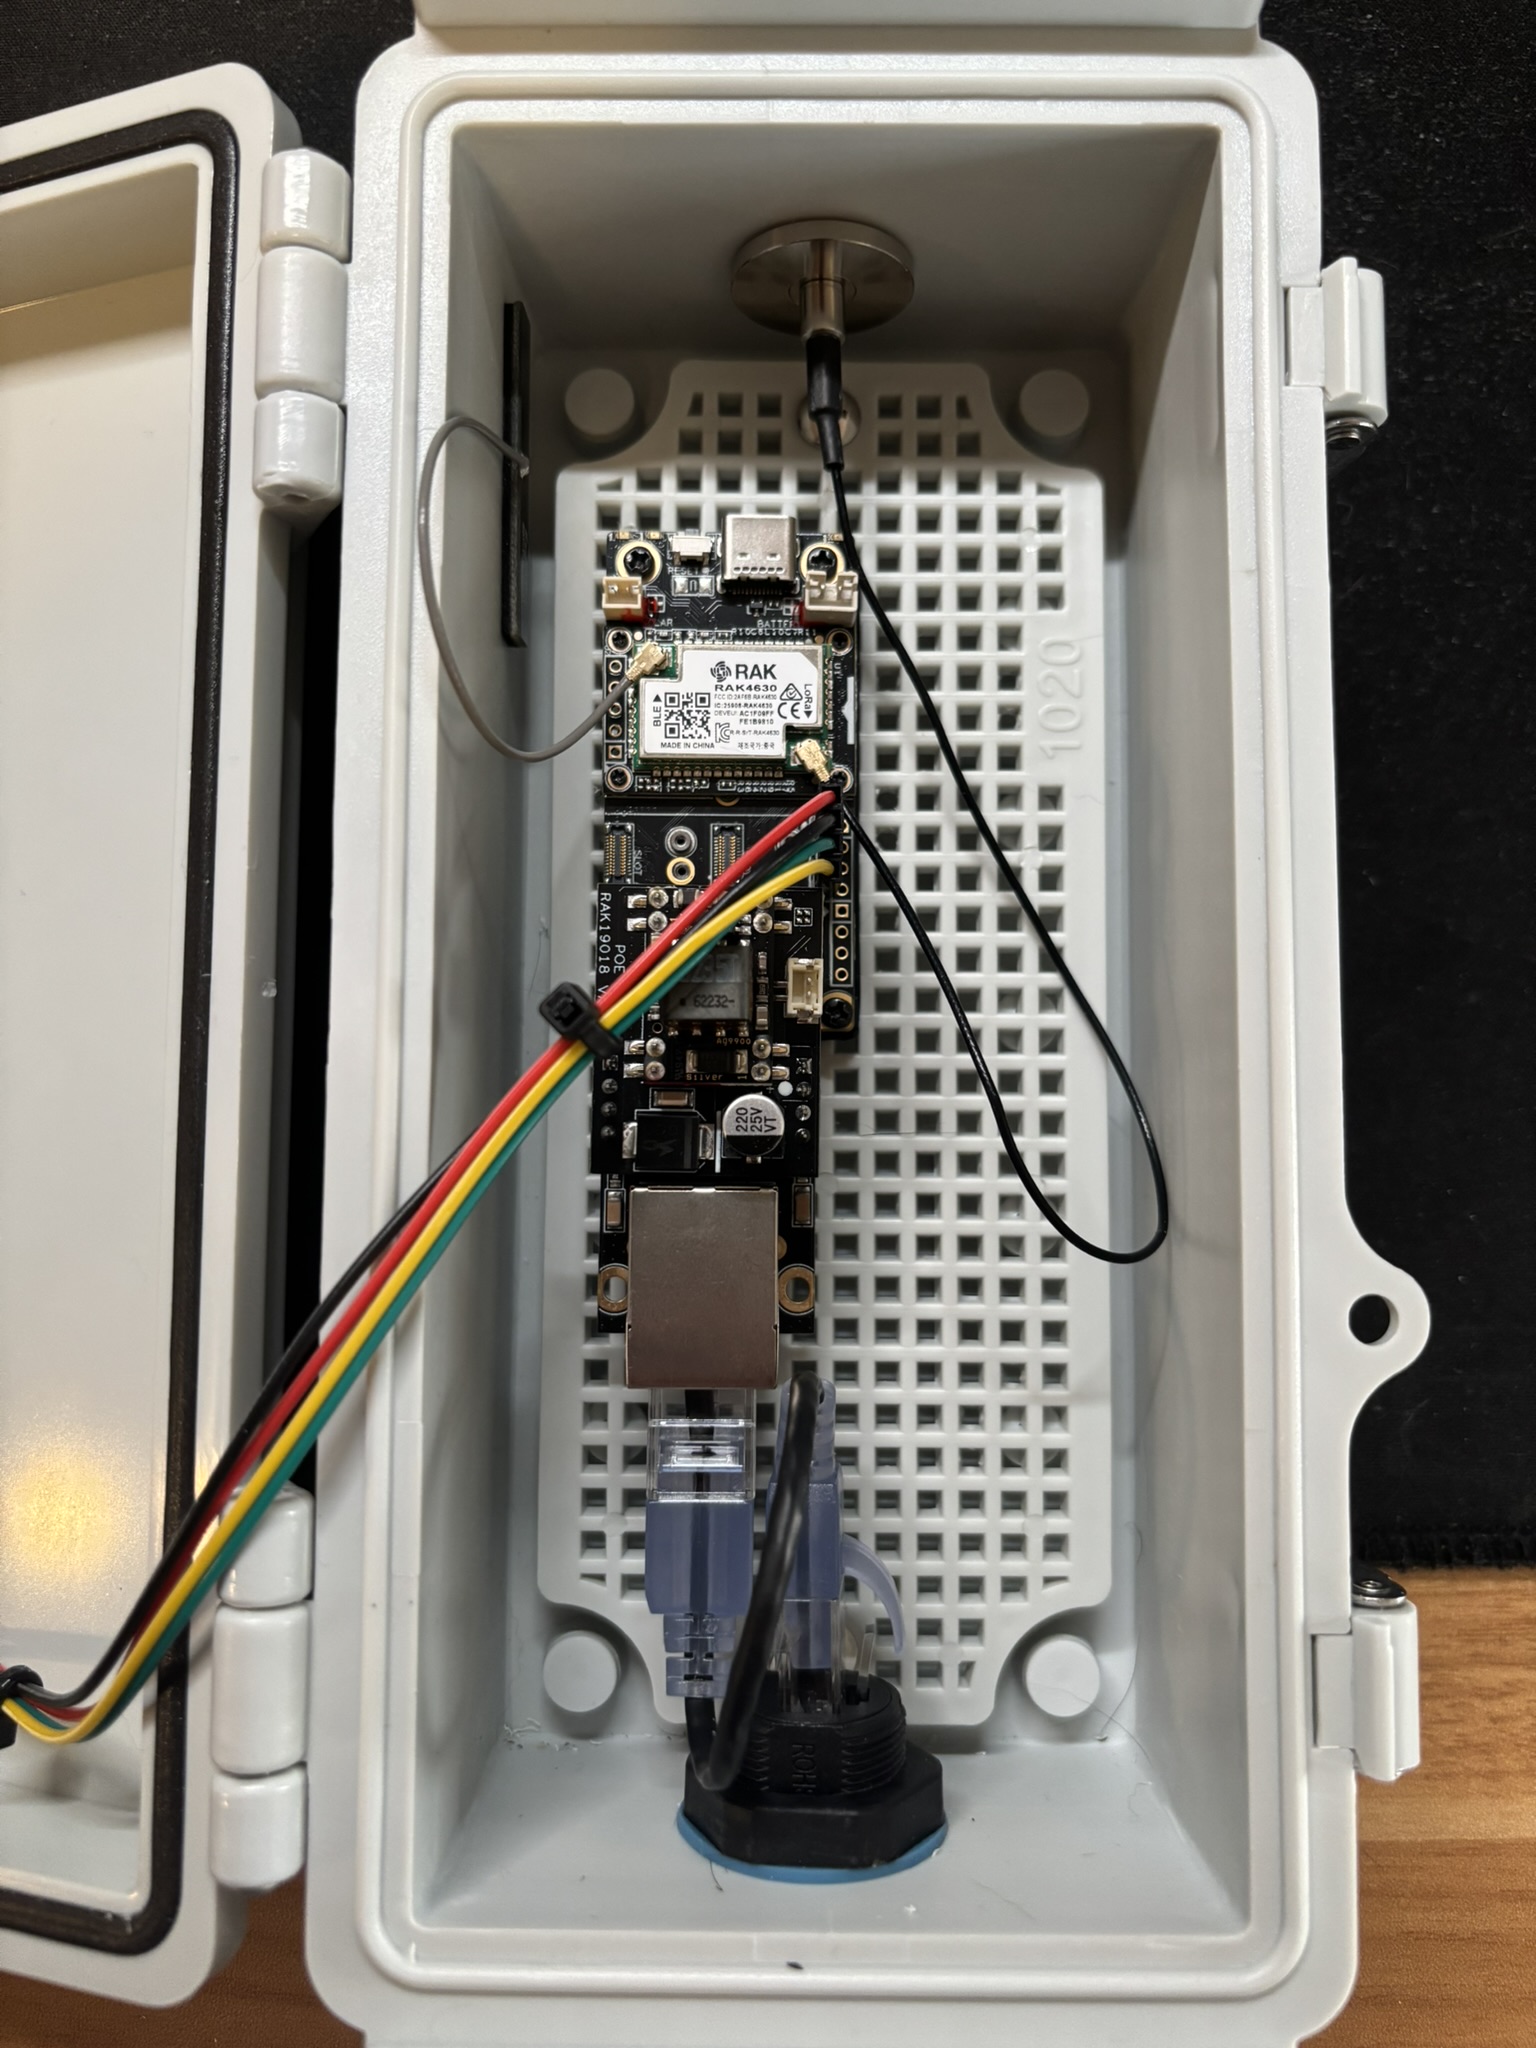
After installing the antenna connector and RJ45 cable gland, I screwed in the 3D-printed RAK mounting plate. I only screwed in two screws here, as I had soldered on some pin headers for a BME280 temperature, humidity, and barometric pressure sensor. I used some 3mm-0.5x6mm screws from Menards here. I placed electrical tape over the screws as I wasn’t able to find flat head ones.
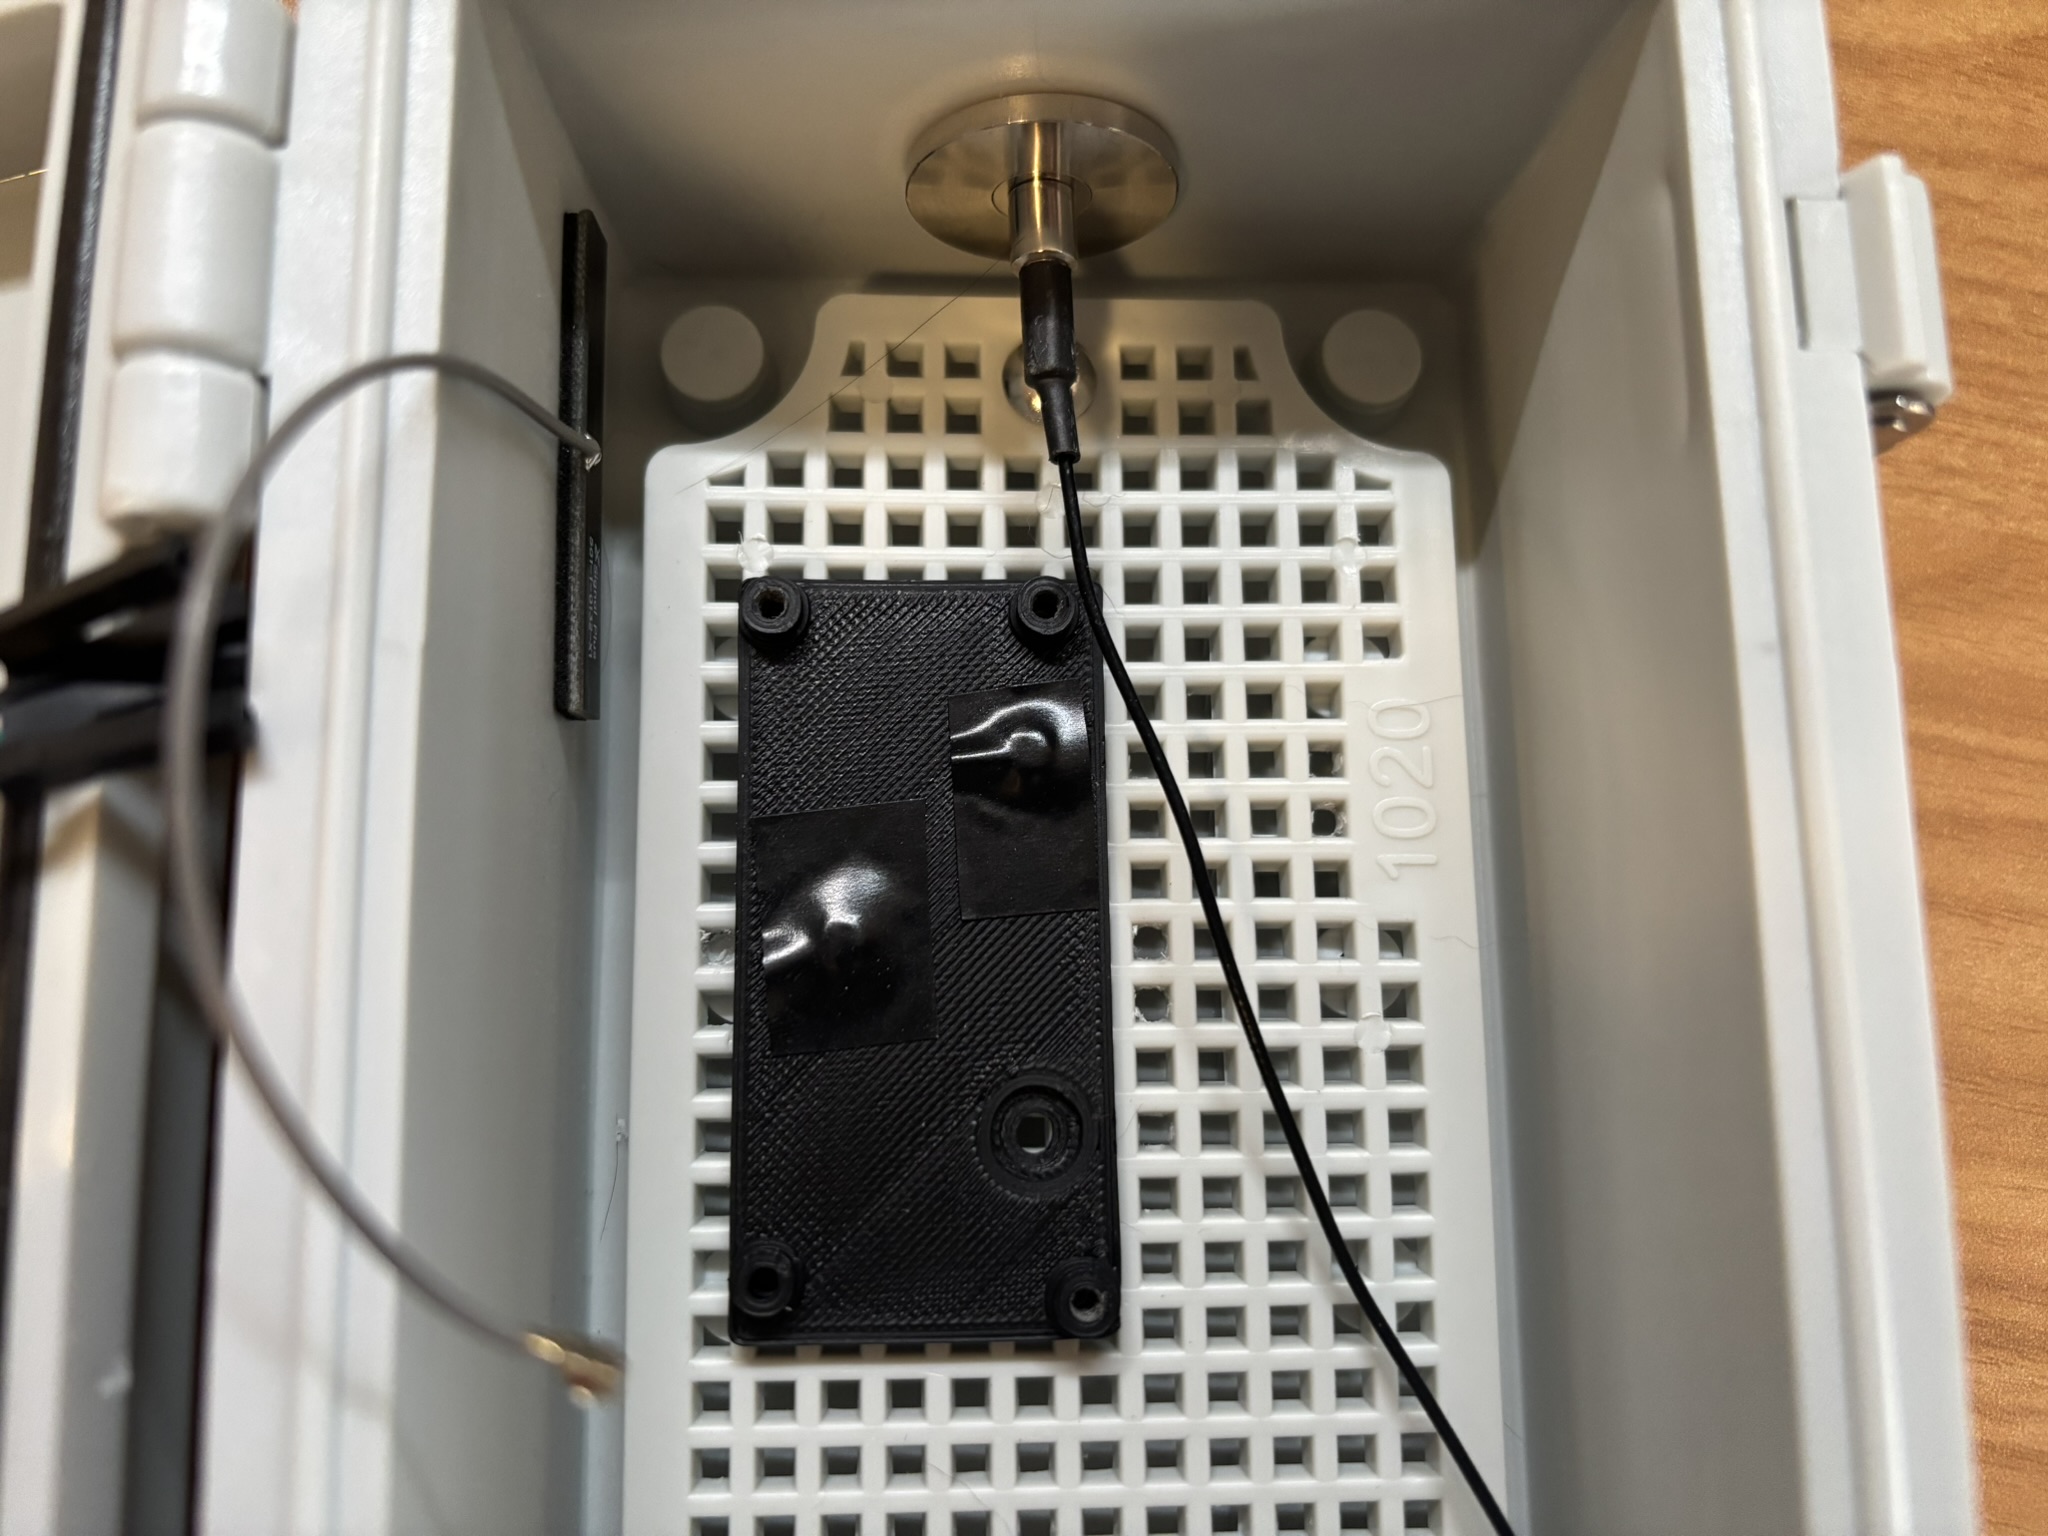
Finally, I screwed the RAK board into the 3D-printed mounting plate and connected the LoRa and Bluetooth antenas, and the Ethernet cables to the Ethernet board.
Below is a picture of the inside of the finished node. One addition I made was adding a BME280 environmental sensor which is connected to the RAK board through the I2C headers. I chose to use an external sensor since I was afraid the PoE module would throw off the readings, but it doesn’t seem to do so. If you wish to add enviornmental monitoring to your node, the official RAK sensor board would probably suffice.
Rak Solar Node
Rak Solar Node with Parts from Rokland
In this post, I’ll cover what I could call my standard solar node build. I could have gone the fancy route, but the goal was a simple self-sustaining node that would go in a fixed location and likely high up. So as power-conscious as possible and easy to service if we ever had to. Rokland was my natural go-to with a kit that had all of the parts and could be easily done.
Rokland makes nothing off of this. I just believe in their product set enough to make mention of it here!
The nice thing here is that it can all be ordered in one shot from their site.
Parts List:
Rokland Rak Wireless Starter Kit
Rokland Rak Wireless Solar Kit
Rokland Pole Mount Kit for Solar Node
Rokland 3000 mah Battery with 2.0 JST Connector
I want to point out right away that the battery is a Makers Focus 3000 mah battery. Don’t get caught up with the same batteries on Amazon. Most of them you’ll find will have a 1.5 JST connector which WILL NOT WORK. The Rak 19007 board requires a 2.0 JST Connector. You’ll either need to cut off the 1.5 JST and replace it or just buy the battery from Rokland. No mess, no fuss. I’ve kept an eye out for these on Amazon and rarely find them without some sort of modification.
I found that Rokland does have excellent instructions. If you were to substitute any of the parts in this list they show you which ones you should cut out on the base board. For the sake of this post, I ended up with the starter kit which includes the 19007 base board and the 4631 module board. Rak offers plenty of module options that you could add on from collecting Temp and Humidity and reporting it back through the mesh. You could add those on if you would like, but I opted not too
Instructions are here:
Rokland Solar Enclosure Instructions
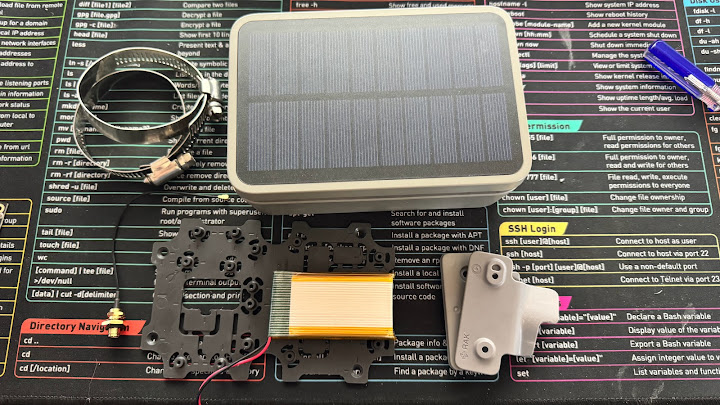
Without modules, there is a handy way of mounting the battery on the unused part of the solar plate. I’ve been using Gorilla double sided tape as it seems to adhere very well to these things.
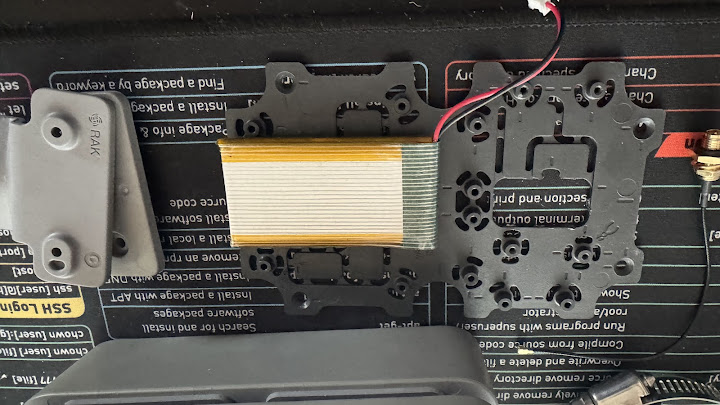
With a pair of side cutters snip or another tool that will cut out the correct location cut out the sections to fit the board. This is covered in the instruction manual very clearly which ones to trim out. For the 19007 Rak base board, it will look something like this when you are done
Using the supplied screws from the Rak starter kit put the baseboard on the solar plate. The USB port will face outwards from the edge of the plate. The nice thing is that it can only go one way based on the offset of the screw holes on the 19007.
Slide the plate into the solar enclosure and then install the supplied USB cable thing and the antenna port. Both will go from the outside in and be held tight by the supplied nuts for each. I opted to not use or hook up the special USB cable but left it in there because it sealed the case.
I hooked up the supplied Bluetooth antenna. I think this could go many places based on what you think, but I opted to put in on the side of the case opposite of the Rak board. There was a nice slack there to tuck under the battery and hide away for now.
The solar panel plug from the lid goes in to the left port (or smaller port) and the battery connector goes into the right port (or larger port)
When completed it will look a little something like this:
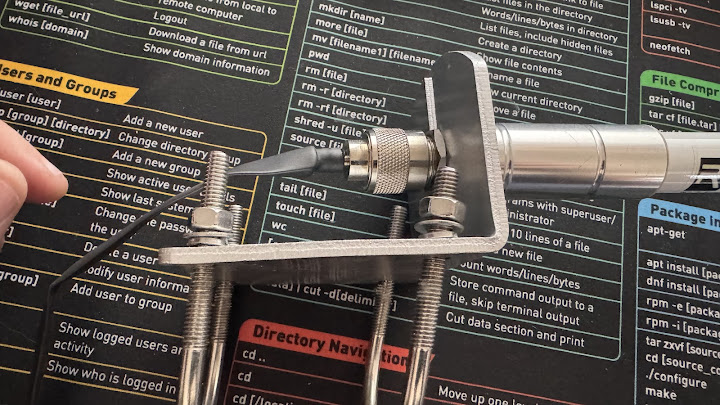
The only thing left is to put the mount brackets on the rear and mount it in a location that works!
As for the Antenna, this could be one of many things. I’ve standardized on the 8dbi Rokland Antenna. It has a good quality build and the kit comes with the mount to put up on a pole. I like this mount over the standard u bolts that other kits come with. I also can’t speak highly enough of the flat pigtails they make. They are meant to go into doors and windows, but I think they offer a nice level of protection over exposed cables, and at 18in are the right size to put the antenna right above the solar enclosure and keep everything nice and neat!
Hope this helps! As always find us on Discord or email and ask questions!
Heltec T114 Build
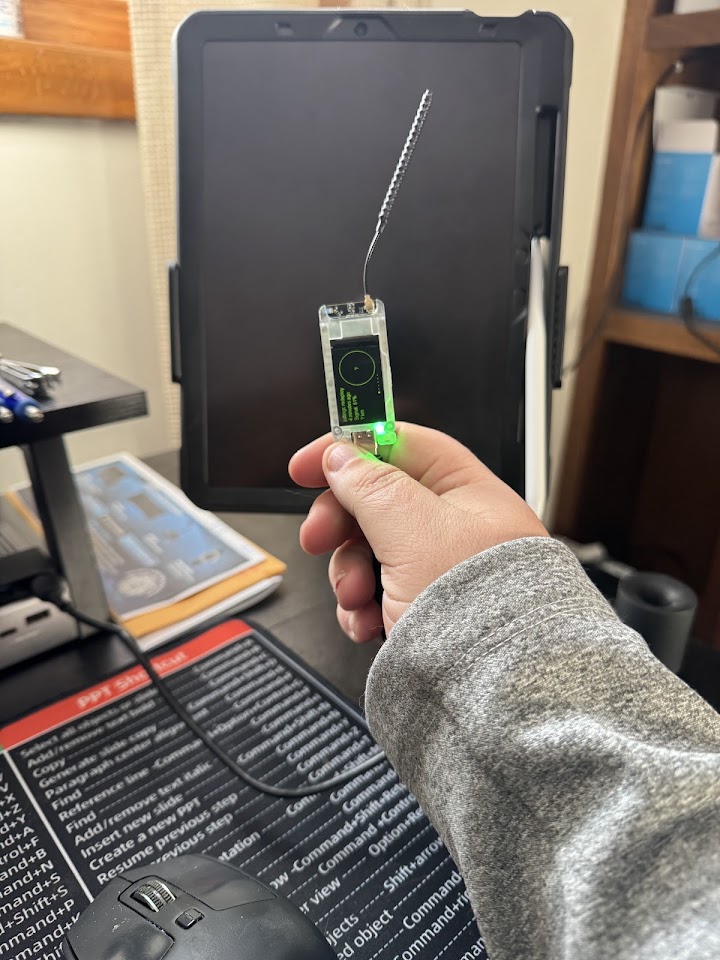
Heltec T114 for Everyday Carry
When I first got started into Meshtatsic I ended up with a few of the Heltec V3s. They were inexpensive and got me out to Vegas in a hurry. I was always annoyed by the battery life and just seemed so sluggish that I started to stray away from them and started going exclusively RAK wireless for base stations, Solar and carry nodes. I was stocking up on my supply Rak Wireless boards and took at chance on the Heltec T114. I had co-workers that were testing them with success so I thought I’d dip my toes. It was based on an NRF processor so it should at least have a good battery consumption.
So here we are with a base install of Meshtastic:
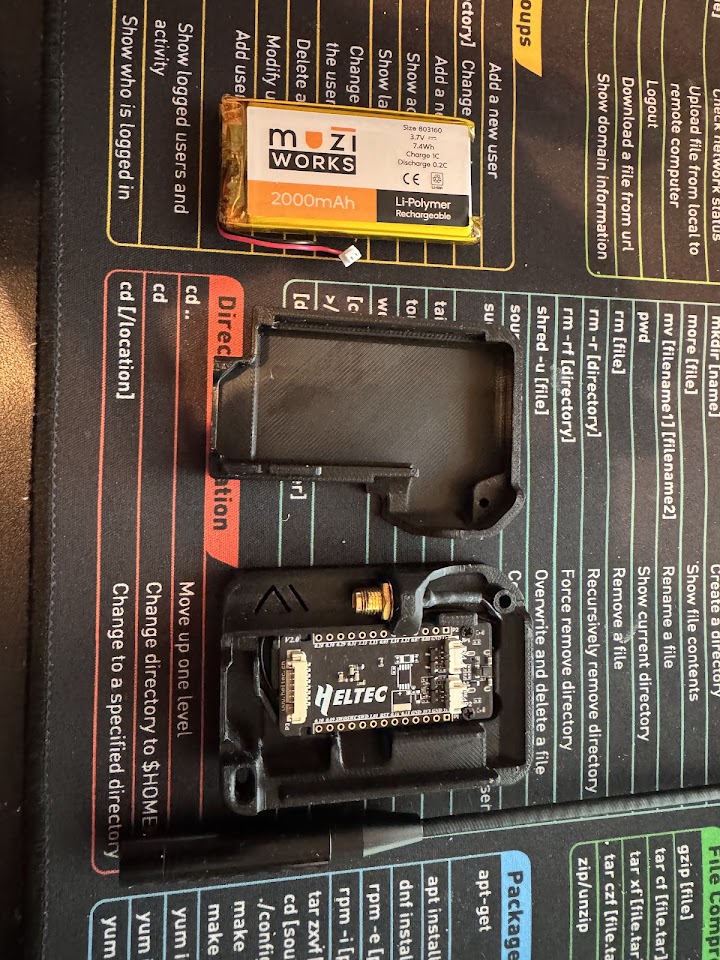
Full transparency, Muzi Works does sell a kit that does the same thing. I had ordered the board before finding the kit or the 3d prints so I opted to just get the battery from them and 3d print the case. They were generous enough to post their STL files on Printables! Hats off to them for that!
Parts List:
I had some of these parts lying around from other builds so feel free to swap out what works for you!
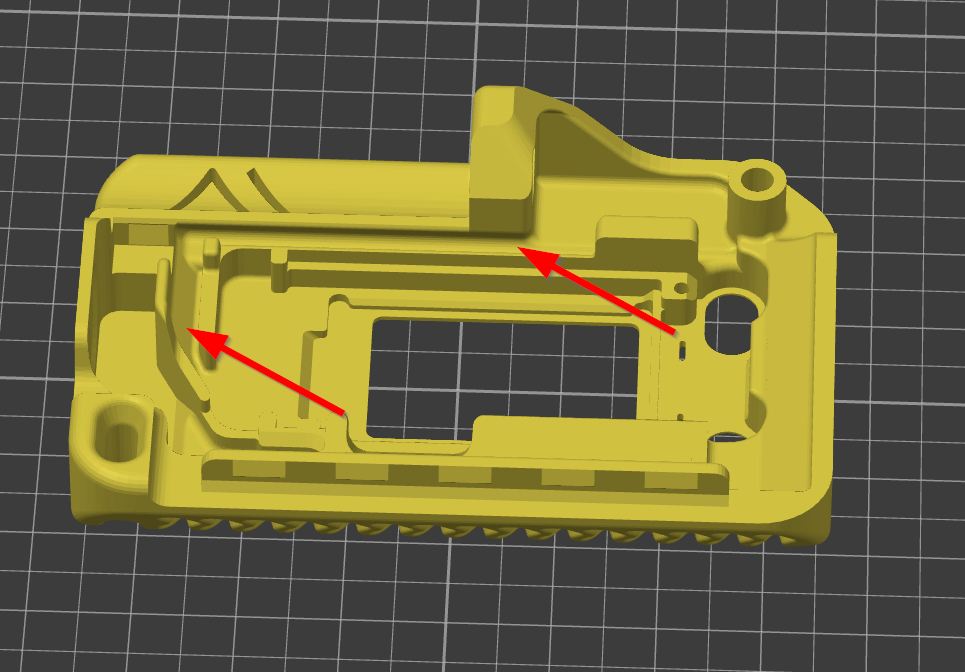
The first step was to install the antenna cable and route it through the channel they’d built. Hats off the Muzi Works guys for thinking about that as with other builds has the cable in the open. Once in there, you can screw down the connector to stay.
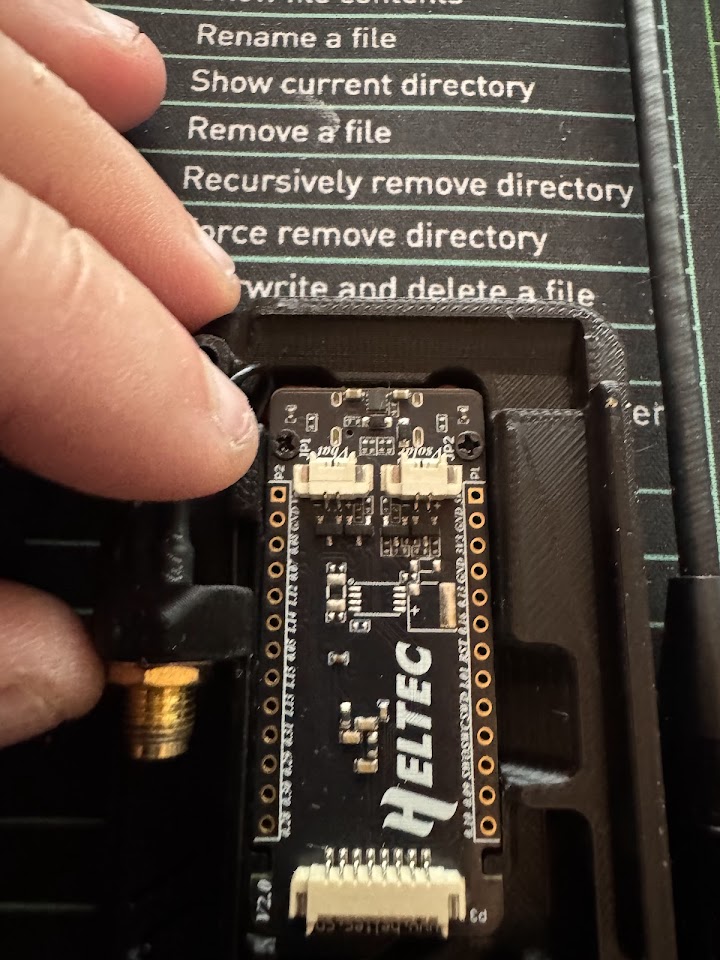
The second step was to remove the two screws that held the plastic shell and screen in place. The screen will be free to move around so be careful not to rip it off or somehow bend it. While the front of the case is face down, put the buttons in, hook up the antenna to the port on the board and put the two little screws in. This took me a few times because while the screen was loose it didn’t work to cooperate the first time times. Be patient and you’ll get it
The next step is to put the battery in the tray. Another feature of the case is a nice way of routing the battery cable so it avoids hitting the antenna and other parts of the board when the case is fully assembled.
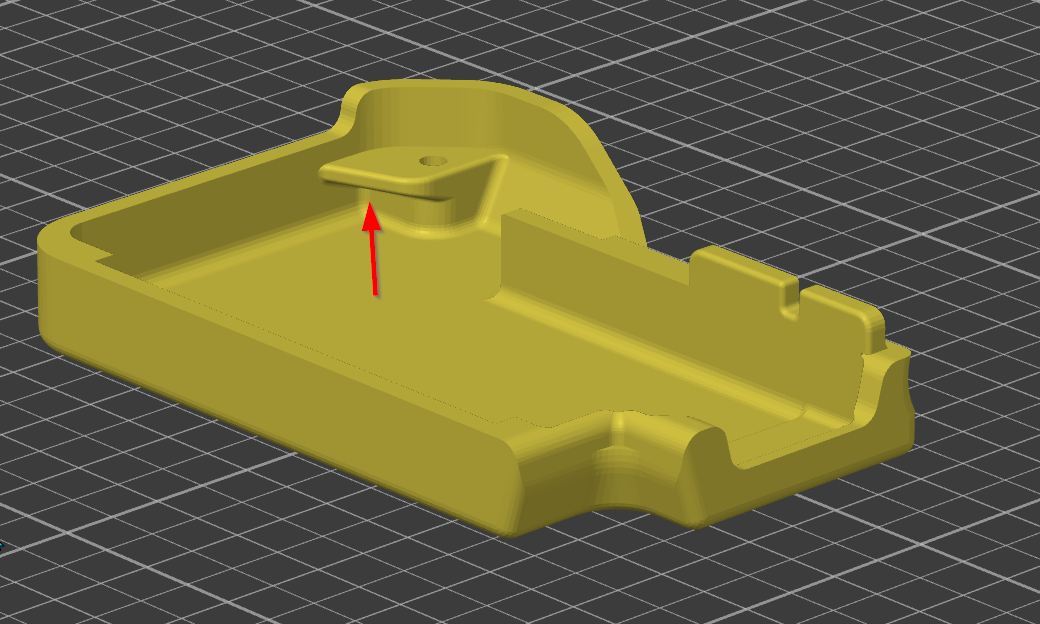
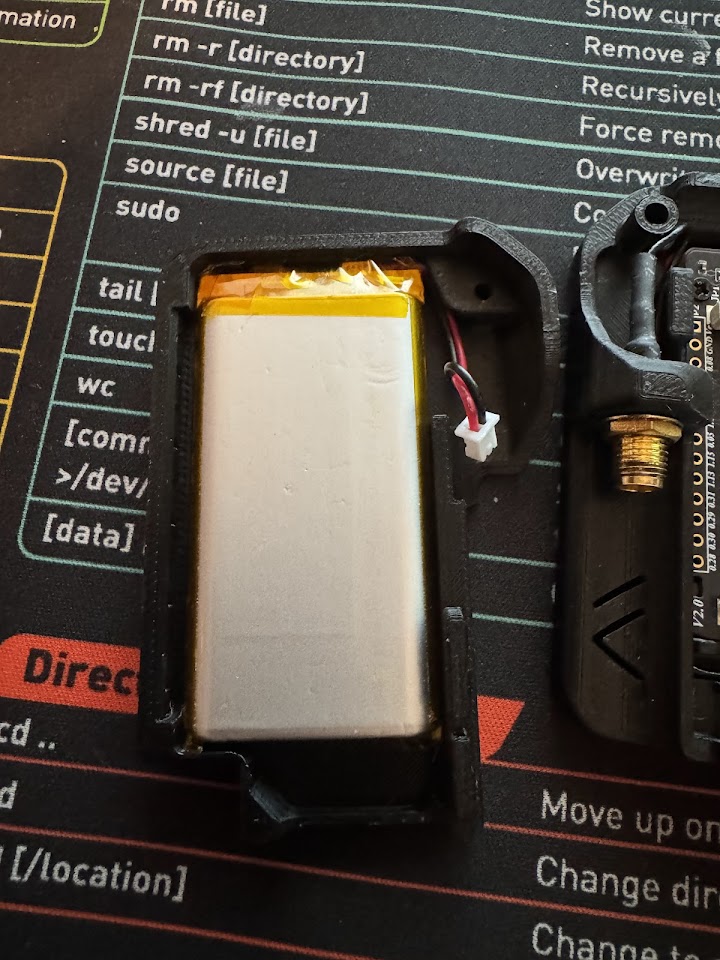
That’s pretty much it. Plug the battery into the battery port (make sure it’s the correct way so you don’t burn out the board) and enjoy.
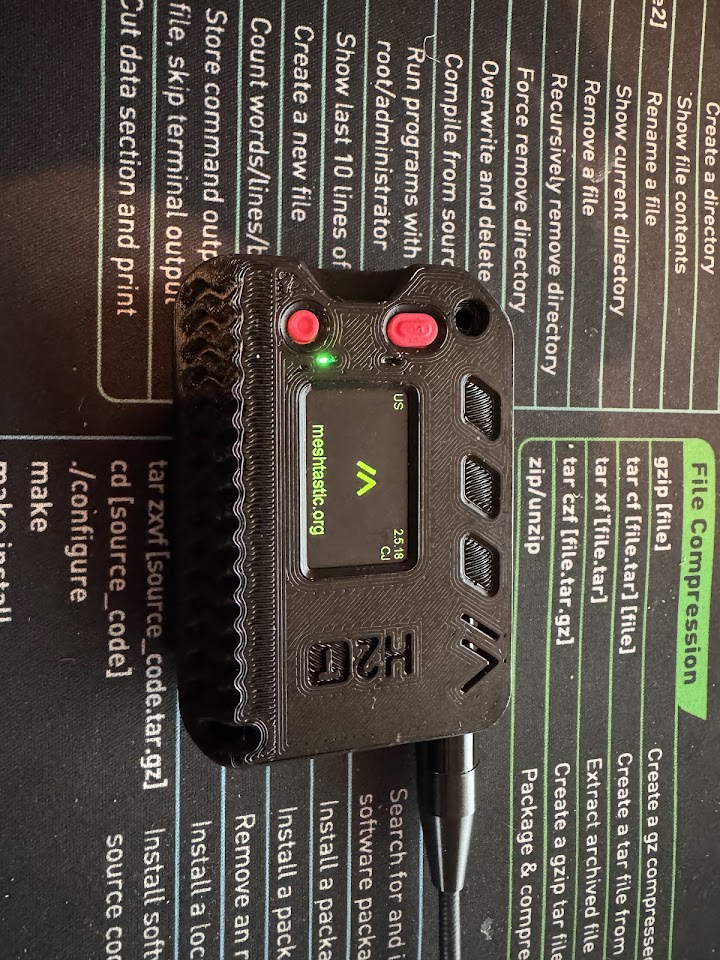
I have to say I’m impressed with the battery life. I opted to not put in the GPS and use the GPS from my phone when I care enough to do it, but this last just as good as my rak carry (which will be another post soon). It is responsive when you hit the buttons, the screen is easy to read and use and overall a good unit. I’ve not messed with other antenna as of yet, but the Amazon one seems to do the trick. As soon as I get my nanovna I might hook it up and find out how close to 915 it is!
Thanks for taking the time to read this. I hope it was helpful!